Waterproof Shed DIY: 9 Steps to Stop Leaks and Rot
If you’ve noticed damp tools, musty smells, or water pooling inside after a heavy rain, you’re probably searching for a waterproof shed DIY solution that actually works. Whether you’re trying to protect a brand-new shed or rescue an older one from recurring leaks, finding the source of the problem can feel overwhelming. Water doesn’t always enter where you expect, and sealing the wrong area can waste both time and money.
The good news is that waterproofing a shed doesn’t have to be complicated. With the right approach, even beginners can tackle the project one step at a time. The key is understanding where moisture is coming from, fixing underlying issues before applying sealants, and choosing materials that are designed to withstand the weather.
In this guide, you’ll learn how to inspect your shed for common leak points, improve drainage around the base, waterproof the roof, walls, doors, windows, and floor, and prevent condensation from causing damage inside. You’ll also discover which tools and materials are worth using, how to avoid common mistakes, and what ongoing maintenance will keep your shed dry for years to come.
By the end, you’ll have a clear plan to create a shed that stands up to rain, protects your belongings, and requires less maintenance over time. Let’s start by identifying where water is getting into your shed before making any repairs.


Chapter 2: Improve Drainage Before Waterproofing
Once you’ve identified where moisture is coming from, it’s time to address one of the most overlooked causes of water damage: poor drainage around the shed. Many DIYers immediately reach for caulk, waterproof paint, or roof sealant, only to discover that their shed is still damp after the next heavy rain. The reason is simple—if water is constantly collecting around the foundation, no amount of surface waterproofing will solve the problem.
Think of drainage as your shed’s first line of defense. The less water that reaches the structure in the first place, the less work your roof, walls, and waterproof coatings have to do. By directing rainwater away from the shed, you’ll reduce the risk of rot, mold, and structural damage while extending the life of the entire building.
Why Proper Drainage Is So Important
Wood and moisture are never a good long-term combination. Even pressure-treated lumber will deteriorate more quickly if it sits in wet conditions year after year. When rainwater pools around the base of a shed, it can seep into the flooring, wick up wall framing, and create the perfect environment for fungal growth.
Poor drainage can lead to problems such as:
- Rotting floor joists and skids
- Warped plywood flooring
- Mold and mildew inside the shed
- Rust on tools and metal hardware
- Soil erosion beneath the foundation
- Frost heave in colder climates
- Increased insect activity attracted by damp timber
These issues often develop gradually, making them easy to overlook until repairs become much more expensive.
Inspect the Ground After Rainfall
The easiest time to evaluate drainage is shortly after a heavy rain. Instead of looking only at the shed itself, observe how water moves across your yard.
Walk around the structure and look for:
- Puddles forming next to the walls
- Mud collecting around the foundation
- Water flowing toward the shed instead of away from it
- Splash marks on the lower siding
- Soil erosion beneath corners
- Wet grass that stays saturated long after surrounding areas have dried
If you notice standing water that remains for more than a day or two, improving drainage should become a priority before applying any waterproof coatings.
Make Sure the Ground Slopes Away from the Shed
One of the simplest and most effective improvements is ensuring the surrounding ground slopes gently away from the building.
Ideally, the soil should drop about 1 inch (25 mm) for every foot (30 cm) away from the shed during the first few feet around the perimeter. This gradual slope encourages rainwater to flow away naturally rather than collecting against the walls.
If your yard has settled over time, correcting the slope may be as simple as adding topsoil to low areas and compacting it firmly. Avoid piling soil directly against wooden siding, as this traps moisture and accelerates rot.
For areas with heavy clay soil that drains slowly, mixing in gravel or coarse sand can improve water movement and reduce surface pooling.
Install a Gravel Perimeter
Adding a gravel border around your shed is an inexpensive project that offers several long-term benefits.
A gravel perimeter helps:
- Improve surface drainage
- Reduce mud during wet weather
- Prevent rain from splashing onto lower wall boards
- Discourage weeds and vegetation from growing against the shed
- Keep the foundation area cleaner and drier
For best results, remove grass and organic material first, lay landscape fabric to reduce weed growth, and add 3 to 4 inches (75–100 mm) of clean crushed stone or drainage gravel.
Unlike decorative mulch, gravel doesn’t retain moisture against the structure, making it a much better choice around wooden sheds.
Check Gutters and Downspouts
If your shed has gutters, they should direct rainwater well away from the foundation—not dump it beside the walls.
Inspect your gutter system for:
- Leaves and debris causing blockages
- Loose brackets
- Sagging sections
- Leaking joints
- Improper slope
- Downspouts ending too close to the shed
A simple downspout extension can move hundreds of gallons of rainwater away from the foundation during a single storm.
If your shed doesn’t currently have gutters, installing a compact gutter kit can be one of the most effective upgrades for reducing water damage, especially if your roof has a large surface area or you live in a region with frequent rainfall.
Raise the Shed Above Ground Moisture
Even excellent drainage won’t help if the shed sits directly on bare soil.
Keeping the floor elevated allows air to circulate underneath, helping timber dry naturally after rain while reducing constant exposure to moisture.
Common foundation options include:
- Pressure-treated skids
- Concrete blocks
- Concrete piers
- Gravel foundations
- Adjustable shed supports
Each option has its advantages depending on your soil conditions and the size of your shed. If you’re planning a new build or replacing an aging structure, our Build a Small Shed: Step-by-Step Easy Beginner Guide explains how different foundation types affect drainage, stability, and long-term durability.
Keep Plants Away from the Walls
Landscaping can make a shed look attractive, but dense vegetation often creates hidden moisture problems.
Bushes, climbing vines, and tall grass reduce airflow and keep exterior walls damp long after rainfall has ended. Over time, this encourages mold growth and speeds up wood deterioration.
To improve drying:
- Trim shrubs regularly.
- Keep vines off siding.
- Remove fallen leaves from around the base.
- Leave at least 12 inches (30 cm) of open space around the shed whenever possible.
Better air circulation means less moisture remains trapped against the wood.
Simple Drainage Improvements That Save Money
Improving drainage doesn’t always require major landscaping. Many homeowners can make a noticeable difference over a single weekend with a few affordable changes.
Consider:
- Cleaning gutters at least twice a year
- Installing inexpensive downspout extensions
- Filling low spots where water collects
- Adding gravel around the perimeter
- Removing mulch that touches the siding
- Redirecting sprinkler systems away from the shed
These small improvements often cost far less than replacing rotten flooring or repairing structural framing later.
Common Drainage Mistakes to Avoid
Before moving on to waterproofing, avoid these common mistakes that can undermine all your hard work:
- Waterproofing the shed while ignoring standing water around the foundation
- Allowing mulch or soil to touch wooden siding
- Letting clogged gutters overflow against the walls
- Building or relocating a shed in the lowest part of the yard
- Assuming waterproof paint alone will solve drainage problems
- Forgetting to inspect the area after heavy storms
Addressing these issues now creates a solid foundation for every waterproofing step that follows.
If your inspection reveals that the shed sits on an inadequate or deteriorating base, it may also be worth exploring shed flooring ideas before investing in waterproof coatings. A dry, stable floor is just as important as a watertight roof when protecting your tools and equipment.
With drainage under control, the next step is to repair any damaged timber. Waterproofing products perform best on solid, dry wood, so before reaching for paint or sealant, it’s essential to fix rot, cracks, and weakened boards that could allow moisture to return.

Chapter 3: Repair Damaged Wood Before Sealing
After improving the drainage around your shed, the next step is to make sure the structure itself is in good condition. This is a stage that many DIYers rush through, but it’s one of the most important parts of a successful waterproof shed DIY project.
Waterproof paints, stains, and sealants are designed to protect sound wood—not repair damaged wood. If you apply a waterproof coating over rotting timber, cracked boards, or loose trim, the moisture trapped inside will continue to cause decay. The surface may look better for a while, but the underlying problem will only get worse.
Taking the time to repair damaged wood before sealing gives waterproof products a solid surface to bond to and helps ensure your repairs last for years instead of just one season.
Inspect Every Wooden Component Carefully
Start by examining every exposed wooden part of the shed. Moisture damage isn’t always obvious, especially if the shed has been painted or stained several times over the years.
Look closely at areas that receive the most exposure to rain, including:
-
Bottom wall plates
-
Exterior siding
-
Corner trim
-
Door frames
-
Window sills
-
Roof fascia boards
-
Floor edges
-
Roof overhangs
These locations tend to stay damp longer than other parts of the shed and are often where rot begins.
As you inspect, don’t rely on appearance alone. Wood can look perfectly healthy while being soft beneath the surface.
How to Check for Hidden Rot
One of the simplest ways to identify hidden damage is with a flat-head screwdriver or awl.
Gently press the tip into any suspicious areas.
Healthy wood should:
-
Feel firm
-
Resist pressure
-
Produce clean wood fibers
Damaged wood will often:
-
Feel soft or spongy
-
Allow the screwdriver to sink easily
-
Crumble around the edges
-
Break apart with very little force
Pay particular attention to areas where two pieces of wood meet. Joints tend to trap moisture longer than exposed surfaces, making them prime locations for fungal decay.
If you discover widespread soft wood, don’t ignore it. Small repairs are much easier—and far less expensive—than waiting until structural framing needs replacement.
Know When to Repair and When to Replace
Not every damaged board needs to be removed. The best solution depends on how much of the wood has deteriorated and whether it plays a structural role.
Repair Minor Damage
Small cosmetic issues can usually be repaired if the wood is still structurally sound.
Examples include:
-
Hairline cracks
-
Small nail holes
-
Minor surface weathering
-
Loose trim
-
Shallow dents
Exterior-grade wood filler works well for filling small imperfections before sanding and repainting.
Replace Severely Damaged Wood
Replacement is usually the better choice when wood has:
-
Extensive rot
-
Deep cracks
-
Large soft areas
-
Severe warping
-
Structural weakness
-
Insect damage
Trying to save badly deteriorated timber often costs more in the long run because the repairs rarely last.
Replacing a single board today is much easier than rebuilding an entire wall later.
Use Exterior-Rated Materials
Outdoor sheds are exposed to changing temperatures, rain, sunlight, and humidity throughout the year. Using products intended for indoor use almost always results in premature failure.
Choose materials specifically designed for exterior conditions, including:
-
Pressure-treated lumber for structural repairs near the ground
-
Exterior-grade plywood
-
Galvanized or stainless-steel screws
-
Exterior wood filler
-
Waterproof construction adhesive
-
Exterior caulk for finishing joints
These materials resist moisture far better than standard indoor products and help extend the life of your repairs.
Allow the Wood to Dry Completely
One of the biggest mistakes DIYers make is rushing to seal wood before it’s fully dry.
Even if the surface appears dry, moisture may still be trapped inside the timber. Applying paint or sealant too early can lock that moisture in, leading to:
-
Peeling paint
-
Bubbling finishes
-
Mold growth
-
Continued wood rot
-
Poor adhesion of waterproof coatings
After making repairs, allow the wood to dry naturally before moving on to waterproofing.
Opening doors and windows during dry weather improves airflow and speeds up the drying process.
Don’t Forget the Hardware
Water damage isn’t limited to wood.
Inspect all exterior hardware, including:
-
Hinges
-
Latches
-
Door handles
-
Window fasteners
-
Screws
-
Nails
-
Brackets
Replace rusted fasteners with galvanized or stainless-steel versions whenever possible.
Work Safely During Repairs
Repair work often involves cutting timber, removing old boards, and working with power tools.
Always:
-
Wear safety glasses when cutting or sanding wood.
-
Use heavy-duty work gloves.
-
Wear a dust mask when removing moldy or painted materials.
-
Support weakened sections before removing structural components.
-
Keep children and pets away from the work area.
Save Money by Repairing Early
Catching damage early can significantly reduce repair costs.
Instead of replacing entire wall sections, you may only need to:
-
Replace one damaged board
-
Install new trim
-
Fill small cracks
-
Tighten loose fasteners
-
Re-caulk exposed joints
Regular inspections after storms help identify these small issues before they become expensive structural problems.
Common Mistakes to Avoid
Avoid these common errors:
-
Painting or sealing over rotten wood
-
Using untreated lumber near the ground
-
Filling large structural gaps with caulk alone
-
Ignoring hidden rot behind trim boards
-
Mixing indoor and outdoor repair materials
-
Skipping the drying time after repairs
-
Forgetting to replace rusted fasteners
A few extra hours spent repairing damaged wood now will greatly improve the effectiveness of every waterproofing product you apply later.
With the structure repaired and completely dry, you’re ready for the next stage—waterproofing the roof, walls, doors, and windows.

Chapter 4: Waterproof the Roof, Walls, Doors, and Windows
With your shed now inspected, drainage improved, and damaged wood repaired, it’s time to focus on keeping rain where it belongs—outside. While many people think of waterproofing as applying a single coat of sealant, effective protection comes from treating every part of the shed that is exposed to the weather.
The roof, walls, doors, and windows work together as one protective system. If even one of these areas has gaps, cracked sealant, or worn weatherstripping, water can find its way inside. By addressing each area carefully, you’ll create a shed that’s better equipped to handle heavy rain, changing temperatures, and years of outdoor exposure.
Start with the Roof
The roof is the first line of defense against rain, making it the most important area to waterproof. Because it receives the greatest amount of weather exposure, even minor damage can eventually lead to leaks inside the shed.
Begin by checking for:
-
Missing or damaged shingles
-
Torn roofing felt
-
Loose metal roofing screws
-
Cracked flashing
-
Open roof seams
-
Rust around fasteners
-
Loose ridge caps
-
Worn sealant around vents or roof penetrations
Small problems should be repaired before they become larger ones. Replace damaged shingles or roofing felt, tighten loose fasteners, and reseal exposed joints with an exterior roofing sealant designed for outdoor use.
If your shed has a metal roof, inspect every screw. Rubber washers beneath roofing screws can become brittle over time, allowing water to seep through even when the screw appears tight.
For older wooden sheds with multiple roof repairs, applying a waterproof roof coating after completing repairs can provide an additional layer of protection and help extend the life of the roof.
Seal the Walls and Exterior Trim
After the roof, inspect every wall carefully. Rain doesn’t always fall straight down—wind-driven storms can force water into surprisingly small openings around siding, trim, and corner joints.
Check for:
-
Cracked caulk
-
Open joints
-
Split siding boards
-
Loose corner trim
-
Nail holes
-
Small gaps around exterior fixtures
Remove any loose or deteriorated caulk before applying new sealant. Simply adding fresh caulk over old, cracked material rarely creates a lasting seal.
Choose an exterior-grade silicone or polyurethane sealant that’s designed for outdoor wood structures. These products remain flexible as the wood naturally expands and contracts throughout the seasons.
A quality caulk gun with a remover tool can make it much easier to strip away old sealant and apply a smooth, consistent bead around siding, trim, windows, and doors.
After sealing the joints, inspect the siding itself. Boards that are cracked, warped, or pulling away from the frame should be repaired before moving on to painting or staining.
Protect Doors from Wind-Driven Rain
Even a well-built shed can leak if the door doesn’t seal properly.
Over time, hinges may loosen, the frame may settle slightly, and weatherstripping can wear out. These small changes create gaps that allow rain and cold air to enter.
Inspect the entire door assembly, including:
-
Door edges
-
Hinges
-
Threshold
-
Weatherstripping
-
Latch alignment
-
Upper corners
Close the door and look for daylight around the edges. If light can pass through, water usually can as well.
Replacing worn weatherstripping is one of the simplest and most affordable waterproofing improvements. Modern foam or rubber weather seals are inexpensive, easy to install, and can dramatically reduce both water intrusion and drafts.
If the door rubs against the frame or doesn’t latch securely, adjust the hinges before installing new weatherstripping. A properly aligned door creates a tighter seal and reduces unnecessary wear.
Check Every Window Carefully
Windows are another common source of leaks, particularly on older sheds.
Inspect the area around each window for:
-
Cracked exterior caulk
-
Loose trim
-
Damaged glazing
-
Soft wooden sills
-
Water stains beneath the frame
Remove loose caulk and replace it with an exterior-rated product that remains flexible in changing weather.
If wooden window sills have started to soften, repair or replace them before sealing. Waterproofing over decaying wood only hides the problem temporarily.
Adding a small drip cap above exposed windows can also help divert rainwater away from the frame, reducing the likelihood of future leaks.
Choose the Right Sealant
Not every sealant is suitable for outdoor use, and choosing the wrong product can shorten the lifespan of your repairs.
When selecting a sealant, consider:
-
Silicone sealants for flexible joints exposed to frequent moisture
-
Polyurethane sealants for strong adhesion on wood and masonry
-
Roofing sealants for roof seams and flashing
-
Paintable exterior caulks where the surface will later be painted
Avoid using interior caulk outdoors, as it isn’t designed to withstand UV exposure, temperature changes, or prolonged moisture.
Always read the manufacturer’s instructions and allow the sealant to cure fully before exposing it to rain.
Apply Waterproof Coatings Correctly
Once all repairs and sealing are complete, the exterior can be protected with a waterproof coating.
Depending on your shed, this may include:
-
Exterior wood sealer
-
Waterproof stain
-
Exterior paint
-
Liquid waterproof membrane for selected surfaces
Always follow the manufacturer’s recommendations regarding surface preparation, drying time, and application temperature.
Avoid applying waterproof products:
-
During rainfall
-
On damp wood
-
In extremely humid conditions
-
Under intense midday sunlight
Applying two or three thin coats usually provides better durability than one heavy coat.
Inspect and Maintain the Waterproof Barrier
Waterproofing isn’t a one-time project.
Over time, sunlight, rain, and seasonal temperature changes gradually wear down protective finishes.
Inspect your shed at least once each year and after severe storms.
Look for:
-
Cracked sealant
-
Loose flashing
-
Peeling paint
-
Damaged weatherstripping
-
New gaps around doors and windows
-
Roof debris
Small repairs made early are usually quick, inexpensive, and help prevent much larger structural problems later.
With the roof, walls, doors, and windows now fully protected, you’ve created a strong barrier against rain and moisture. Next, it’s time to focus on another area that’s often overlooked—the floor and foundation—to ensure your shed stays dry from the ground up.

Chapter 5: Protect the Shed Floor and Foundation
After waterproofing the roof, walls, doors, and windows, there’s one area that deserves just as much attention—the floor and foundation. Even if rain never enters from above, moisture rising from the ground can gradually damage your shed from the bottom up.
Many homeowners are surprised to discover that soft floors, moldy odors, and rusted tools aren’t always caused by roof leaks. In many cases, the real culprit is ground moisture that slowly works its way into the floor framing and lower walls. Protecting the foundation and floor is the final step in creating a truly weather-resistant shed.
Why the Floor and Foundation Matter
Unlike the roof, which dries quickly after rainfall, the floor and foundation are often exposed to moisture for much longer. Damp soil, poor drainage, and limited airflow beneath the shed can keep the underside wet for days after a storm.
Over time, this can lead to:
-
Rotting floor joists
-
Swollen or warped plywood flooring
-
Mold and mildew growth
-
Rust on tools and equipment
-
Sagging floor panels
-
Insect infestations attracted to damp wood
These problems usually develop gradually, making regular inspections essential.
Inspect the Floor from Above and Below
Begin your inspection inside the shed.
Look for signs such as:
-
Soft or springy areas when walking
-
Warped or uneven flooring
-
Dark water stains
-
Peeling paint or floor coatings
-
Mold around corners
-
Damp spots beneath stored items
If your shed is elevated, inspect underneath as well.
Pay close attention to:
-
Floor joists
-
Support beams
-
Moisture on the underside of the floor
-
Standing water
-
Vegetation touching the framing
-
Signs of insect or rodent activity
A flashlight makes it much easier to inspect hidden areas beneath the structure.
Seal the Floor Properly
Once you’re certain the floor is dry and structurally sound, applying a waterproof finish will provide an additional layer of protection.
Suitable options include:
-
Exterior wood sealers
-
Waterproof floor coatings
-
Penetrating wood preservatives
-
Epoxy coatings for workshop sheds
Before applying any finish:
-
Sweep away dirt and dust.
-
Remove grease or oil stains.
-
Repair damaged boards.
-
Allow the wood to dry completely.
Several thin coats usually perform better than one thick application and produce a more durable finish.
Protect Vulnerable Floor Edges
The edges of the floor are among the first areas to absorb moisture because exposed end grain draws in water much faster than flat surfaces.
Give extra attention to:
-
Door thresholds
-
Floor corners
-
Joist ends
-
Areas where siding meets the floor
-
Expansion joints
Applying an extra coat of waterproof sealer to these high-risk areas helps reduce water absorption and extends the life of the flooring.
Install a Vapor Barrier When Needed
If your shed sits over bare soil, a vapor barrier can greatly reduce ground moisture.
A heavy-duty polyethylene sheet helps prevent water vapor from rising into the floor framing.
For best results:
-
Cover as much ground beneath the shed as possible.
-
Overlap seams by several inches.
-
Secure the edges with gravel or landscape staples.
-
Replace damaged sections if they become torn.
A vapor barrier works best when combined with good drainage and proper ventilation.
Choose the Right Foundation
The foundation plays a major role in keeping your shed dry.
Common options include:
Gravel Foundation
-
Excellent drainage
-
Affordable
-
Easy to maintain
-
Reduces standing water
Concrete Slab
-
Strong and durable
-
Ideal for heavier sheds
-
Requires proper drainage around the edges
Concrete Piers
-
Elevate the shed above damp ground
-
Improve airflow beneath the floor
-
Reduce long-term moisture exposure
Pressure-Treated Skids
-
Cost-effective
-
Easy to install
-
Allow small sheds to be relocated if needed
Choosing the right foundation depends on your climate, soil conditions, and the size of your shed.
Store Items Off the Floor
Even a well-protected floor can become damp during periods of high humidity.
To reduce moisture damage:
-
Store tools on shelving.
-
Use pallets beneath storage bins.
-
Keep cardboard boxes off the floor.
-
Leave small gaps around stored items for airflow.
-
Avoid stacking items tightly against the walls.
Good organization not only protects your belongings but also makes it easier to spot leaks or moisture problems before they become serious.
Perform Regular Floor Maintenance
Keeping the floor dry requires ongoing attention.
At least once or twice a year:
-
Sweep away dirt and debris.
-
Inspect for soft spots.
-
Reapply waterproof coatings when necessary.
-
Check underneath the shed for standing water.
-
Remove vegetation growing beneath or around the structure.
-
Ensure drainage continues directing water away from the foundation.
Routine maintenance takes very little time and can significantly extend the life of your shed.
Common Mistakes to Avoid
Many floor problems result from a few avoidable mistakes.
Avoid:
-
Placing the shed directly on bare soil
-
Applying waterproof coatings to damp wood
-
Blocking airflow beneath the shed
-
Allowing mulch or soil to touch the floor framing
-
Ignoring small soft spots until they spread
-
Storing wet equipment directly on wooden flooring
Preventing moisture is always easier—and less expensive—than repairing structural damage later.
With the floor and foundation now protected, your shed has a solid defense against moisture from both above and below. In the next chapter, you’ll learn how to choose and apply the right waterproof finishes, including paints, stains, and sealers that keep your shed looking great while providing long-lasting weather protection.

Chapter 6: Apply the Right Waterproof Finish
After repairing damaged wood and sealing vulnerable areas, the final layer of protection is applying the right waterproof finish. While sealants stop water from entering through gaps and joints, paints, stains, and wood sealers protect the entire exterior surface from rain, UV rays, and changing weather conditions.
Choosing the right finish isn’t just about appearance. A high-quality waterproof coating helps prevent moisture from penetrating the wood, reduces cracking and warping, and extends the life of your shed with regular maintenance.
Understand the Different Types of Waterproof Finishes
Not all waterproof finishes provide the same level of protection. The best choice depends on your shed’s material, local climate, and the look you want to achieve.
The most common options include:
Exterior Paint
Exterior paint forms a protective layer over the wood, shielding it from moisture and harmful UV rays.
Benefits:
-
Excellent weather protection
-
Wide range of colors
-
Strong UV resistance
-
Covers imperfections well
Things to Consider:
-
Can peel if applied to damp wood
-
Requires periodic repainting
-
Hides the natural wood grain
Exterior Wood Stain
Wood stain penetrates into the timber instead of sitting on the surface, allowing the natural grain to remain visible.
Benefits:
-
Enhances the wood’s natural appearance
-
Less likely to peel than paint
-
Easier to maintain over time
-
Available in transparent, semi-transparent, and solid colors
Things to Consider:
-
May require more frequent reapplication in harsh climates
-
Provides slightly less surface protection than paint
Clear Wood Sealer
A clear sealer protects the wood while preserving its original appearance.
It’s a good choice for:
-
New wooden sheds
-
Pressure-treated lumber
-
Decorative backyard structures
-
Natural cedar or redwood sheds
Keep in mind that clear sealers generally offer less UV protection than paint or stain, so regular maintenance is important.
Choose the Right Finish for Your Climate
Weather conditions have a significant impact on how long a waterproof finish lasts.
Choose products designed for your local environment.
For example:
-
Rainy climates: Prioritize highly water-resistant coatings.
-
Hot, sunny regions: Look for finishes with strong UV protection.
-
Cold climates: Choose flexible coatings that expand and contract with temperature changes.
-
Humid areas: Select breathable finishes that allow trapped moisture to escape.
Using products suited to your climate helps maximize their lifespan and reduces maintenance.
Prepare the Surface Properly
Even the best waterproof coating won’t perform well if the surface isn’t prepared correctly.
Before applying any finish:
-
Wash away dirt and dust.
-
Remove mold or mildew.
-
Scrape loose paint.
-
Sand rough areas smooth.
-
Repair damaged boards.
-
Allow the wood to dry completely.
Skipping surface preparation is one of the most common reasons waterproof finishes fail prematurely.
Apply the Finish Correctly
Taking your time during application will produce a better-looking finish and longer-lasting protection.
For the best results:
-
Apply thin, even coats.
-
Follow the manufacturer’s drying times.
-
Work in dry weather.
-
Avoid painting just before rain.
-
Don’t apply coatings in direct midday sun on extremely hot days.
Applying two or three light coats usually provides better durability than one thick coat.
Always pay extra attention to exposed end grain, joints, and repaired sections, as these areas absorb moisture more quickly than flat surfaces.
Choose Quality Products
Using quality products can make a noticeable difference in both appearance and long-term protection.
For natural wood sheds, Nordicare Teak Oil for Outdoor Furniture helps nourish exterior timber while enhancing the wood grain and improving moisture resistance. It’s particularly suitable for hardwood sheds, trim, and exterior wooden features that benefit from a rich, natural finish.
If certain areas of your shed—such as lower wall sections, foundation edges, or repaired roof details—are exposed to especially harsh weather, Liquid Rubber Waterproof Sealant provides an extra waterproof barrier before painting or staining. It’s a practical option for surfaces that experience prolonged exposure to rain and moisture.
Choose products based on the condition of your shed rather than applying unnecessary layers that may trap moisture.
Know When to Reapply
Waterproof finishes don’t last forever. Sunlight, rain, snow, and seasonal temperature changes gradually wear down the protective coating.
Inspect your shed every year for signs such as:
-
Faded color
-
Peeling paint
-
Worn stain
-
Cracked surfaces
-
Exposed bare wood
-
Water no longer beading on the surface
Touching up these areas early is much easier than refinishing the entire shed after the coating has completely failed.
For additional advice on choosing and applying finishes, see our guide to Top Wood Finishing Techniques: Get a Pro Look Every Time, which explains how different finishes perform and how to achieve a professional-looking result.
Common Mistakes to Avoid
Avoid these common finishing mistakes:
-
Applying paint or stain to damp wood
-
Skipping surface cleaning and sanding
-
Applying coats that are too thick
-
Ignoring end grain and exposed joints
-
Mixing incompatible products
-
Choosing indoor finishes for outdoor use
-
Waiting until the finish completely fails before reapplying
A quality waterproof finish is your shed’s final protective shield against the elements. Combined with proper drainage, sound repairs, and routine maintenance, it will help keep your shed dry, attractive, and structurally sound for many years.
With the exterior fully protected, the next step is learning how proper ventilation and regular maintenance prevent future moisture problems. In the following chapter, you’ll discover simple ways to improve airflow, reduce condensation, and keep your shed dry in every season.

Chapter 7: Improve Ventilation and Prevent Future Moisture
After waterproofing your shed from top to bottom, it’s easy to think the job is complete. However, keeping water out is only half the battle. Moisture can also build up inside the shed through condensation, changing temperatures, and everyday use. Without proper ventilation, that trapped moisture can eventually lead to mold, mildew, rust, and wood rot—even if your shed never develops another leak.
The goal is to create a balance between keeping rain outside while allowing humid air inside the shed to escape. A well-ventilated shed stays drier, protects stored belongings, and requires less maintenance over time.
Why Ventilation Is Just as Important as Waterproofing
Every day, your shed experiences changes in temperature. Warm air holds more moisture than cold air. When warm, humid air comes into contact with cooler surfaces such as the roof, windows, or metal tools, condensation forms.
Over time, excess humidity can cause:
-
Mold and mildew growth
-
Rust on hand tools and power tools
-
Swollen wooden doors
-
Warped shelving
-
Musty odors
-
Damaged cardboard boxes and stored fabrics
-
Premature deterioration of wooden structures
Proper ventilation helps remove this moisture before it causes damage.
Signs Your Shed Has Poor Ventilation
Some ventilation problems are obvious, while others develop gradually.
Watch for these warning signs:
-
Water droplets on windows or metal roofing
-
A musty smell when opening the shed
-
Mold in corners or behind shelving
-
Rust forming on tools
-
Damp wooden shelves
-
Swollen doors that become difficult to close
-
Persistent humidity even during dry weather
If you notice any of these problems, improving airflow should be one of your top priorities.
Choose the Right Ventilation System
The best ventilation setup depends on your shed’s size, climate, and how you use the space.
Wall Vents
Wall vents are one of the easiest and most affordable ways to improve airflow.
Benefits include:
-
Better cross ventilation
-
Reduced humidity
-
Minimal maintenance
-
Easy installation
For the best results, install vents on opposite walls to create natural airflow through the shed.
Roof Vents
Since warm air naturally rises, roof vents help remove heat and moisture before condensation forms.
Roof vents are especially effective for:
-
Large storage sheds
-
Workshop sheds
-
Areas with hot summers
-
Humid climates
Combining roof vents with wall vents creates continuous air circulation throughout the building.
Louvered Vents
Louvered vents are designed to allow airflow while helping prevent rain from entering.
Many models also include insect screens to keep pests out without restricting ventilation.
Improve Airflow Inside the Shed
Ventilation isn’t only about adding vents—how you organize the interior also matters.
To improve airflow:
-
Leave several inches of space between shelving and exterior walls.
-
Store boxes on shelves instead of directly on the floor.
-
Avoid overfilling the shed with unnecessary clutter.
-
Keep frequently used tools organized.
-
Store firewood outside whenever possible.
Good air circulation allows moisture to evaporate more quickly and makes it easier to detect leaks or damp spots.
If you’re looking for ideas to maximize storage without blocking airflow, our guide to Shed Storage Ideas: 15 Smart Ways to Maximize Space offers practical layouts for keeping your shed organized while maintaining good ventilation.
Reduce Humidity Before It Becomes a Problem
Many moisture problems can be prevented with a few simple habits.
Try to:
-
Dry lawn equipment before storing it.
-
Wipe moisture from tools after use.
-
Keep fertilizers and chemicals in sealed containers.
-
Open the shed on warm, dry days.
-
Avoid storing damp cardboard or fabric.
These small habits reduce the amount of moisture introduced into the shed and make condensation much less likely.
If you’re unsure whether high humidity is affecting the wood, a Rechargeable Moisture Meter for Wood, Drywall & Flooring can help monitor moisture levels in floors, walls, and framing before problems become visible. It’s especially useful for older sheds or those located in humid climates.
Perform Seasonal Maintenance
Regular inspections are the easiest way to prevent moisture problems from returning.
Spring
After winter, inspect the shed for:
-
Roof damage
-
Loose flashing
-
Cracked caulk
-
Water stains
-
Soft wood
-
Clogged gutters
Summer
Warm weather is ideal for:
-
Touching up paint or stain
-
Replacing weatherstripping
-
Cleaning ventilation openings
-
Trimming nearby shrubs
-
Checking drainage around the foundation
Autumn
Before the rainy season:
-
Clean gutters and downspouts.
-
Remove fallen leaves.
-
Inspect roof fasteners.
-
Check door and window seals.
-
Confirm that water drains away from the shed.
Winter
If snow and freezing temperatures are common in your area:
-
Remove excessive snow from the roof when necessary.
-
Watch for ice buildup around doors.
-
Inspect for leaks during freeze-thaw cycles.
-
Ensure vents remain unobstructed.
A quick seasonal inspection often takes less than an hour but can prevent costly repairs later.
Create a Simple Annual Maintenance Checklist
To keep your shed in excellent condition year after year, include these tasks in your annual routine:
-
Inspect the roof and siding
-
Clean gutters
-
Check caulk and weatherstripping
-
Look for peeling paint
-
Inspect the floor for soft spots
-
Test doors and windows
-
Remove vegetation around the shed
-
Clear ventilation openings
-
Tighten loose hardware
-
Reapply waterproof coatings when needed
Making these checks part of your yearly routine will greatly extend the life of your shed.
Common Mistakes to Avoid
Even a well-built shed can develop moisture problems if ventilation is neglected.
Avoid these common mistakes:
-
Sealing every opening without allowing airflow
-
Blocking vents with shelving or storage bins
-
Storing wet equipment inside overnight
-
Ignoring condensation because there are no visible leaks
-
Waiting until mold appears before improving ventilation
-
Skipping seasonal inspections
Waterproofing protects your shed from the outside, while proper ventilation protects it from the inside. Together, they create a dry, healthy environment that keeps your shed in excellent condition throughout the year.
In the next chapter, we’ll look at the overall cost of waterproofing a shed, the essential tools worth investing in, and the common mistakes that can shorten the lifespan of your waterproofing work.

Chapter 8: Waterproofing Costs, Essential Tools, and Common Mistakes
One of the biggest advantages of a DIY shed waterproofing project is that it doesn’t require a professional contractor or a huge budget. In many cases, you can stop leaks, prevent future moisture damage, and extend the life of your shed with a few quality materials, the right tools, and a well-planned approach.
Understanding the expected costs before you begin also helps you avoid unnecessary purchases. Instead of buying every waterproofing product available, focus on the items your shed actually needs. Investing in quality materials where they matter most will usually save money over the long term.
Estimate Your Waterproofing Budget
The total cost depends largely on the current condition of your shed. A newer shed may only need fresh sealant and a protective finish, while an older structure could require roof repairs, replacement boards, or improved drainage.
As a general guide:
| Project | Estimated Cost |
|---|---|
| Exterior caulk and sealant | $10–$40 |
| Waterproof wood sealer or stain | $30–$80 |
| Exterior paint | $40–$120 |
| Roof waterproofing products | $20–$70 |
| Weatherstripping | $15–$40 |
| Gravel for drainage improvements | $50–$200 |
| Replacement lumber | $30–$200+ |
| Gutters and downspouts | $60–$180 |
For most homeowners, a complete waterproofing project can often be completed for $150 to $400, depending on the condition of the shed and the materials selected.
If major structural repairs are required, rebuilding damaged sections may provide better long-term value than repeatedly patching the same problems.
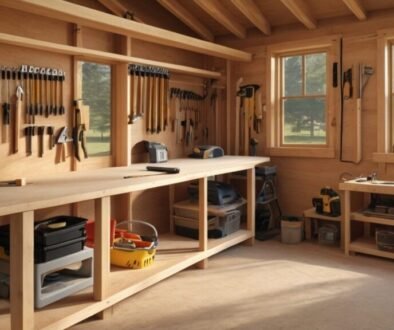
Essential Tools You’ll Need
Most waterproofing projects can be completed using common DIY tools.
Recommended equipment includes:
-
Tape measure
-
Utility knife
-
Hammer
-
Screwdriver set
-
Cordless drill
-
Caulk gun
-
Putty knife
-
Paint brushes and rollers
-
Paint scraper
-
Ladder
-
Flashlight
-
Safety glasses
-
Work gloves
-
Dust mask
If you’re just starting your DIY journey, our Complete Shed Building Tools Checklist for Beginners explains which tools are essential, which ones are optional, and how to choose quality equipment without overspending.
Choose Quality Materials
Using better materials often reduces maintenance and provides longer-lasting protection.
For most wooden sheds, consider investing in:
-
Exterior-grade silicone sealant
-
Waterproof roof sealant
-
Pressure-treated replacement lumber
-
Exterior wood filler
-
High-quality waterproof paint or stain
-
Galvanized or stainless-steel fasteners
Cheaper products may seem like a good value initially, but they often require more frequent repairs and replacement.
Helpful Products That Make the Job Easier
While not every project requires specialty equipment, a few tools can make waterproofing simpler and more reliable.
Moisture Meter
A moisture meter is one of the most useful diagnostic tools for older sheds.
It allows you to:
-
Detect hidden moisture inside timber
-
Confirm repaired wood has fully dried
-
Reduce the risk of trapping moisture beneath paint or sealant
-
Identify potential problem areas before visible damage appears
It’s particularly valuable if your shed has experienced recurring leaks or prolonged damp conditions.
Professional Caulk Gun
Applying sealant neatly and consistently is much easier with a quality caulk gun.
A professional model provides:
-
Better control
-
Smoother application
-
Less wasted sealant
-
Cleaner joints around windows, doors, and siding
Using the right tool often improves both the appearance and durability of the finished seal.
Know When Repair Is No Longer Worth It
Most sheds can be repaired successfully, but there comes a point when rebuilding becomes the smarter investment.
Consider replacing the shed if you discover:
-
Extensive structural rot
-
Multiple roof failures
-
Severely sagging floor framing
-
Foundation movement
-
Widespread insect damage
-
Repair costs approaching the price of a replacement
Instead of continually patching an aging structure, many homeowners find it more economical to rebuild using professionally designed plans that incorporate modern construction methods and improved weather resistance.
Avoid These Common Waterproofing Mistakes
Even experienced DIYers occasionally make mistakes that reduce the effectiveness of their waterproofing work.
The most common include:
-
Waterproofing before locating the source of the leak
-
Ignoring drainage around the foundation
-
Applying paint or sealant to damp wood
-
Using indoor products outdoors
-
Skipping surface preparation
-
Applying waterproof coatings too thickly
-
Forgetting to inspect hidden areas such as floor framing and roof overhangs
-
Waiting until major damage appears before making repairs
Most waterproofing failures are caused by poor preparation rather than poor products.
Save Money with Preventive Maintenance
The easiest way to reduce long-term repair costs is to prevent water damage before it starts.
Simple maintenance habits include:
-
Inspect the shed after major storms.
-
Clean gutters twice a year.
-
Replace cracked caulk promptly.
-
Touch up damaged paint before bare wood is exposed.
-
Keep vegetation away from exterior walls.
-
Remove standing water around the foundation.
Spending a few minutes on routine maintenance each season can prevent hundreds of dollars in future repairs.
For additional ideas on protecting and organizing your shed after waterproofing, our Small Shed Storage Ideas: 21 Smart Ways to Save Space guide shares practical storage solutions that improve airflow while keeping tools and equipment dry.
Final Thoughts Before Long-Term Maintenance
By this point, you’ve completed every major step of waterproofing your shed—from identifying leaks and improving drainage to repairing damaged wood and applying long-lasting protective finishes. Just as importantly, you now understand which tools are worth owning, where it’s worth investing in better materials, and how to avoid the common mistakes that lead to repeat repairs.
In the final chapter, we’ll bring everything together with a simple annual maintenance plan and explain how to recognize when routine repairs are no longer enough—and rebuilding your shed becomes the better long-term solution.

Chapter 9: Annual Maintenance and When to Rebuild
Waterproofing your shed isn’t a one-time project—it’s an ongoing investment in protecting your tools, equipment, and the structure itself. Even the best waterproofing products gradually wear down due to sunlight, rain, wind, and seasonal temperature changes. Fortunately, keeping your shed in excellent condition doesn’t require constant work. A simple maintenance routine performed once or twice a year can prevent most problems before they become expensive repairs.
Just as important, knowing when a shed has reached the end of its useful life can save you from spending time and money on repairs that no longer make financial sense.
Create an Annual Maintenance Schedule
A consistent inspection schedule helps you catch small issues before they turn into major structural problems.
Rather than waiting until you notice a leak, inspect your shed every spring and autumn, as well as after severe storms.
During each inspection, check:
-
Roof coverings and flashing
-
Exterior siding and trim
-
Door and window seals
-
Gutters and downspouts
-
Foundation and drainage
-
Floor condition
-
Ventilation openings
-
Interior signs of moisture or mold
Most inspections take less than an hour and can significantly extend the life of your shed.
Seasonal Maintenance Checklist
Different seasons create different challenges, so your maintenance routine should change throughout the year.
Spring
After winter, inspect for:
-
Loose or damaged roofing
-
Cracked caulk
-
Water stains
-
Soft or swollen wood
-
Clogged gutters
-
Soil erosion around the foundation
Summer
Warm, dry weather is the best time for repairs and refinishing.
Consider:
-
Washing the exterior
-
Repainting or restaining exposed wood
-
Replacing worn weatherstripping
-
Cleaning ventilation openings
-
Trimming nearby shrubs and tree branches
Autumn
Preparing your shed before wet weather arrives helps prevent moisture problems during winter.
Focus on:
-
Cleaning gutters and downspouts
-
Removing leaves around the foundation
-
Checking roof fasteners
-
Inspecting sealant around doors and windows
-
Confirming water drains away from the shed
Winter
If your area experiences snow or freezing temperatures:
-
Remove excessive snow from the roof when necessary.
-
Check for ice buildup around doors.
-
Watch for leaks caused by freeze-thaw cycles.
-
Ensure vents remain open and unobstructed.
Keep the Exterior in Good Condition
The waterproof finish you applied earlier will eventually begin to wear.
At least once a year, inspect for:
-
Peeling paint
-
Faded stain
-
Cracked sealant
-
Exposed bare wood
-
Loose trim
-
Rusted fasteners
Touching up small areas immediately is far easier than refinishing the entire shed after the protective coating has failed.
If you’re planning to refresh the finish, our guide to Top Wood Finishing Techniques: Get a Pro Look Every Time explains how to choose the right products and achieve a durable, professional-looking result.
Protect the Interior
A dry interior depends on more than waterproof walls.
Good storage habits also help prevent moisture problems.
To protect your belongings:
-
Store tools on shelves instead of directly on the floor.
-
Keep boxes several inches away from exterior walls.
-
Dry lawn equipment before storing it.
-
Avoid leaving damp clothing or fabrics inside.
-
Check stored items regularly for signs of moisture.
Good organization also improves airflow and makes it easier to spot leaks before they become serious.
Know When to Repair
Many sheds can remain in excellent condition for decades with routine maintenance.
Repairing is usually the best option when:
-
Damage is limited to a few boards.
-
Roof leaks are localized.
-
The foundation remains stable.
-
Most framing is still structurally sound.
-
Doors and windows operate normally.
Replacing individual boards, updating sealant, and repainting the exterior are often much more economical than replacing the entire shed.
Know When It’s Time to Rebuild
Sometimes repairs simply aren’t enough.
Consider rebuilding your shed if you find:
-
Extensive structural rot
-
Multiple leaking roof sections
-
Sagging floor joists
-
Foundation failure
-
Severe termite or insect damage
-
Twisted wall framing
-
Repair costs approaching the price of a new shed
Rather than repeatedly fixing an aging structure, rebuilding may provide better long-term value while giving you the opportunity to improve the layout, storage, and weather resistance.
If you’ve reached that point, professionally designed My Shed Plans can simplify the process by providing detailed drawings, material lists, and step-by-step construction guidance for a wide range of shed styles and sizes.
Common Maintenance Mistakes to Avoid
Many expensive repairs can be prevented by avoiding a few common mistakes.
Avoid:
-
Waiting until leaks become obvious
-
Ignoring small cracks in caulk or paint
-
Allowing leaves to accumulate around the foundation
-
Storing wet equipment inside
-
Blocking ventilation openings
-
Skipping annual inspections
-
Delaying small repairs until they become structural problems
A few minutes of maintenance each season can save hundreds of dollars in future repairs.

Chapter 10: Conclusion
A waterproof shed isn’t created by a single product—it’s the result of good planning, careful repairs, proper drainage, quality materials, and regular maintenance. By following the steps in this guide, you’ve learned how to identify the source of moisture, repair damaged wood, seal vulnerable areas, improve ventilation, and protect your shed from the ground up.
The key to long-term success is consistency. Regular inspections and small preventative repairs are far easier and less expensive than dealing with widespread water damage later. Whether your shed stores garden tools, outdoor equipment, or serves as a workshop, a little maintenance each year will help keep it dry, safe, and functional for many seasons to come.
If you’re planning additional improvements, don’t stop here. Continue exploring DIY Wood Haven for practical woodworking tutorials, shed-building guides, storage ideas, and backyard projects that help you get even more from your outdoor space.
Frequently Asked Questions
1. What’s the best way to waterproof a wooden shed?
Start by identifying the source of moisture, improving drainage, repairing damaged wood, sealing gaps, and applying a high-quality exterior waterproof finish.
2. How often should I waterproof my shed?
Inspect your shed annually and reapply paint, stain, or wood sealer every three to five years, depending on your climate and the product used.
3. Can I waterproof an old shed instead of replacing it?
Yes. If the structure is still sound, replacing damaged boards and renewing the waterproof finish can significantly extend its lifespan.
4. Is exterior paint enough to waterproof a shed?
Paint helps protect wood from weather, but it works best when combined with proper repairs, quality sealants, and good drainage.
5. How can I stop condensation inside my shed?
Improve ventilation with wall or roof vents, avoid storing wet equipment inside, and keep air circulating around stored items.
6. What’s the most common cause of shed leaks?
Damaged roofing materials, deteriorated sealant, poor drainage, clogged gutters, and worn weatherstripping are among the most common causes.
7. Should I waterproof the inside of my shed?
The exterior should always be your priority. Interior floor sealers can provide extra protection, but they shouldn’t replace proper exterior waterproofing.
8. When should I rebuild instead of repairing my shed?
If your shed has widespread structural rot, foundation problems, or repair costs approaching the price of a replacement, rebuilding is often the better long-term investment.
Affiliate Disclosure
This article may contain affiliate links. If you purchase through these links, DIY Wood Haven may earn a small commission at no additional cost to you. We only recommend products and resources that we believe genuinely help DIY enthusiasts complete their projects successfully.
Amazon Disclosure
As an Amazon Associate, DIY Wood Haven earns from qualifying purchases.