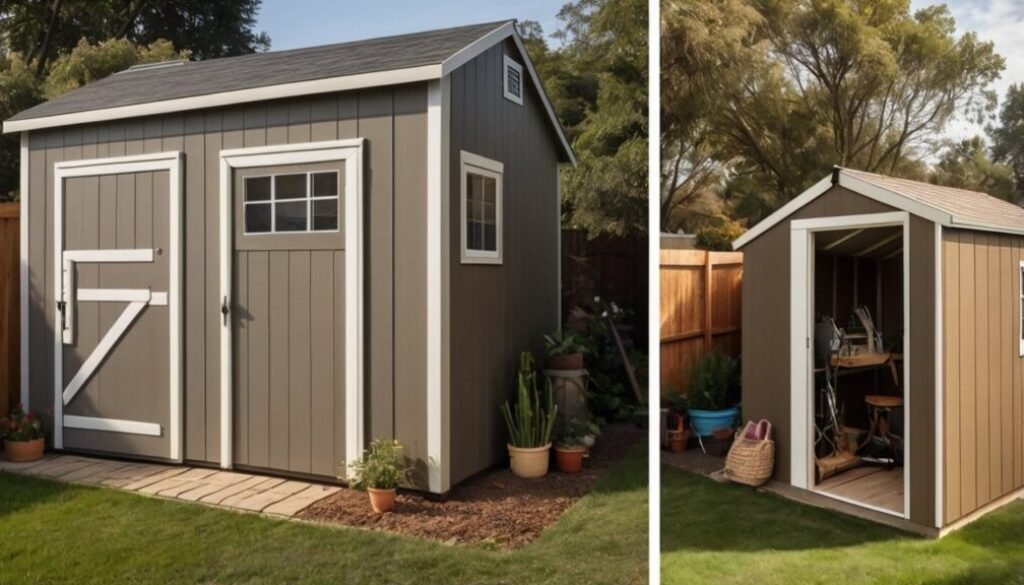
Shed Size Guide: 7 Smart Tips to Choose the Perfect Fit
How do you know if you’re choosing the right shed size for your needs? A reliable shed size guide can make all the difference between a cluttered mess and a perfectly organized outdoor space. Whether you’re storing garden tools, housing lawn equipment, or creating a small workshop, picking the wrong size can lead to wasted money—or worse, running out of space too soon.
Many homeowners underestimate how much room they actually need. That’s where a practical shed size guide becomes essential. By understanding common storage shed sizes and planning ahead, you can avoid costly mistakes and ensure your shed grows with your needs. It’s not just about fitting your current items—it’s about thinking long-term and maximizing every square foot.
In this article, we’ll walk you through a smart and simple shed size guide to help you choose the perfect fit for your backyard, lifestyle, and future plans.

Chapter 1: Shed Size Guide for Beginners – Start with the Right Plan
Choosing the right shed size might seem simple at first—but it’s where most beginners go wrong. This shed size guide is designed to help you avoid common mistakes and confidently decide what size shed actually fits your needs. If you’ve ever wondered whether you’re going too small or too big, you’re not alone. Many people only realize their mistake after they’ve already built or bought the shed.
Why Following a Shed Size Guide Matters
A proper shed size guide does more than just suggest dimensions—it helps you think ahead. Without planning, you might end up with a shed that feels cramped within weeks or one that takes up too much valuable yard space.
Here’s why size matters more than you think:
- Too small: You quickly run out of storage space
- Too large: Wastes money and reduces outdoor space
- Poor layout: Makes it hard to move around inside
Experts from Better Homes & Gardens emphasize that planning storage needs in advance is key to building functional outdoor spaces.
Common Mistakes Beginners Make When Choosing Shed Size
Even with good intentions, beginners often skip important steps when deciding shed size. This is where a reliable shed size guide becomes essential.
Some of the most common mistakes include:
- Guessing instead of measuring available space
- Not considering future storage needs
- Ignoring access space around the shed
- Choosing size based only on price
For example, someone might choose a small shed to save money—only to upgrade a year later because it no longer fits their tools.
If you’re still exploring basic projects, it helps to review beginner-friendly builds like
easy woodworking projects for beginners
before committing to a larger structure.
How to Start Using a Shed Size Guide Effectively
The best way to use this shed size guide is to start with your actual needs—not guesses. Think about what you plan to store today and what you might add in the future.
Step 1: List What You’ll Store
- Garden tools
- Lawn equipment
- Bikes or outdoor gear
Step 2: Measure Your Available Space
- Check backyard dimensions
- Leave room for walking and maintenance
Step 3: Plan for Extra Space
- Add at least 20–30% more space than your current needs
👉 Want a simple solution that removes guesswork?
See how you can build your own shed with this step-by-step guide.
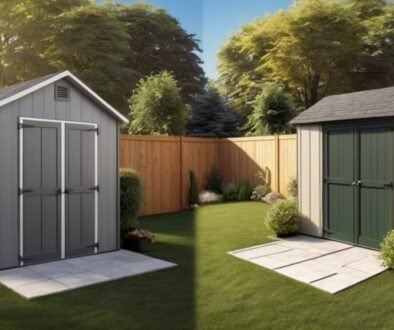
Small Shed vs Large Shed: Which One Fits You?
Choosing between sizes can feel overwhelming, so let’s simplify it:
| Shed Size | Best For | Limitations |
|---|---|---|
| Small (6×8, 8×10) | Basic storage, tools | Limited future space |
| Medium (10×12, 12×16) | Storage + workspace | Moderate cost |
| Large (12×20+) | Workshop, multi-use | Higher budget, more space needed |
For most beginners, a medium-sized shed is often the best solution—it balances cost, space, and flexibility.
Real-Life Example: Choosing the Right Size
Let’s compare two beginners:
- Builder A (No Plan):
Chooses small shed → runs out of space → upgrades later - Builder B (Uses Shed Size Guide):
Plans ahead → chooses medium shed → fits everything comfortably
The difference? Just a bit of planning upfront.
Expert Tips for First-Time Shed Builders
Professionals from The Spruce recommend:
- Always measure twice before deciding
- Think about how you’ll move inside the shed
- Don’t forget vertical storage (shelves, hooks)
- Plan for future tools or upgrades
👉 Looking for affordable DIY plans that include sizing guidance?
Check out these affordable woodworking plans →
Quick Shed Size Checklist
Before moving forward, make sure:
- You’ve listed all items to store
- You’ve measured your yard space
- You’ve allowed extra room for future needs
- You’ve considered usability inside the shed
Transition to Chapter 2
Now that you understand the basics of this shed size guide, the next step is matching your shed size to your specific storage needs. In Chapter 2, we’ll break down how to calculate the exact space you need—so you don’t end up guessing.

Chapter 2: Shed Size Guide Based on Your Storage Needs – Choose Smart, Not Guesswork
Once you understand the basics, the next step in this shed size guide is figuring out exactly how much space you truly need. This is where many beginners either overestimate or underestimate—and both can lead to frustration later.
Instead of guessing, the smartest approach is to base your shed size on what you actually plan to store.
Why Storage Needs Are Key in Any Shed Size Guide
A reliable shed size guide always starts with your storage requirements. Without this step, you’re just picking a size based on assumptions—which often leads to regret.
Here’s why this matters:
- You avoid running out of space too quickly
- You don’t overspend on unnecessary square footage
- You create a more organized and functional shed
Experts from The Spruce recommend listing all items before choosing shed dimensions, especially for first-time builders.
Step-by-Step: How to Calculate Your Shed Space Needs
Let’s break this down into a simple method you can follow right away.
1. List All Items You Plan to Store
Start with the obvious, but don’t forget smaller items:
- Lawn mower
- Gardening tools
- Bicycles
- Storage boxes
- Outdoor furniture
👉 Tip: Lay everything out visually in your yard or garage—it helps you estimate space more accurately.
2. Measure Large Items First
Big equipment determines your minimum shed size.
- Lawn mower: ~6–8 sq ft
- Bicycle: ~3–4 sq ft each
- Workbench: ~6–10 sq ft
A good shed size guide always prioritizes large items first because they take up the most room.
3. Add Walking and Working Space
This is where many beginners go wrong.
You’ll need space to:
- Move around comfortably
- Access items easily
- Work inside (if needed)
👉 Add at least 30% extra space beyond your storage needs.
4. Plan for Future Storage
Think ahead. Will you:
- Buy more tools?
- Add shelves?
- Use the shed as a workspace later?
A smart shed size guide always includes future-proofing to avoid upgrading too soon.
👉 Want a recommended solution that calculates everything for you?
See how you can build your own shed with this step-by-step guide.
Storage-Based Shed Size Recommendations (Easy Guide)
Here’s a practical breakdown to help you decide:
| Storage Need | Recommended Shed Size | Best For |
|---|---|---|
| Light Storage | 6×8 or 8×8 | Tools, small items |
| Moderate Storage | 8×10 or 10×12 | Tools + equipment |
| Heavy Storage | 10×16 or larger | Equipment + workspace |
For most homeowners, 8×10 or 10×12 is the sweet spot—it offers flexibility without taking over your yard.
Common Storage Planning Mistakes to Avoid
Even when following a shed size guide, beginners often miss these details:
- Stacking items without planning layout
- Forgetting vertical storage (walls, shelves)
- Not leaving space for doors to open fully
- Ignoring awkward or bulky shapes
For example, a lawn mower might fit—but can you easily pull it out? That’s the real question.
Real-Life Scenario: Guessing vs Planning
- Builder A (Guessing):
Picks 6×8 shed → fits tools but no walking space → feels cramped - Builder B (Using Shed Size Guide):
Plans storage → chooses 10×12 → organized and easy to use
The difference? Practical planning instead of assumptions.
Expert Tips for Smarter Storage Planning
Professionals from Better Homes & Gardens suggest:
- Use wall-mounted storage to save floor space
- Group similar items together
- Keep frequently used tools near the entrance
- Design layout before building
👉 Looking for affordable DIY plans with storage layouts included?
Check out these affordable woodworking plans →
Quick Storage Planning Checklist
Before choosing your shed size, make sure:
- All items are listed and measured
- Large equipment is prioritized
- Extra space for movement is included
- Future storage needs are considered
Transition to Chapter 3
Now that you’ve calculated your storage needs using this shed size guide, the next step is understanding how your available backyard space affects your decision. In Chapter 3, we’ll explore how to match your shed size with your yard—without overcrowding your outdoor space.

Chapter 3: Shed Size Guide for Backyard Space – Fit Your Shed Without Overcrowding
After understanding your storage needs, the next step in this shed size guide is making sure your shed actually fits your backyard. This is where many beginners make costly mistakes—either choosing a shed that’s too big for the space or placing it in a way that disrupts the entire layout.
A shed should enhance your outdoor area, not dominate it.
Why Backyard Space Matters in a Shed Size Guide
A well-planned shed size guide always considers your available yard space—not just what you want to store. Even if a larger shed seems appealing, it can quickly make your backyard feel cramped and less functional.
Here’s what happens when size and space don’t match:
- Limited room for walking or landscaping
- Poor airflow around the shed
- Reduced usability of your outdoor area
- Potential issues with local building regulations
Experts from HGTV recommend balancing structure size with open space to maintain a visually pleasing and practical yard.
How to Measure Your Backyard Properly
Before choosing a shed size, you need accurate measurements. This step is often skipped—but it’s critical.
1. Measure Total Available Area
- Use a tape measure or measuring wheel
- Mark boundaries clearly
2. Identify Usable Space
- Avoid areas with slopes or poor drainage
- Consider existing features like trees, fences, or patios
3. Leave Clearance Around the Shed
- At least 2–3 feet on all sides
- Space for maintenance and airflow
A smart shed size guide always includes clearance—not just the shed footprint.
Common Backyard Space Mistakes Beginners Make
Even when measuring, beginners often overlook key details:
- Placing the shed too close to property lines
- Blocking pathways or garden areas
- Ignoring door swing space
- Overfilling a small yard with a large shed
For example, a 12×16 shed might technically fit—but if it leaves no room to move around, it’s not practical.
Small Yard vs Large Yard Shed Planning (Pros & Cons)
Let’s simplify your decision based on yard size:
| Yard Size | Best Shed Size | Key Considerations |
|---|---|---|
| Small Yard | 6×8 or 8×10 | Maximize vertical storage |
| Medium Yard | 8×10 or 10×12 | Balance storage and open space |
| Large Yard | 10×16+ | Flexibility for workshop use |
For most homeowners, choosing a shed that uses no more than 25–30% of backyard space is the best solution.
Real-Life Example: Overcrowded vs Balanced Yard
- Builder A (Oversized Shed):
Installs large shed → yard feels cramped → limited outdoor use - Builder B (Balanced Planning):
Chooses moderate size → keeps open space → functional and visually appealing
The difference? Following a practical shed size guide instead of maximizing size.
Expert Tips for Better Shed Placement
Professionals from Better Homes & Gardens suggest:
- Place sheds in corners to save space
- Align with fences for a cleaner look
- Keep sunlight and drainage in mind
- Maintain easy access from your home
👉 Want a recommended solution that includes layout planning?
See how you can build your own shed with this step-by-step guide.
Quick Backyard Planning Checklist
Before finalizing your shed size, make sure:
- You’ve measured your yard accurately
- You’ve allowed clearance around the shed
- You’ve considered movement and access
- The shed doesn’t overwhelm your outdoor space
Transition to Chapter 4
Now that you’ve matched your shed size to your backyard space using this shed size guide, the next step is understanding height and layout. In Chapter 4, we’ll explore how vertical space and interior design can maximize your shed’s functionality without increasing its footprint.

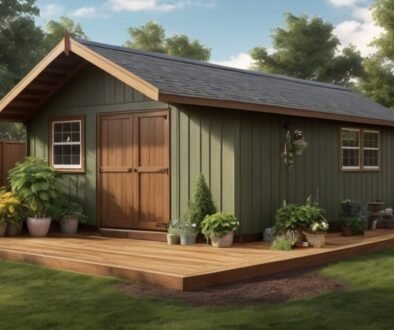
Chapter 4: Shed Size Guide for Height & Layout – Maximize Space Without Going Bigger
When most beginners think about shed size, they only focus on width and length. But a smart shed size guide also considers height and interior layout. This is where you can unlock extra storage space without increasing the shed’s footprint.
In fact, using vertical space effectively can make a small shed feel much larger and more functional.
Why Height Matters in a Shed Size Guide
A well-planned shed size guide doesn’t stop at floor space—it looks upward. Height plays a crucial role in how usable your shed feels.
Here’s why it matters:
- More vertical storage (shelves, hooks, racks)
- Better airflow and ventilation
- Easier movement inside the shed
- Option to add overhead storage or loft space
Experts from This Old House recommend maximizing vertical space before increasing the overall size of a structure.
Common Height & Layout Mistakes Beginners Make
Even when choosing the right footprint, beginners often waste space due to poor layout decisions. These are common shed size guide mistakes:
- Choosing a low roof height that limits movement
- Not using wall space for storage
- Placing items randomly without planning layout
- Ignoring headroom for taller equipment
For example, a shed might have enough floor space—but if you can’t stand comfortably or stack items, it quickly becomes inconvenient.
How to Use Vertical Space Effectively
You don’t always need a bigger shed—you just need a smarter layout. A practical shed size guide includes vertical planning from the start.
1. Install Wall Shelving
- Store smaller tools and supplies
- Keep floor space clear
2. Use Hooks and Pegboards
- Hang tools, hoses, or bikes
- Easy access and organization
3. Add Overhead Storage or Loft
- Ideal for seasonal items
- Maximizes unused upper space
4. Choose the Right Roof Style
- Gable roofs provide more headroom
- Taller roofs allow future upgrades
👉 Want a recommended solution with smart layout designs included?
See how you can build your own shed with this step-by-step guide.
Low Shed vs Tall Shed (Pros & Cons)
Let’s compare your options:
| Shed Type | Pros | Cons |
|---|---|---|
| Low Height Shed | Lower cost, easier build | Limited storage and movement |
| Tall Shed | More storage, better airflow | Slightly higher cost |
For most beginners, a slightly taller shed is the best solution—it gives flexibility without drastically increasing cost.
Real-Life Example: Poor Layout vs Smart Layout
- Builder A (Poor Layout):
Stores everything on floor → cluttered space → hard to access tools - Builder B (Smart Layout):
Uses shelves + hooks → organized space → more usable room
The difference? Understanding how to apply a shed size guide beyond just dimensions.
Expert Tips for Better Shed Layout
Professionals from Better Homes & Gardens suggest:
- Plan your layout before building
- Keep frequently used items within easy reach
- Use vertical storage to reduce clutter
- Leave open floor space for movement
👉 Looking for affordable DIY plans with layout ideas included?
Check out these affordable woodworking plans →
Quick Height & Layout Checklist
Before finalizing your shed size, make sure:
- You have enough headroom to move comfortably
- Wall space is used efficiently
- Storage is organized vertically
- Layout supports easy access and movement
Transition to Chapter 5
Now that you’ve optimized your shed’s height and layout using this shed size guide, the next step is budgeting. In Chapter 5, we’ll explore how your budget impacts shed size—and how to get the best value without overspending.

Chapter 5: Shed Size Guide for Budget Planning – Get the Right Size Without Overspending
Budget plays a bigger role than most beginners expect. One of the most practical parts of any shed size guide is understanding how much space you can afford—and how to make smart decisions without cutting corners.
It’s not just about building the biggest shed possible. It’s about finding the right balance between size, cost, and long-term value.
Why Budget Matters in a Shed Size Guide
A good shed size guide helps you avoid two common problems: overspending or underbuilding. Both can lead to frustration later.
Here’s how budget affects your shed size:
- Larger sheds require more materials → higher cost
- Bigger structures may need permits → additional fees
- More space means more time and labor
- Maintenance costs increase with size
Experts from HomeAdvisor note that shed costs can vary significantly depending on size, materials, and design choices.
Average Shed Costs by Size (Beginner-Friendly Overview)
To help you plan, here’s a simple breakdown:
| Shed Size | Estimated Cost Range | Best For |
|---|---|---|
| 6×8 / 8×8 | Low budget | Basic storage |
| 8×10 / 10×12 | Medium budget | Storage + flexibility |
| 12×16+ | Higher budget | Workshop or multi-use |
👉 A smart shed size guide focuses on value—not just size.
Common Budget Mistakes Beginners Make
Even with a plan, beginners often run into these issues:
- Choosing the cheapest option without considering durability
- Underestimating material costs
- Forgetting tools, paint, or finishing expenses
- Not budgeting for future upgrades
For example, building a slightly bigger shed with better materials might cost more upfront—but saves money in the long run.
How to Choose the Right Shed Size for Your Budget
Instead of guessing, follow this simple approach:
1. Set a Realistic Budget Range
- Decide your maximum spend
- Leave a buffer (10–20%) for unexpected costs
2. Prioritize Your Needs
- Storage only? → smaller shed
- Workspace? → medium or larger shed
3. Balance Size and Quality
- Don’t sacrifice durability for size
- Choose quality materials within your budget
4. Consider DIY vs Pre-Built Options
- DIY is usually more affordable
- Pre-built sheds save time but cost more
👉 Want a recommended solution that helps you plan everything within budget?
See how you can build your own shed with this step-by-step guide.
DIY Shed vs Buying Pre-Built (Pros & Cons)
Let’s compare your options clearly:
| Option | Pros | Cons |
|---|---|---|
| DIY Shed | Lower cost, customizable | Requires time and effort |
| Pre-Built Shed | Fast, convenient | Higher price, limited flexibility |
For beginners, DIY is often the best solution if you’re willing to invest some time.
Real-Life Example: Budget Mistake vs Smart Planning
- Builder A (No Budget Plan):
Starts small → upgrades later → spends more overall - Builder B (Uses Shed Size Guide):
Plans budget → builds correct size → avoids extra costs
The difference? Thinking long-term instead of short-term.
Expert Tips to Save Money Without Sacrificing Quality
Professionals from Better Homes & Gardens recommend:
- Buy materials in bulk when possible
- Choose standard sizes to reduce waste
- Use simple designs to lower costs
- Invest in durable materials for long-term savings
👉 Looking for affordable DIY plans that match your budget?
Check out these affordable woodworking plans →
Quick Budget Planning Checklist
Before deciding your shed size, make sure:
- You’ve set a clear budget range
- You’ve included extra costs (tools, finishes)
- You’ve balanced size with material quality
- You’ve considered long-term value
Transition to Chapter 6
Now that you understand how budget affects your decision in this shed size guide, the next step is thinking ahead. In Chapter 6, we’ll explore how future needs can impact your shed size—and why planning ahead can save you from upgrading later.

Chapter 6: Shed Size Guide for Future Needs – Plan Ahead and Avoid Regret
One of the smartest sections in any shed size guide is planning for the future. Many beginners focus only on what they need right now—but that’s one of the biggest reasons people outgrow their sheds too quickly.
A shed isn’t just a short-term project. It’s something you’ll use for years, so thinking ahead can save you time, money, and the hassle of upgrading later.
Why Future Planning Matters in a Shed Size Guide
A reliable shed size guide always includes future-proofing. Your storage needs will likely grow over time, whether it’s new tools, equipment, or even a change in how you use the space.
Here’s why planning ahead is important:
- Avoids the need to rebuild or upgrade
- Saves money in the long run
- Keeps your shed functional for years
- Adds flexibility for new uses
Experts from The Spruce recommend always choosing slightly more space than you currently need to avoid limitations later.
Common Future Planning Mistakes Beginners Make
Even when following a shed size guide, beginners often overlook long-term needs.
Watch out for these common mistakes:
- Choosing the smallest possible shed to save money
- Not considering future tools or equipment
- Ignoring potential lifestyle changes (e.g., hobbies, gardening)
- Skipping flexible storage options
For example, you might only need space for basic tools now—but what if you later add a lawn mower, bikes, or a small workbench?
How to Future-Proof Your Shed Size (Simple Steps)
Planning ahead doesn’t have to be complicated. A smart shed size guide includes these simple strategies:
1. Add Extra Space (20–30%)
- Always go slightly bigger than your current needs
- Gives room for growth
2. Think About Multi-Use
- Storage + workspace
- Gardening + tool organization
3. Plan for Storage Expansion
- Shelving, hooks, and cabinets
- Leave room for upgrades
4. Choose a Flexible Layout
- Open floor plan is easier to adapt
- Avoid fixed structures that limit changes
👉 Want a recommended solution that helps you plan for both now and the future?
See how you can build your own shed with this step-by-step guide.
Small Now vs Plan Ahead (Pros & Cons)
Let’s compare two approaches:
| Approach | Pros | Cons |
|---|---|---|
| Build for Now Only | Lower upfront cost | Outgrows quickly, limited use |
| Plan for Future Needs | Long-term flexibility, better value | Slightly higher initial cost |
For most beginners, planning ahead is the best solution—it prevents costly upgrades later.
Real-Life Example: Short-Term vs Long-Term Thinking
- Builder A (Short-Term Focus):
Builds small shed → adds more tools → runs out of space → needs upgrade - Builder B (Future Planning):
Adds extra space → adapts shed over time → no need to rebuild
The difference? Thinking beyond today.
Expert Tips for Long-Term Shed Planning
Professionals from HGTV suggest:
- Always plan for at least one future upgrade
- Keep layout flexible and adaptable
- Use modular storage solutions
- Avoid filling the shed completely from day one
👉 Looking for affordable DIY plans that support future expansion?
Check out these affordable woodworking plans →
Quick Future Planning Checklist
Before finalizing your shed size, make sure:
- You’ve added extra space beyond current needs
- You’ve considered future tools or hobbies
- Layout allows easy upgrades
- Storage solutions are flexible
Transition to Chapter 7
Now that you’ve planned for future needs using this shed size guide, the final step is putting everything together. In Chapter 7, we’ll summarize the key tips and help you confidently choose the perfect shed size for your situation.

Chapter 7: Ignoring Weather Conditions – A Risky Shed Building Mistake Beginners Should Avoid
Weather might seem like a minor detail, but ignoring it is one of the most damaging shed building mistakes beginners can make. From unexpected rain to extreme heat, weather conditions can affect everything—from your materials to the overall stability of your shed.
How Weather Impacts Shed Building Mistakes
Building a shed outdoors means you’re constantly exposed to the elements. If you don’t plan for weather, you risk damaging materials before your shed is even complete.
Here’s how weather can cause problems:
- Rain: Warps wood and delays construction
- Humidity: Leads to swelling and mold growth
- Heat: Causes materials to expand or dry too quickly
- Wind: Makes installation unsafe and inaccurate
According to experts at The Weather Channel, even light rain can affect untreated wood within hours. This is why weather-related shed building mistakes are more common than many beginners realize.
Common Weather Mistakes Beginners Make
Many DIY builders underestimate how quickly weather can change. Here are some typical errors:
- Starting a project without checking the forecast
- Leaving materials exposed overnight
- Building during extreme heat or rain
- Skipping weatherproofing steps
For example, leaving plywood uncovered during a rainy night can ruin it completely—forcing you to repurchase materials.
If you’re exploring outdoor builds, it’s helpful to review guides like
outdoor woodworking projects
to better understand how weather impacts your work.
Best Practices to Avoid Weather-Related Shed Building Mistakes
Planning around weather is easier than you think. Follow these beginner-friendly tips:
1. Always Check the Weather Forecast
- Plan your build during a stretch of dry days
- Avoid starting before storms or heavy rain
2. Protect Your Materials
- Store wood in a dry, covered area
- Use tarps if working outdoors
3. Build in Ideal Conditions
- Mild temperatures (not too hot or cold)
- Low humidity when possible
4. Weatherproof as You Build
- Seal wood early
- Install roofing quickly to protect the structure
👉 Want a recommended tool that includes weather-smart building steps?
See how you can build your own shed with this step-by-step guide.
Building in Good vs Bad Weather (Pros & Cons)
Let’s compare how weather affects your project:
| Condition | Pros | Cons |
|---|---|---|
| Good Weather | Smooth workflow, better results | Requires planning |
| Bad Weather | None | Delays, material damage, safety risks |
The takeaway is simple: waiting for the right conditions is always the best solution.
Real-Life Example: Weather Mistake vs Smart Planning
Consider these two beginners:
- Builder A (Ignores Weather):
Starts before rain → materials get wet → wood warps → delays project - Builder B (Plans Ahead):
Checks forecast → builds in dry weather → materials stay intact → smooth progress
The difference? Just a bit of patience and preparation.
Expert Advice on Weather Awareness
Professionals from Bob Vila recommend treating weather as part of your building plan—not an afterthought.
They suggest:
- Monitoring forecasts daily during your build
- Scheduling tasks based on conditions (e.g., painting on dry days)
- Avoiding rushed work before storms
👉 Looking for affordable DIY plans that include weatherproofing tips?
Check out these affordable woodworking plans →
Quick Weather Checklist for Beginners
Before you start building, make sure:
- Forecast shows clear weather for several days
- Materials are stored in a dry place
- Tools are safe to use in current conditions
- You have tarps or covers ready if needed
Transition to Chapter 8
Now that you understand how weather conditions can impact your project, the next step is ensuring your shed’s structure is strong. In Chapter 8, we’ll explore how poor framing techniques can weaken your shed—and how to build a solid structure from the start.

Chapter 8: Shed Size Guide for Access & Usability – Make Your Shed Easy to Use Every Day
Choosing the right dimensions isn’t just about fitting your items inside—it’s also about how easy your shed is to use. A complete shed size guide must include access and usability, because even a perfectly sized shed can become frustrating if you can’t move around comfortably.
This is one of the most overlooked factors, especially for beginners.
Why Access Matters in a Shed Size Guide
A smart shed size guide doesn’t just focus on storage—it considers how you interact with the space daily. If your shed is hard to access, it quickly becomes inconvenient.
Here’s what poor usability can lead to:
- Difficulty moving large items in and out
- Limited walking space inside
- Cluttered and disorganized storage
- Reduced overall functionality
Experts from The Spruce emphasize that usability is just as important as size when designing storage spaces.
Common Access Mistakes Beginners Make
Even when following a shed size guide, beginners often forget about usability.
Watch out for these common mistakes:
- Choosing doors that are too narrow
- Not leaving enough walking space inside
- Blocking access with poor layout design
- Ignoring how often items are used
For example, a lawn mower might technically fit—but if you struggle to pull it out, the shed isn’t practical.
How to Improve Shed Access and Usability
A well-designed shed size guide includes these simple but powerful improvements:
1. Choose the Right Door Size
- Double doors for large equipment
- Wide openings for easy movement
2. Plan Walking Space
- Leave clear pathways inside
- Avoid placing items too close together
3. Organize Based on Usage
- Frequently used items near the entrance
- Seasonal items stored further inside
4. Consider Door Placement
- Front-facing for easy access
- Side doors for flexible layout
👉 Want a recommended solution that includes smart layout and access planning?
See how you can build your own shed with this step-by-step guide.
Single Door vs Double Door (Pros & Cons)
Let’s compare your options:
| Door Type | Pros | Cons |
|---|---|---|
| Single Door | Lower cost, simple design | Limited access for large items |
| Double Door | Easy access, more flexible | Slightly higher cost |
For most beginners, double doors are the best solution—especially if you store bulky equipment.
Real-Life Example: Poor Access vs Smart Design
- Builder A (Poor Access):
Narrow door → tight space → struggles to move items → frustration - Builder B (Smart Access):
Wide doors + clear layout → easy movement → efficient use
The difference? Thinking beyond size and focusing on usability.
Expert Tips for Better Shed Usability
Professionals from HGTV recommend:
- Testing your layout before building
- Leaving at least 2–3 feet of walking space
- Keeping entry points clear
- Designing with daily use in mind
👉 Looking for affordable DIY plans with smart access layouts?
Check out these affordable woodworking plans →
Quick Access & Usability Checklist
Before finalizing your shed size, make sure:
- Doors are wide enough for your largest items
- Walking space is comfortable
- Layout supports easy movement
- Frequently used tools are easily accessible
Final Wrap-Up Transition
Now that you’ve completed every step in this shed size guide, you have everything you need to choose the perfect shed size—from storage and space to layout, budget, and usability.
If you follow these principles, you won’t just build a shed—you’ll build one that actually works for your everyday life.

Chapter 9: Shed Size Guide for Permits & Regulations – Avoid Legal Mistakes Before You Build
One important part that many beginners overlook in a shed size guide is local permits and building regulations. You might choose the perfect shed size for your needs—but if it doesn’t meet local rules, you could face fines, delays, or even be forced to remove it.
That’s why understanding regulations is just as important as choosing the right size.
Why Permits Matter in a Shed Size Guide
A complete shed size guide doesn’t just focus on dimensions and storage—it also considers legal requirements. Different areas have rules about how big your shed can be without needing approval.
Here’s why this matters:
- Avoid fines or penalties
- Prevent project delays
- Ensure safe and approved construction
- Protect your property value
Experts from International Code Council highlight that even small structures must meet local building codes depending on size and placement.
Common Permit Mistakes Beginners Make
Even when following a shed size guide, beginners often miss these key points:
- Assuming small sheds don’t require permits
- Ignoring property line setbacks
- Building too large without approval
- Not checking height restrictions
For example, many areas allow sheds under a certain size (like 10×12) without permits—but going just slightly bigger can trigger requirements.
Typical Shed Size Limits (General Guidelines)
While rules vary by location, here are common guidelines:
| Shed Size | Permit Requirement |
|---|---|
| Under 100–120 sq ft | Usually no permit needed |
| 120–200 sq ft | May require approval |
| 200+ sq ft | Permit almost always required |
👉 A smart shed size guide always includes checking your local rules before building.
How to Check Local Shed Regulations
Avoiding legal issues is simple if you follow these steps:
1. Visit Your Local Council Website
- Look for building codes or zoning laws
2. Check Size and Height Limits
- Maximum square footage
- Height restrictions
3. Review Setback Rules
- Distance from fences or property lines
- Placement requirements
4. Ask If Unsure
- Contact local authorities directly
- Better to confirm than risk mistakes
👉 Want a recommended solution that helps you plan within safe limits?
See how you can build your own shed with this step-by-step guide.
Build Without Permit vs With Permit (Pros & Cons)
Let’s compare both approaches:
| Option | Pros | Cons |
|---|---|---|
| No Permit (Small Shed) | Faster, less paperwork | Size limitations |
| With Permit | Larger size allowed, compliant | More time and effort |
For beginners, staying within no-permit limits is often the best solution—as long as it meets your needs.
Real-Life Example: Ignoring vs Following Rules
- Builder A (Ignored Rules):
Builds large shed → receives complaint → forced to modify or remove - Builder B (Follows Shed Size Guide):
Checks regulations → builds within limits → no issues
The difference? Just a quick check before starting.
Expert Tips for Staying Compliant
Professionals from HGTV recommend:
- Always verify local requirements first
- Keep documentation if permits are approved
- Don’t rely on assumptions or outdated info
- Plan size with regulations in mind
👉 Looking for affordable DIY plans that consider legal sizing?
Check out these affordable woodworking plans →
Quick Permit Checklist
Before finalizing your shed size, make sure:
- You’ve checked local building regulations
- Shed size falls within allowed limits
- Placement follows setback rules
- Permits are obtained if required
Final Wrap-Up Transition
With this final step in your shed size guide, you now understand not only how to choose the right size—but also how to do it legally and safely.
By combining smart planning with proper regulations, you’ll avoid costly mistakes and build with confidence.

Chapter 10: Lack of Ventilation – A Silent Shed Building Mistake Beginners Often Ignore
Ventilation might not be the first thing on your mind when building a shed, but ignoring it is one of the most overlooked shed building mistakes beginners make. Without proper airflow, your shed can quickly become a damp, mold-prone space that damages tools, materials, and even the structure itself.
Why Poor Ventilation Leads to Shed Building Mistakes
A shed without ventilation traps heat and moisture inside. Over time, this creates the perfect environment for mold, mildew, and wood rot.
Here’s what can happen when ventilation is ignored:
- Moisture buildup inside the shed
- Mold growth on walls and stored items
- Warping or rotting wood
- Unpleasant odors and poor air quality
According to experts at Energy.gov, proper ventilation is essential for controlling moisture in enclosed spaces. This is why ventilation-related shed building mistakes can lead to long-term damage.
Common Ventilation Mistakes Beginners Make
Many beginners assume small gaps or cracks are enough for airflow—but that’s rarely the case.
Watch out for these common errors:
- Building a completely sealed shed
- Not installing vents or windows
- Placing the shed in a poorly ventilated area
- Ignoring airflow direction
For example, a tightly sealed shed may keep rain out—but it also traps humidity inside, leading to condensation on walls and tools.
If you’re exploring more outdoor builds, guides like
outdoor woodworking projects
highlight how airflow affects durability.
Best Ventilation Solutions for Beginner Shed Builders
Avoiding these shed building mistakes beginners often make is simple when you follow proven ventilation strategies:
1. Install Air Vents
- Place vents on opposite walls for cross-ventilation
- Position them near the roof to release hot air
2. Add Windows (If Possible)
- Improves natural airflow and lighting
- Helps regulate temperature
3. Leave Small Gaps Strategically
- Under eaves or roof edges
- Allows air to circulate without letting water in
4. Use Vent Covers or Screens
- Prevent insects from entering
- Maintain airflow safely
👉 Want a recommended tool system that includes ventilation planning?
See how you can build your own shed with this step-by-step guide.
Ventilated vs Non-Ventilated Shed (Pros & Cons)
Let’s compare the impact of ventilation:
| Shed Type | Pros | Cons |
|---|---|---|
| Ventilated Shed | Dry interior, longer lifespan, better air quality | Slightly more planning required |
| Non-Ventilated Shed | Easier to build initially | Moisture buildup, mold risk, damage over time |
Clearly, proper ventilation is the best solution for maintaining your shed.
Real-Life Example: No Ventilation vs Proper Airflow
- Builder A (No Ventilation):
Builds sealed shed → moisture accumulates → tools rust → mold appears - Builder B (Proper Ventilation):
Installs vents → air circulates → interior stays dry → tools stay protected
The difference? Just a few simple additions during construction.
Expert Tips for Better Shed Ventilation
Professionals from Bob Vila recommend:
- Installing at least two vents for cross airflow
- Positioning vents high to release hot air
- Checking ventilation regularly after construction
👉 Looking for affordable DIY plans that include ventilation layouts?
Check out these affordable woodworking plans →
Quick Ventilation Checklist for Beginners
Before finishing your shed, make sure:
- Air vents are installed on opposite sides
- Openings allow airflow without letting water in
- Shed placement supports natural ventilation
- Interior feels dry and well-ventilated
Transition to Chapter 11
Now that your shed has proper airflow, the next step is controlling temperature. In Chapter 11, we’ll explore how skipping insulation can lead to extreme heat or cold—and how to make your shed more comfortable and functional.

Chapter 11: Skipping Insulation – A Costly Shed Building Mistake Beginners Overlook
When building a shed, many beginners focus on structure and appearance—but forget about insulation. This is one of the most common shed building mistakes beginners make, especially if they plan to use the shed beyond simple storage. Without insulation, your shed can become unbearably hot in summer and freezing in colder months.
Why Skipping Insulation Leads to Shed Building Mistakes
Insulation plays a key role in regulating temperature and protecting your shed’s interior. Without it, your shed is fully exposed to external weather conditions.
Here’s what can happen:
- Extreme heat buildup during the day
- Cold and damp conditions at night
- Condensation forming inside walls
- Damage to stored tools and materials
According to Energy.gov, proper insulation helps maintain stable indoor conditions and prevents moisture-related issues. This makes insulation a crucial factor in avoiding long-term shed building mistakes.
Common Insulation Mistakes Beginners Make
Even when beginners consider insulation, they often make these errors:
- Skipping insulation entirely to save money
- Using the wrong insulation type
- Not sealing gaps properly
- Ignoring moisture barriers
For example, installing insulation without sealing air gaps can reduce its effectiveness and allow moisture to seep in.
If you’re still learning, reviewing guides like
types of wood for every project
can help you understand how materials interact with temperature and moisture.
Types of Shed Insulation (Pros vs Cons)
Choosing the right insulation depends on your shed’s purpose. Here’s a simple comparison:
| Insulation Type | Pros | Cons |
|---|---|---|
| Fiberglass Batts | Affordable, easy to install | Requires proper sealing |
| Foam Boards | High insulation value, moisture-resistant | Higher cost |
| Spray Foam | Excellent coverage, seals gaps | Expensive, needs careful application |
For beginners, foam boards are often the best solution because they’re easier to handle and provide good protection against moisture.
When Do You Actually Need Insulation?
Not every shed requires insulation. It depends on how you plan to use it:
- Storage Shed:
Minimal insulation may be enough - Workshop or Office:
Insulation is highly recommended - Garden Shed:
Optional, depending on climate
If you plan to spend time inside your shed, insulation becomes essential—not optional.
👉 Want a recommended tool system that includes insulation planning?
See how you can build your own shed with this step-by-step guide.
DIY Insulation vs No Insulation (Pros & Cons)
Let’s compare the impact:
| Option | Pros | Cons |
|---|---|---|
| Insulated Shed | Comfortable, protects tools, reduces moisture | Slightly higher cost |
| Non-Insulated Shed | Lower upfront cost | Temperature extremes, potential damage |
For most beginners, adding insulation is a smart long-term investment.
Real-Life Example: Insulated vs Non-Insulated Shed
- Builder A (No Insulation):
Shed overheats → tools degrade → uncomfortable workspace - Builder B (With Insulation):
Stable temperature → tools protected → usable year-round
The difference is especially noticeable if you use your shed frequently.
Expert Tips for Proper Insulation
Professionals from This Old House recommend:
- Installing insulation after framing but before interior panels
- Using vapor barriers to prevent moisture buildup
- Sealing all gaps and joints carefully
- Combining insulation with proper ventilation
👉 Looking for affordable DIY plans with insulation guidance?
Check out these affordable woodworking plans →
Quick Insulation Checklist for Beginners
Before finishing your shed, make sure:
- Insulation type matches your needs
- All gaps and seams are sealed
- Moisture barrier is installed (if needed)
- Ventilation works alongside insulation
Transition to Chapter 12
Now that your shed is comfortable and protected from temperature extremes, the next step is using the right tools. In Chapter 12, we’ll explore how using the wrong tools can slow down your project—and lead to unnecessary mistakes.

Chapter 12: Using the Wrong Tools – A Frustrating Shed Building Mistake Beginners Must Avoid
Using the wrong tools might not seem like a big deal at first, but it’s one of the most common shed building mistakes beginners make. The right tools don’t just make your work easier—they ensure accuracy, safety, and better overall results. Without them, even simple tasks can become time-consuming and error-prone.
Why the Wrong Tools Lead to Shed Building Mistakes
Many beginners try to “make do” with whatever tools they have. While this might work for small projects, shed building requires precision and efficiency.
Here’s what can go wrong when using the wrong tools:
- Inaccurate cuts and measurements
- Loose or unstable joints
- Increased risk of injury
- Slower progress and frustration
According to Fine Woodworking, using proper tools is essential for both safety and quality in woodworking. This is why tool-related shed building mistakes can significantly affect your project outcome.
Common Tool Mistakes Beginners Make
Even with good intentions, beginners often fall into these traps:
- Using dull or worn-out tools
- Choosing the wrong type of saw or drill
- Skipping essential tools like levels or squares
- Improvising instead of using the correct equipment
For example, trying to cut thick wood with a basic handsaw can lead to uneven edges and wasted materials.
If you’re new to DIY, it’s helpful to explore guides like
setup woodworking shop layouts and essential tools
to understand what tools you truly need.
Essential Tools Every Beginner Shed Builder Needs
Avoiding shed building mistakes beginners often face starts with having the right tools on hand.
Here’s a simple list of must-haves:
- Measuring Tape – for accurate dimensions
- Circular Saw or Handsaw – for cutting wood
- Power Drill – for fast and secure assembly
- Spirit Level – to ensure alignment
- Hammer – for basic fastening
- Carpenter’s Square – for precise angles
Investing in these tools doesn’t have to break the bank—but it will greatly improve your results.
👉 Want a recommended tool system that includes everything you need?
See how you can build your own shed with this step-by-step guide.
Basic Tools vs Professional Tools (Pros & Cons)
Let’s compare your options:
| Tool Type | Pros | Cons |
|---|---|---|
| Basic Tools | Affordable, easy to use | Slower, less precise |
| Professional Tools | Faster, more accurate, durable | Higher upfront cost |
For beginners, starting with quality basic tools is usually the best solution. You can upgrade later as your skills improve.
Real-Life Example: Wrong Tools vs Right Tools
- Builder A (Wrong Tools):
Uses dull saw → uneven cuts → pieces don’t fit → wastes materials - Builder B (Right Tools):
Uses proper saw and drill → clean cuts → perfect fit → smooth assembly
The difference? Efficiency, accuracy, and confidence.
Expert Tips for Choosing the Right Tools
Professionals from Popular Mechanics recommend:
- Buying tools based on project needs—not impulse
- Keeping tools clean and well-maintained
- Investing in multi-purpose tools for versatility
- Prioritizing safety equipment (gloves, goggles)
👉 Looking for affordable DIY plans that include tool lists?
Check out these affordable woodworking plans →
Quick Tool Checklist for Beginners
Before starting your build, make sure:
- Tools are in good working condition
- You have all essential equipment ready
- Safety gear is available
- Tools match the tasks required
Transition to Chapter 13
Now that you’re equipped with the right tools, the next challenge is managing your time. In Chapter 13, we’ll explore how rushing your shed project can lead to avoidable mistakes—and how to stay patient for better results.
Chapter 13: Rushing the Project – A Costly Shed Building Mistake Beginners Should Avoid
It’s natural to feel excited when building your first shed—but rushing the process is one of the most common shed building mistakes beginners make. While it’s tempting to finish quickly, speeding through steps often leads to poor workmanship, safety risks, and costly repairs.
Why Rushing Leads to Shed Building Mistakes
Building a shed requires patience and attention to detail. When you rush, you’re more likely to skip important steps or overlook small errors that turn into bigger problems later.
Here’s what rushing can cause:
- Misaligned structures and uneven framing
- Weak joints and loose fasteners
- Increased material waste
- Higher risk of accidents
Experts from This Old House emphasize that taking your time ensures accuracy and long-term durability. This is why rushing is a major contributor to shed building mistakes.
Common Signs You’re Rushing Your Shed Project
Many beginners don’t realize they’re rushing until problems appear. Watch for these warning signs:
- Skipping measurements or double-checks
- Ignoring instructions or plans
- Working when tired or distracted
- Trying to finish everything in one day
For example, rushing to complete roofing before sunset might lead to poor sealing—resulting in leaks later.
If you’re still building confidence, it helps to start with smaller builds like
simple woodworking projects for beginners
before committing to a full shed.
How to Avoid Rushing and Build Smarter
Avoiding these shed building mistakes beginners often make is all about planning your time properly.
1. Set a Realistic Timeline
- Break the project into smaller tasks
- Allow extra time for unexpected delays
2. Focus on One Step at a Time
- Complete each stage fully before moving on
- Don’t multitask during critical steps
3. Take Breaks When Needed
- Avoid working when tired
- Stay focused and alert
4. Follow a Step-by-Step Plan
- Stick to proven instructions
- Avoid guessing or improvising
👉 Want a recommended tool system to keep your project on track?
See how you can build your own shed with this step-by-step guide.
Rushed Build vs Planned Build (Pros & Cons)
Let’s compare the outcomes:
| Approach | Pros | Cons |
|---|---|---|
| Rushed Build | Faster completion (initially) | More mistakes, repairs, safety risks |
| Planned Build | Higher quality, fewer errors | Takes more time |
While rushing may seem faster, a planned approach is clearly the best solution for long-term success.
Real-Life Example: Rushing vs Patience
- Builder A (Rushing):
Skips steps → makes measurement errors → rebuilds sections → project takes longer overall - Builder B (Patient Approach):
Follows steps carefully → avoids mistakes → completes project smoothly
Ironically, rushing often makes the project take longer—not shorter.
Expert Tips for Better Time Management
Professionals from Family Handyman recommend:
- Creating a checklist before starting
- Prioritizing quality over speed
- Scheduling work during daylight hours
- Reviewing each step before moving forward
👉 Looking for affordable DIY plans that keep your build organized?
Check out these affordable woodworking plans →
Quick Time Management Checklist
Before continuing your build, make sure:
- You have a clear step-by-step plan
- Tasks are broken into manageable steps
- You’re not rushing to meet unrealistic deadlines
- You’re working in a safe and focused environment
Transition to Chapter 14
Now that you understand the importance of patience, the next step is ensuring proper installation of key components. In Chapter 14, we’ll explore how poor door and window installation can affect both functionality and durability—and how to get it right the first time.
Chapter 14: Poor Door and Window Installation – A Functional Shed Building Mistake Beginners Must Avoid
Doors and windows might seem like finishing touches, but installing them incorrectly is one of the most frustrating shed building mistakes beginners make. Poor installation can affect not only the look of your shed but also its usability, security, and weather resistance.
Why Improper Installation Leads to Shed Building Mistakes
Doors and windows are moving parts—they need precise alignment to function properly. When installed incorrectly, they can cause ongoing issues that are difficult to fix later.
Here’s what can go wrong:
- Doors that won’t close or latch properly
- Gaps that allow water, wind, or pests inside
- Misaligned windows that reduce ventilation
- Increased wear and tear over time
Experts from Bob Vila emphasize that proper installation ensures both durability and energy efficiency. This is why door and window errors are common shed building mistakes that beginners regret.
Common Door and Window Mistakes Beginners Make
Many beginners underestimate the precision required for these installations. Watch out for these common issues:
- Incorrect frame measurements
- Not checking level and alignment
- Skipping proper sealing
- Using weak or incorrect hinges
For example, even a slightly uneven door frame can cause the door to stick or leave gaps, especially as the wood expands and contracts with weather changes.
If you’re still learning the basics, reviewing guides like
wood joints explained for beginners
can help you understand how to create strong and precise fittings.
Step-by-Step Guide to Proper Installation
Avoiding these shed building mistakes beginners often make is easier when you follow a clear process:
1. Measure Openings Accurately
- Double-check width and height
- Allow slight clearance for movement
2. Ensure Frames Are Level and Square
- Use a spirit level and carpenter’s square
- Adjust before securing permanently
3. Install Hinges and Fasteners Properly
- Use strong, rust-resistant hinges
- Secure tightly but avoid over-tightening
4. Seal All Edges
- Apply weatherproof sealant
- Prevent water and air leaks
👉 Want a recommended tool system that includes precise installation guidance?
See how you can build your own shed with this step-by-step guide.
DIY Installation vs Pre-Made Kits (Pros & Cons)
Choosing how to install doors and windows can impact your results:
| Option | Pros | Cons |
|---|---|---|
| DIY Installation | Custom fit, lower cost | Requires precision, higher error risk |
| Pre-Made Kits | Easier installation, better alignment | Less customization |
For beginners, pre-made kits are often the best solution because they reduce alignment issues and save time.
Real-Life Example: Poor Installation vs Proper Fit
- Builder A (Poor Installation):
Installs door unevenly → door sticks → gaps appear → water enters shed - Builder B (Proper Installation):
Measures carefully → aligns frame → seals edges → smooth operation
The difference? Attention to detail during installation.
Expert Tips for Better Results
Professionals from The Family Handyman recommend:
- Installing doors and windows after the structure is fully stable
- Testing movement before finalizing installation
- Using weather stripping for better sealing
- Rechecking alignment after installation
👉 Looking for affordable DIY plans with door and window layouts?
Check out these affordable woodworking plans →
Quick Installation Checklist for Beginners
Before finishing this step, make sure:
- Frames are square and level
- Doors open and close smoothly
- Windows are properly aligned
- All edges are sealed against weather
Transition to Chapter 15
Now that your shed is fully functional, the final step is making it visually appealing. In Chapter 15, we’ll explore how ignoring aesthetic design can impact your shed’s overall look—and how to create a structure that complements your backyard beautifully.

Chapter 15: Ignoring Aesthetic Design – A Subtle Shed Building Mistake Beginners Shouldn’t Overlook
After completing the structure, many beginners think the job is done—but ignoring design is one of the most underrated shed building mistakes beginners make. While your shed may be functional, poor aesthetics can make it look out of place and reduce the overall appeal of your backyard.
Why Aesthetic Design Matters in Shed Building Mistakes
A shed isn’t just a storage space—it’s part of your outdoor environment. A poorly designed shed can clash with your home and reduce your property’s visual value.
Here’s what happens when design is ignored:
- Shed looks mismatched with your home
- Reduces overall backyard appeal
- Missed opportunity for added functionality
- Lower perceived value of your property
Experts from Better Homes & Gardens emphasize that outdoor structures should complement existing design elements. This is why aesthetic-related shed building mistakes shouldn’t be overlooked.
Common Design Mistakes Beginners Make
Many beginners focus only on function and forget about appearance. Watch out for these common issues:
- Choosing mismatched colors
- Ignoring roof style consistency
- Using random materials without a theme
- Skipping finishing touches like paint or trim
For example, a shed with bright, clashing colors can stand out in a negative way instead of blending naturally with your backyard.
To get inspiration, you can explore creative ideas like
cheap shed ideas for small backyards
How to Design a Shed That Looks Great and Functions Well
Avoiding these shed building mistakes beginners often make is easier when you follow a few simple design principles:
1. Match Your Home’s Style
- Use similar colors and materials
- Keep the design consistent with your house
2. Choose a Complementary Roof Design
- Match roof pitch and style
- Maintain visual harmony
3. Add Functional Aesthetic Features
- Windows for natural light
- Shelves and hooks for organization
4. Apply Finishes and Paint
- Protect wood from weather
- Enhance visual appeal
👉 Want a recommended tool system with design ideas included?
See how you can build your own shed with this step-by-step guide.
Basic Design vs Styled Shed (Pros & Cons)
Let’s compare the impact of design choices:
| Design Type | Pros | Cons |
|---|---|---|
| Basic Shed | Quick build, lower cost | Less attractive, lower value |
| Styled Shed | Visually appealing, adds property value | Slightly more time and effort |
For most beginners, adding simple design elements is the best solution to improve both appearance and usability.
Real-Life Example: Plain vs Styled Shed
- Builder A (No Design Focus):
Builds plain shed → no paint or trim → looks unfinished → blends poorly - Builder B (Design-Focused):
Matches colors → adds trim and windows → visually appealing → enhances backyard
The difference? Just a bit of extra effort at the end.
Expert Tips for Better Shed Design
Professionals from HGTV recommend:
- Using neutral colors for timeless appeal
- Adding small decorative features like shutters
- Keeping design simple but consistent
- Planning aesthetics during the early stages
👉 Looking for affordable DIY plans with design inspiration?
Check out these affordable woodworking plans →
Quick Design Checklist for Beginners
Before finishing your shed, make sure:
- Colors match your home or backyard theme
- Roof style complements existing structures
- Paint or finish is applied properly
- Functional design elements are included
Final Transition – Moving Toward Completion
You’ve now covered the most common shed building mistakes beginners make—from planning and foundation to design and finishing touches. In the next section, we’ll wrap everything up with key takeaways and practical tips to help you build your shed with confidence and success.

Chapter 16: Not Following a Step-by-Step Guide – The Final Shed Building Mistake Beginners Make
After going through all the major pitfalls, there’s one mistake that ties them all together—not following a proper guide. This is one of the most preventable yet impactful shed building mistakes beginners make. Without clear instructions, even simple steps can become confusing, leading to errors that could have easily been avoided.
Why Skipping a Guide Leads to Shed Building Mistakes
Building a shed involves multiple stages—planning, measuring, framing, roofing, and finishing. Trying to manage all of these without a structured guide is like assembling furniture without instructions.
Here’s what can go wrong:
- Missing important steps in construction
- Incorrect order of tasks
- Increased risk of structural errors
- Wasted time and materials
Experts from Instructables highlight that step-by-step guides significantly improve success rates for beginners. This is why skipping guidance often leads to repeated shed building mistakes.
Common Mistakes When Not Using a Guide
Beginners who avoid structured plans often face these issues:
- Guessing measurements and layouts
- Skipping essential steps like sealing or leveling
- Using incorrect materials or tools
- Struggling with complex parts like roofing or framing
For example, building walls before confirming the foundation is level can create alignment problems that affect the entire structure.
If you want a reliable starting point, check out this detailed resource:
build a small shed step-by-step
Benefits of Following a Step-by-Step Shed Plan
Using a structured guide is the best solution to avoid most shed building mistakes beginners encounter.
Here’s why:
- Clear instructions reduce confusion
- Pre-calculated measurements improve accuracy
- Material lists prevent shortages
- Logical workflow ensures smooth progress
Instead of figuring things out as you go, a guide gives you a proven roadmap to follow.
DIY Without Guide vs Using a Plan (Pros & Cons)
Let’s compare the two approaches:
| Approach | Pros | Cons |
|---|---|---|
| No Guide (Trial & Error) | Full flexibility | High risk of mistakes, time-consuming |
| Step-by-Step Plan | Easy to follow, beginner-friendly, efficient | Less creative freedom |
For beginners, using a plan is almost always the smarter choice.
Real-Life Example: Guesswork vs Guided Build
- Builder A (No Guide):
Builds without instructions → makes multiple mistakes → restarts sections → delays project - Builder B (With Guide):
Follows structured plan → avoids errors → completes shed efficiently
The result? Builder B saves both time and money.
Expert Tips for Choosing the Right Guide
Professionals from Family Handyman recommend selecting guides that include:
- Step-by-step instructions with visuals
- Clear material and tool lists
- Beginner-friendly explanations
- Proven designs tested by experts
👉 Want a recommended tool system that simplifies everything?
See how you can build your own shed with this step-by-step guide.
Quick Checklist: Choosing the Right Shed Guide
Before starting your project, make sure your guide includes:
- Detailed step-by-step instructions
- Accurate measurements and diagrams
- Complete material list
- Tips for avoiding common mistakes
👉 Looking for affordable DIY plans with everything included?
Check out these affordable woodworking plans →
Final Transition – Wrapping It All Together
You’ve now explored all the major shed building mistakes beginners make—and how to avoid them. From planning and materials to tools and design, each step plays a crucial role in your success.
In the final section, we’ll bring everything together with key takeaways, frequently asked questions, and an important affiliate disclosure to help you move forward with confidence.
Chapter 17: Conclusion, FAQs & Affiliate Disclosure – Build Smarter and Avoid Shed Building Mistakes
Building your first shed doesn’t have to be overwhelming. As you’ve seen throughout this guide, most shed building mistakes beginners make are completely avoidable with the right knowledge, tools, and planning. From choosing the right location to ensuring proper ventilation and following a structured guide, every step plays a role in your success.
Key Takeaways to Avoid Shed Building Mistakes
Before you start your project, keep these essential lessons in mind:
- Plan everything in advance – never skip the design phase
- Choose the right materials and tools for durability
- Focus on accuracy – measurements and alignment matter
- Don’t rush the process – patience leads to better results
- Follow a step-by-step guide to reduce errors
By applying these principles, you’ll not only avoid common shed building mistakes but also enjoy a smoother and more rewarding DIY experience.
👉 Ready to get started with confidence?
See how you can build your own shed with this step-by-step guide.
Frequently Asked Questions (FAQs)
1. What is the most common shed building mistake beginners make?
The most common mistake is skipping proper planning. Without a clear plan, errors in measurements, materials, and structure are more likely.
2. Do I really need a foundation for a small shed?
Yes, even small sheds require a stable foundation. It prevents shifting, water damage, and structural issues over time.
3. What type of wood is best for building a shed?
Pressure-treated wood is ideal for outdoor use because it resists moisture, insects, and decay.
4. How long does it take to build a shed for beginners?
It depends on the size and complexity, but most beginner projects take anywhere from a few days to a couple of weeks.
5. Can I build a shed without professional experience?
Absolutely! With the right tools, materials, and a step-by-step guide, beginners can successfully build a durable shed.
6. Is it cheaper to build or buy a shed?
Building a shed is usually more cost-effective and allows customization, but it requires time and effort.
👉 Want affordable DIY plans to simplify your project?
Check out these affordable woodworking plans →
Affiliate Disclosure
This article may contain affiliate links. This means we may earn a small commission if you purchase through these links—at no additional cost to you. These commissions help support our content and allow us to continue providing helpful, beginner-friendly DIY guides.
We only recommend tools, plans, and resources that are practical, reliable, and suitable for beginners. Always do your own research to ensure the products meet your specific needs.
Final Thoughts
Avoiding shed building mistakes beginners commonly face is all about preparation, patience, and using the right resources. With the knowledge you’ve gained here, you’re now ready to build a shed that is not only functional but also durable and visually appealing.
Take your time, follow proven steps, and enjoy the process—your perfect shed is just a project away.