Beginner Woodworking Mistakes: 7 Costly Errors to Avoid
Beginner woodworking mistakes rarely begin at the saw. They usually start earlier—with a rushed sketch, an unchecked board, a confusing pencil line, or a glue-up that was never rehearsed. One small decision can turn into a part that does not fit, a second trip for lumber, or an assembly that has to be pulled apart and rebuilt.
That does not mean beginners should be afraid to make anything. Mistakes are part of learning, and many offcuts can still become test pieces, spacers, or small projects. The goal is to prevent the avoidable errors that consume good material and make a simple project feel harder than it is.
This guide explains seven common woodworking mistakes and the habits that correct them. You will learn how to plan a project before buying wood, inspect lumber, measure from consistent references, account for the cutting process, prepare for assembly, work more safely, and test a finish before it reaches the project. None of these habits requires an expensive shop. They require a deliberate pause at the right moment.
Mistake 1: Starting Without a Complete Project Plan
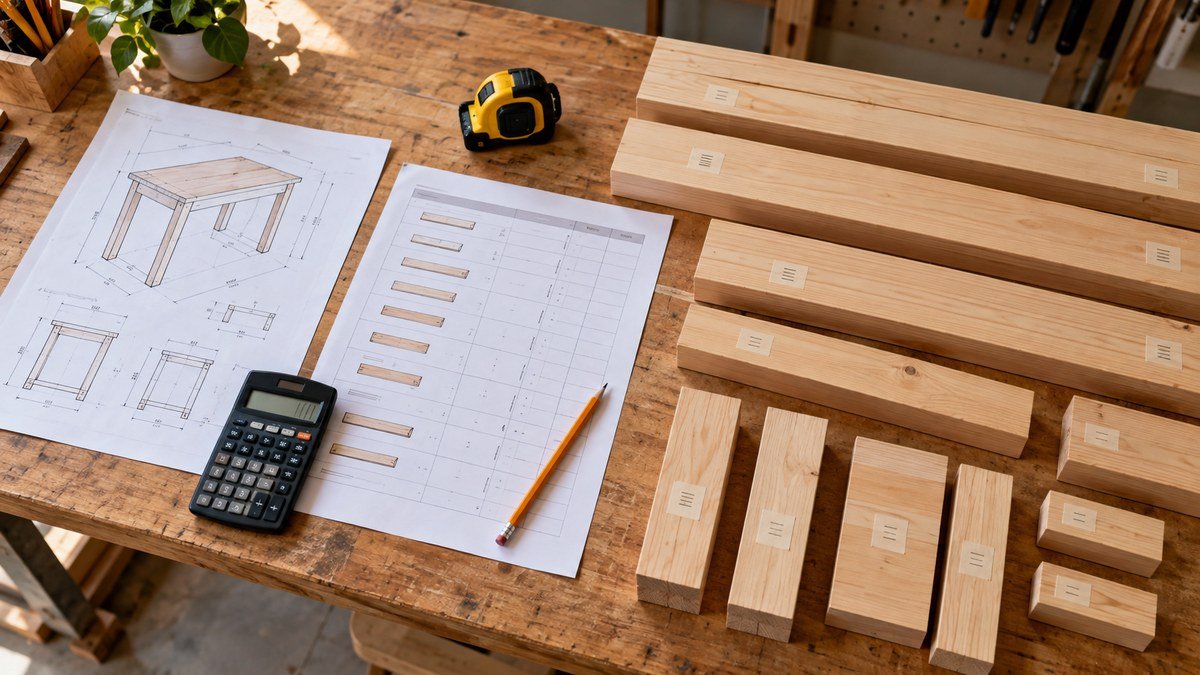
The first of these beginner woodworking mistakes is treating a picture or rough sketch as a complete plan. A photograph can communicate the look of a table, shelf, or planter, but it does not tell you every finished dimension, joint, fastener, or assembly step. When those decisions are left until cutting begins, one change can affect several other parts.
Start by defining the finished size of the project. Write down the overall length, width, and height, then identify the parts that create those dimensions. A basic side table, for example, may need a top, four legs, rails, and a lower shelf. Each piece should have a name, quantity, material, and finished size.
A practical woodworking project planning guide can help you connect the design, materials, tools, budget, and build sequence. For a simple pre-build reminder, the Free Weekend DIY Project Checklist can also help you confirm the basics before the first cut.
Confirm Finished Dimensions and Quantities
Check that the dimensions add up. If a shelf fits between two side panels, its length depends on the outside width and the thickness of both panels. If the design uses boards sold by nominal size, verify their actual dimensions before finalizing the drawing.
Create a cut list from the finished design rather than estimating as you work. Group identical pieces, but keep quantity visible. Missing the second matching rail is an easy way to consume a board that was meant for something else.
Plan the Build Sequence Before Buying Materials
Think through how the pieces will be machined and assembled. Some joinery must be cut before a panel is glued together. Some surfaces are easier to sand before assembly. A cabinet back may need to slide into grooves before the final side is attached.
Write a short sequence such as:
- Inspect and label lumber.
- Rough-cut oversized blanks.
- Flatten, straighten, and thickness the stock if needed.
- Cut parts to final width and length.
- Make joinery and drill holes.
- Dry-fit, sand, assemble, and finish.
The sequence does not need to be complicated. Its purpose is to expose missing decisions while changes are still inexpensive.
Mistake 2: Buying or Cutting Wood Without Inspecting It
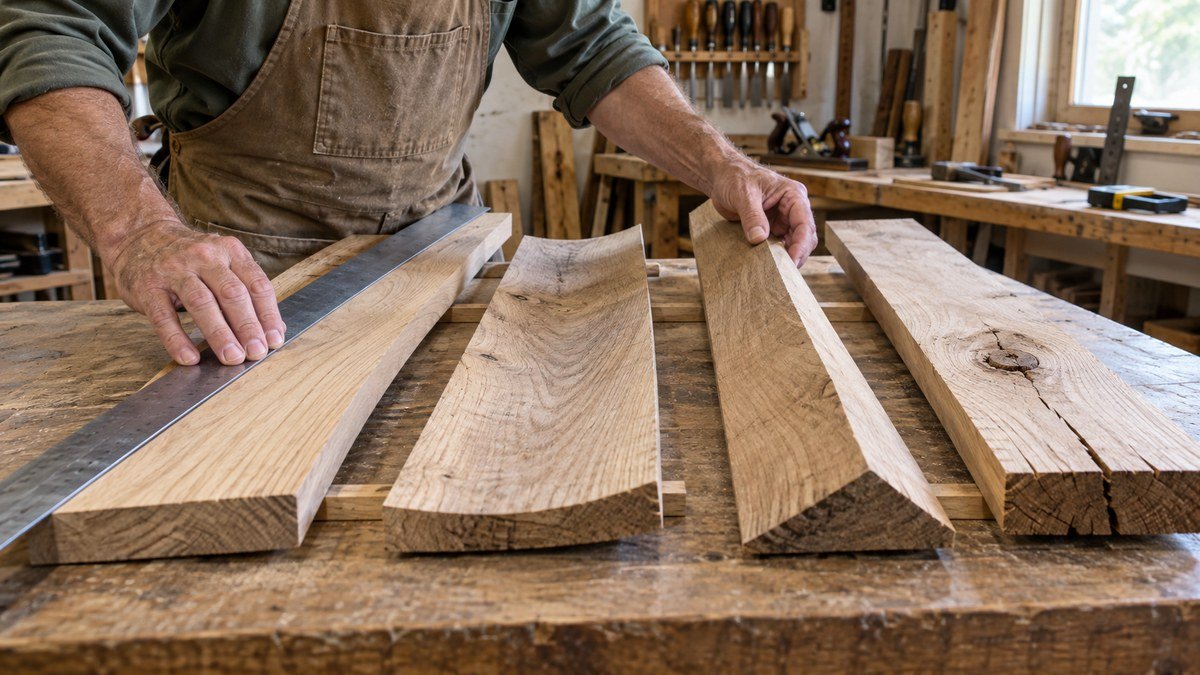
Many beginner woodworking mistakes come from assuming every board in the rack is straight, dry, and ready to use. Lumber can be bowed along its length, cupped across its width, twisted from corner to corner, or checked at the ends. Knots and grain changes may be attractive in one part and weak or distracting in another.
Sight down the length of a board from one end. Look across both faces and edges, and place it on a reasonably flat surface if the store allows. Minor movement may be manageable, but a severely twisted board can lose considerable thickness during milling. Sheet goods should be checked for damaged corners, swollen edges, surface defects, and a noticeable bow.
If the project will live indoors, allow solid wood time to adjust to the workshop environment before final milling when practical. Do not assume a newly purchased board will remain exactly as it looked in the store. Stack it with support so air can move around it and follow good storage practices for the material.
Check Boards for Defects and Movement
Mark defects before laying out parts. End checks often extend farther than they first appear, so avoid placing a critical joint immediately beside one. Loose knots, splits, bark inclusions, and deep dents may also require extra clearance.
Use the clearest, straightest sections for long or appearance-critical parts. Short parts can often fit between defects, which turns an imperfect board into useful material instead of waste. For broader material guidance, see this complete guide to types of wood.
Match Grain and Appearance to the Part
Before cutting, arrange visible parts together. Compare color and grain so paired doors, legs, or rails look intentional. Mark the show face and orientation with painter’s tape or light pencil marks.
Grain direction also affects machining. A board that looks perfect for a rail may tear out badly when planed in one direction. Read the surface, take light cuts, and change the feed direction only when the tool and manufacturer instructions allow it.
Mistake 3: Measuring Once and Trusting Every Mark
“Measure twice, cut once” is helpful, but it is incomplete. You can measure twice from the wrong edge and still produce the wrong part. More reliable work begins with a consistent reference face and reference edge.
Choose the face and edge that are flat, straight, and square to one another. Mark them clearly. Whenever possible, take related measurements from those same references instead of switching sides. This prevents small errors from accumulating across a panel or frame.
Use one tape measure for a series of related parts if practical. Different tapes and rulers can vary slightly, and hooks can become damaged. For joints and fitted parts, direct marking is often more reliable than transferring a number. Hold a shelf against the actual opening, for example, and mark where it must end.
Use One Reference Edge
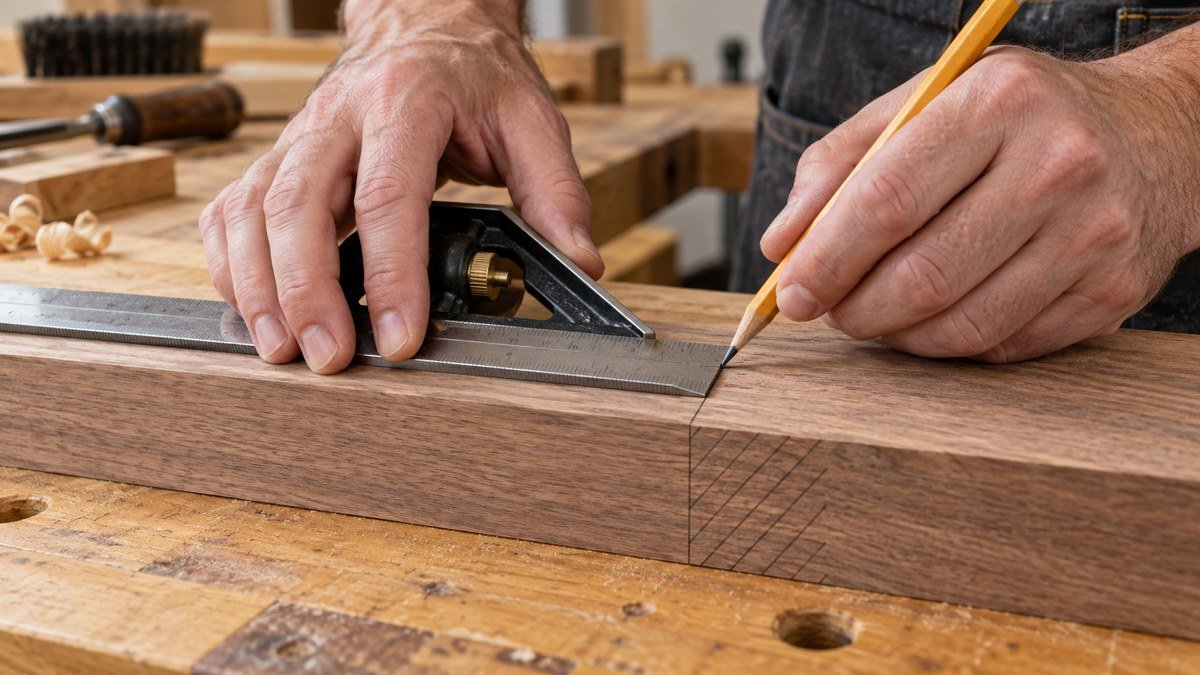
A square is useful only when it is actually square and seated firmly against the reference edge. Check the tool occasionally with a flip test: draw a line, turn the square over against the same straight edge, and compare a second line. A visible divergence suggests the tool or edge needs attention.
Affiliate note: This section contains affiliate links.
For beginners who need one compact layout tool, a multi-angle carpenter square from this article’s product research may help with 45-degree and 90-degree layout work. Treat its markings as a convenience, not a substitute for checking the tool against a known straight reference before using it on project stock.
Mark Waste Sides and Part IDs
Use a clear mark on the waste side of every cut line. Add a part code to each blank, especially when several pieces are close in size. A simple triangle across a set of boards can preserve their order and orientation.
Do not make dark, wide lines when precision matters. Use a sharp pencil or marking knife as appropriate, and decide whether the cut should remove the line, split it, or leave it. That decision should match the way the part was measured.
Mistake 4: Ignoring Kerf, Milling Allowance, and Test Cuts
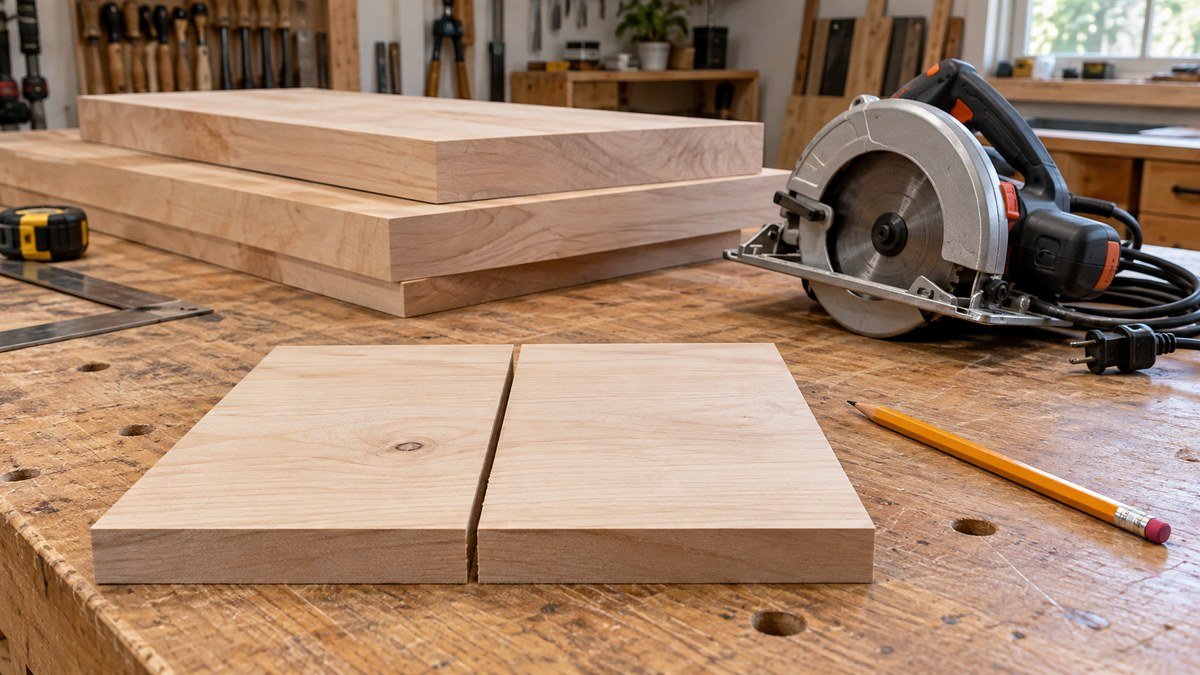
Among the most expensive beginner woodworking mistakes is assuming a cutting line has no width. A saw blade removes material, creating a kerf. If several parts are laid out end to end without allowing for that loss, the last part may come up short even though the arithmetic looked correct.
Keep the blade on the waste side of the line unless a particular setup calls for another method. When cutting several identical pieces, a properly positioned stop block can be more consistent than measuring each part separately. The stop must not trap the workpiece between itself and the blade; use a safe setup appropriate to the tool and follow its manufacturer instructions.
Allowance also matters before final sizing. Rough lumber may need extra length and width so defects can be trimmed and surfaces can be straightened. A rough blank and a finished part are not the same thing. Record both sizes when the distinction matters.
Separate Rough Cuts From Final Cuts
Rough-cutting makes long stock easier to manage, but cutting too close to finished dimensions can remove the material needed for squaring and trimming. Leave a modest, project-appropriate allowance rather than guessing that every rough edge will clean up immediately.
Mill related parts together when possible. Bring them to thickness in the same session, then cut matching pieces using the same setup. This improves consistency and reduces the temptation to chase individual numbers with repeated tool adjustments.
Test the Setup Before Cutting Project Stock
Use scrap of similar thickness to test a blade angle, drilling depth, router setup, or joint fit. Confirm that fences, guides, and stops are secure and that the offcut has a safe path. A test cut costs seconds and can protect a board that took time to select and prepare.
Before powering a tool, check guards, work support, blade or bit clearance, and the location of your hands. Wear relevant eye, hearing, and dust protection. If a test reveals burning, tear-out, vibration, or an unstable setup, stop and correct the cause before using project material.
Mistake 5: Rushing Assembly and Skipping Dry Fits
Glue changes the pace of a project. Parts become slippery, clamps compete for space, and an overlooked joint may refuse to close. Skipping a dry fit is one of the beginner woodworking mistakes that turns an easy assembly into a stressful rescue.
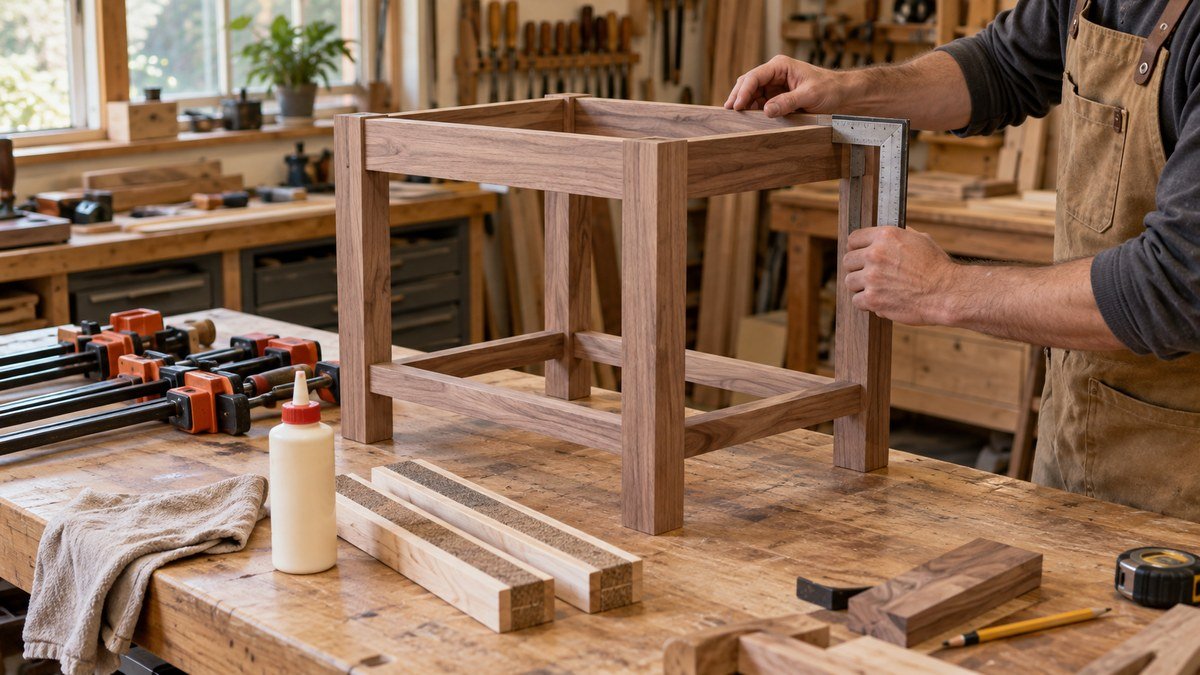
Assemble the project without glue first. Confirm that joints seat fully, parts face the right direction, diagonals agree when the assembly should be square, and every clamp can reach its intended position. Check that clamps do not cover a screw hole or block the next component.
A dry fit also reveals whether an assembly is too large to complete at once. A cabinet may be easier to build in stages. A frame-and-panel door may require a particular sequence so the panel remains free to move. If the sequence feels confusing while dry, it will not become clearer after glue is applied.
Dry-Fit Every Important Joint
Inspect the cause of a poor fit instead of forcing it. A tenon may be too thick, a mortise may contain debris, or the shoulders may not be square. Remove small amounts deliberately and test again. Hammering a joint together can split the workpiece or make disassembly impossible.
For an overview of common connection methods, this guide to wood joinery techniques helps explain where different joints are useful.
Prepare a Simple Glue-Up Plan
Lay out clamps, cauls, protective pads, glue, applicators, a timer, and cleanup materials before opening the bottle. Rehearse the order: apply glue, assemble, clamp lightly, check square, adjust, then bring the joints together without excessive pressure.
Use the adhesive specified for the materials and follow its label for open time, temperature, clamping, and cleanup. More glue and more clamp pressure do not automatically make a stronger joint. The aim is even contact without distorting the assembly.
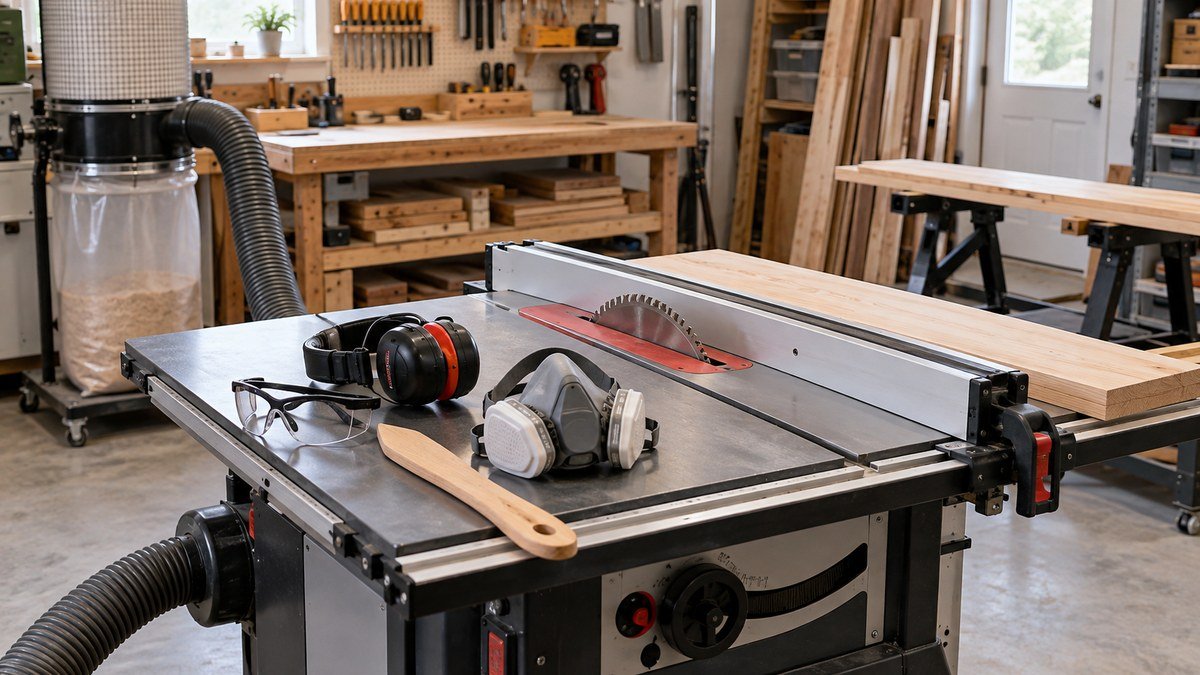
Mistake 6: Treating Safety and Dust Control as Optional
Safety is not a separate task added after woodworking; it shapes the setup from the beginning. Common woodworking mistakes include cutting unsupported stock, reaching near a moving blade, removing a guard without a justified procedure, or working in a cluttered area because the job seems quick.
Clear the floor and work surface before starting. Provide stable infeed and outfeed support for long boards. Make sure cords and hoses will not pull against the tool or create a trip hazard. Use push devices, fences, clamps, and guards as intended for the operation.
Wear eye protection for operations that can throw chips or fragments. Use hearing protection around loud tools and suitable respiratory protection for airborne dust. Dust collection helps, but it does not capture everything at the source. Ventilation and cleanup remain important.
Set Up the Work Area Before Powering a Tool
Know where the workpiece, offcut, and your hands will travel. Stand where a kickback path is less likely to strike you, without compromising balance or control. Wait for blades and bits to stop fully before reaching for scraps or making adjustments.
Inspect the material for nails, screws, staples, and loose knots before machining it. Reclaimed lumber deserves especially careful checking. Follow the tool manufacturer’s setup, guarding, accessory, and operating instructions rather than relying on a generic technique that may not suit your model.
Stop When the Cut or Setup Feels Unclear
Fatigue, distraction, and rushing reduce judgment. Stop when you cannot explain how the stock will be supported or how the cut will finish. Disconnect power before changing blades, bits, or making adjustments that place your hands near the cutting area.
Asking for help or choosing a hand-tool method is not a failure. A cut that cannot be controlled safely with the available workspace, tool, or experience should be redesigned or postponed.
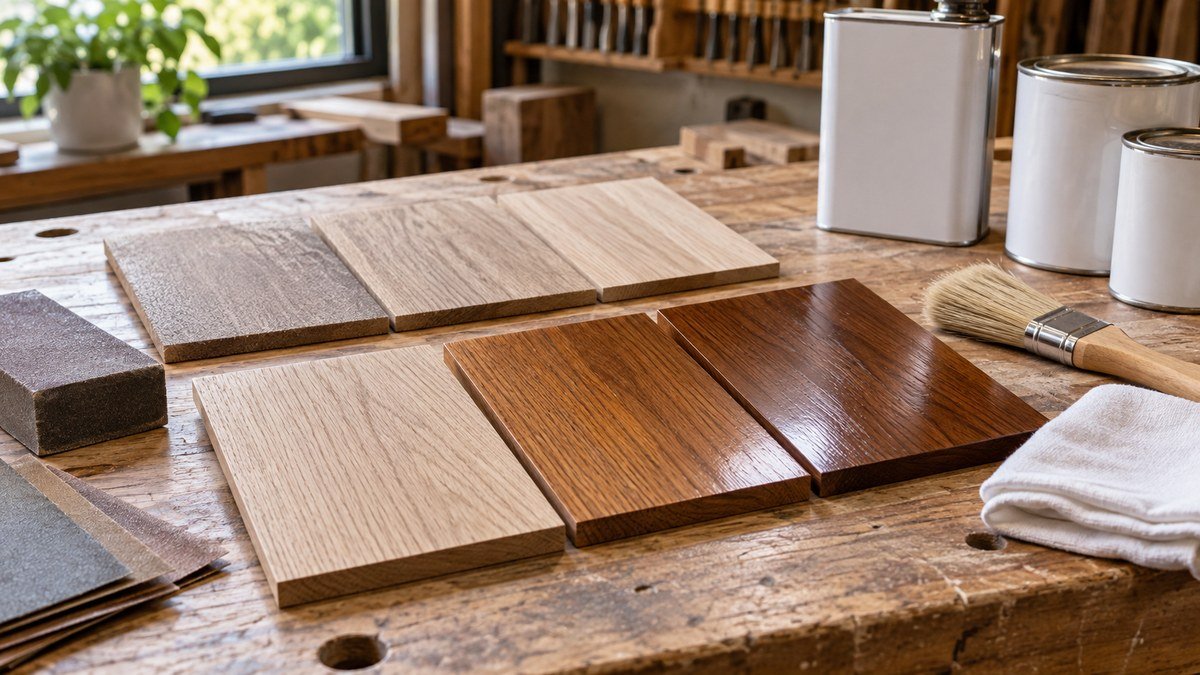
Mistake 7: Sanding and Finishing Without a Sample
The last stage can expose marks that seemed invisible during construction. Beginner woodworking mistakes at this point include skipping grits, sanding unevenly, leaving glue residue, applying finish over dust, or choosing a color based only on the label.
Begin with the least aggressive abrasive that will remove the current defects efficiently. Sand with a progression suited to the wood and finish, removing the scratches from the previous grit before moving on. Jumping too far can leave deep marks that become obvious after stain or clear finish.
Use raking light to inspect the surface. Pencil scribbles can help show whether an area has been sanded evenly, but remove every mark before finishing. Ease sharp edges consistently so they are comfortable and less prone to damage without erasing deliberate details.
Sand in a Deliberate Sequence
Sand accessible surfaces before final assembly when that improves control, but protect glue surfaces if the joint depends on direct wood contact. After assembly, remove dried squeeze-out carefully. Glue left on the surface can prevent stain from penetrating evenly.
Clean sanding dust using a method compatible with the finish. Dust trapped beneath a coating creates roughness and can force unnecessary rework. Provide ventilation and follow the finish manufacturer’s guidance for application tools, temperature, drying, recoating, and disposal of used materials.
Test the Full Finish Schedule on Scrap
A sample should use the same wood, preparation, stain, sealer, and topcoat planned for the project. Sand the sample to the same final grit. This reveals color, grain contrast, blotching, sheen, and compatibility before the finish reaches the real work.
Do not rush drying because the surface feels dry to the touch. Recoat and cure times vary by product and conditions. The best wood finish for beginners guide can help you compare approachable finish types before committing to a full schedule.

Frequently Asked Questions
What Is the Most Common Beginner Woodworking Mistake?
Starting before the project is fully planned is one of the most common beginner woodworking mistakes because it affects everything that follows. Missing dimensions, quantities, or joinery decisions lead to rushed choices at the saw and during assembly. A simple drawing, cut list, material list, and build sequence prevent many later problems. Planning does not need to be professional drafting; it only needs to answer what every part is, how large it will be, and how it connects.
How Can I Avoid Wasting Wood on My First Project?
Choose a small project, inspect each board, and assign parts before cutting. Place long or appearance-critical pieces first, then fit shorter parts around defects. Allow for kerf and any milling needed to straighten or flatten the stock. Test unfamiliar setups on scrap. Keep useful offcuts labeled by species and thickness, but do not save unsafe splinters or contaminated material simply to avoid throwing anything away.
Should Beginners Measure Twice Before Every Cut?
Critical cuts deserve verification, but the quality of the reference matters more than the number of times you read a tape. Measure from a consistent face or edge, mark the waste side, and check how the part relates to the actual assembly. For fitted components, direct marking can avoid errors caused by transferring dimensions. Before cutting, confirm the part name, orientation, quantity, and whether the blade belongs on the waste side of the line.
Do I Need Expensive Tools to Avoid Woodworking Mistakes?
No. Careful planning and reliable habits prevent more errors than an expensive tool collection. A sharp pencil, straightedge, dependable square, basic measuring tool, clamps, and a safe cutting method can support many beginner projects. Start with tools appropriate to the work you actually plan to build. This beginner woodworking tool list can help distinguish core needs from purchases that can wait.
What Should I Do if a Cut Is Slightly Too Short?
Do not immediately force the part into the assembly or hide a structural gap. Check the plan and measure the surrounding pieces to confirm which dimension is wrong. Depending on the design, you may be able to remake the part, adjust a noncritical neighboring dimension, add a deliberate spacer, or revise the layout. The repair should preserve strength, alignment, movement, and appearance. When those conditions cannot be met, remaking the piece is usually the cleanest choice.
How Can a Beginner Make Woodworking Safer?
Read the instructions for each tool, keep guards and safety features in place, support the work securely, and use relevant eye, hearing, and respiratory protection. Keep hands away from cutting paths and use appropriate push devices or clamps. Disconnect power before changing cutters or working near moving parts. Most importantly, pause when a setup feels unstable or confusing. A safer alternative, a redesigned cut, or experienced help is preferable to improvising under pressure.

Conclusion
Avoiding beginner woodworking mistakes is less about achieving perfection and more about building a repeatable process. Plan the finished project, inspect and assign the lumber, measure from consistent references, allow for the material removed during cutting, and test unfamiliar setups before touching the final parts.
Then slow down again at assembly and finishing. A dry fit protects the glue-up, a prepared workspace supports safer tool use, and a finish sample reveals problems while they are still easy to correct. These habits save time because they reduce rework, and they save material because every cut has a clear purpose.
Choose one manageable project and apply the seven habits from the start. Keep notes about what worked and what you would change. The goal of the next build is not to make no mistakes at all; it is to recognize problems earlier and make better decisions before they become expensive.
Affiliate Disclosure: This post contains affiliate links. If you purchase through these links, DIY Wood Haven may earn a commission at no additional cost to you.




Ready to Build Smarter?