Build a Small Shed Step by Step: Easy Beginner Guide
Have you ever wished for extra storage space but didn’t want to spend a fortune? If so, learning how to build a small shed might be the perfect solution. Whether you need a place for tools, garden supplies, or seasonal items, taking the DIY route can save money and give you full control over the design.
Building your own shed isn’t just about cutting costs—it’s also a rewarding project that boosts your skills and adds value to your home. With the right approach, even beginners can successfully build a small shed using simple tools and easy-to-follow steps. Plus, with plenty of DIY shed guide resources and small backyard shed plans available, getting started has never been easier.
In this guide, you’ll discover practical tips, essential materials, and a clear process to help you build a small shed from scratch. Let’s dive into the step-by-step journey and turn your idea into a functional outdoor space.
Chapter 2: Planning Your Shed Project Step by Step
How to Plan to Build a Small Shed Step by Step Successfully
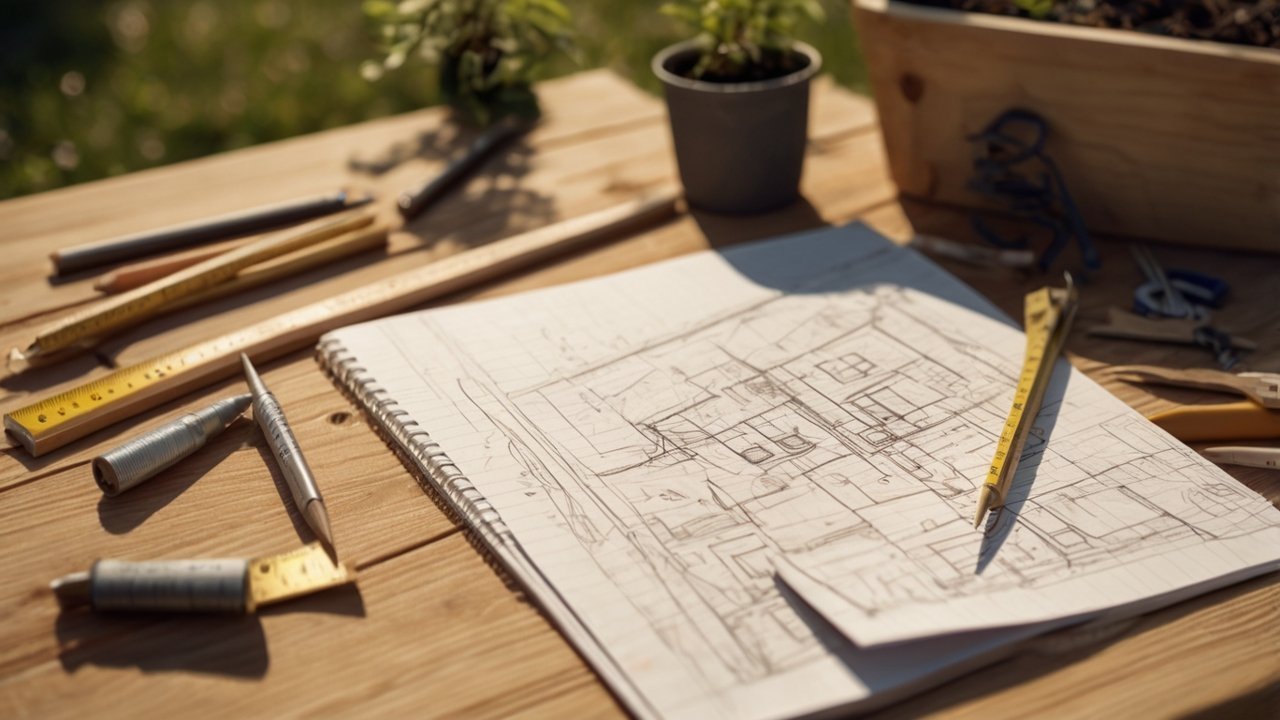
Before you pick up a hammer, proper planning is what makes or breaks your project. If you want to build a small shed step by step without costly mistakes, this stage deserves your full attention. Many beginners rush into construction, only to realize later that the shed is too small, poorly placed, or not compliant with local rules.
A well-thought-out plan helps you:
-
Avoid wasting materials
-
Stay within budget
-
Ensure long-term durability
-
Simplify the entire building process
According to Fine Woodworking Magazine, careful pre-planning can reduce project errors by up to 40%. That’s a huge advantage, especially for first-time builders.
If you’re new to DIY, reviewing guides like beginner woodworking projects can help you understand basic construction principles before starting your shed.
Choosing the Right Shed Size for Your Needs
One of the most common mistakes beginners make is choosing the wrong shed size. When planning to build a small shed, think about both your current and future storage needs.
Ask yourself:
-
What items will you store? (tools, bikes, gardening equipment)
-
Will you need workspace inside?
-
Do you plan to expand storage later?
A typical beginner shed ranges from 6×8 ft to 10×12 ft, which balances space and affordability. Smaller sheds are easier to build and require fewer materials, making them ideal for hobbyists.
👉 If you want a structured layout, See how you can build your own shed with this step-by-step guide using affordable DIY plans designed for beginners.
Also, selecting the right wood matters. You can explore this detailed guide on types of wood for every project to choose durable and budget-friendly materials.
Selecting the Best Location for Your Shed
Location plays a huge role in how functional and long-lasting your shed will be. When planning to build a small shed, avoid placing it randomly in your yard.
Here are key factors to consider:
-
Ground Level: Choose a flat, well-drained area
-
Accessibility: Ensure easy access from your home
-
Sunlight & Weather: Avoid areas prone to flooding or strong winds
-
Aesthetics: Position it where it complements your backyard
The National Association of Home Builders (NAHB) recommends placing sheds on slightly elevated ground to prevent water damage. This simple step can extend your shed’s lifespan significantly.
Checking Local Building Codes and Permits
Before you begin construction, always check local regulations. Many homeowners skip this step, only to face fines or removal orders later.
Depending on your location, you may need:
-
A building permit
-
Size restrictions compliance
-
Property boundary clearance
In general, sheds under a certain size (often 100–120 sq ft) may not require permits—but this varies by region. It’s always safer to confirm with your local authority.
For more structured planning ideas and layouts, you can explore resources at , which include curated DIY building references and project planning tools.
DIY Planning vs Pre-Designed Plans: Pros and Cons
Choosing between designing your own shed or using pre-made plans is another key decision.
| Feature | DIY Planning | Pre-Designed Plans |
|---|---|---|
| Flexibility | Fully customizable | Limited customization |
| Ease of Use | Requires experience | Beginner-friendly |
| Time Efficiency | Slower | Faster setup |
| Error Risk | Higher | Lower |
For beginners, pre-designed plans are often the recommended solution because they reduce guesswork and improve accuracy.
👉 To simplify your project, you can Click here to explore this recommended DIY solution that provides ready-to-use layouts and expert guidance.
Smart Planning Tips for Beginners
To wrap up your planning phase, here are a few practical tips:
-
Start small and scale later
-
Sketch your layout before building
-
Double-check measurements
-
Invest in quality materials where it matters
-
Plan for ventilation and lighting
Planning may not be the most exciting part, but it’s the foundation of a successful project. Once you’ve mapped everything out clearly, the actual building process becomes much smoother and more enjoyable.
Now that your plan is ready, the next step is gathering the right tools and materials to bring your shed to life.


Chapter 6: Building the Shed Floor to Build a Small Shed Step by Step
How to Build a Small Shed Floor Step by Step (Beginner Guide)
Once your foundation is ready, the next critical step is constructing a solid floor. When you build a small shed, the floor acts as the base that supports everything above it—walls, roof, and stored items.
A well-built floor ensures:
-
Structural stability
-
Even weight distribution
-
Protection from moisture and ground contact
-
Long-term durability
According to The Family Handyman, improper floor framing is one of the top reasons sheds become unstable over time. That’s why getting this step right is essential.
If you’re new to framing basics, reviewing wood joinery techniques for DIY projects can help you understand how different joints improve strength.
Installing Floor Joists for a Strong Base
Floor joists are the backbone of your shed floor. When you build a small shed, these horizontal beams support the weight of the entire structure.
Steps to Install Floor Joists:
-
Measure and cut pressure-treated lumber to fit your shed size
-
Lay out joists evenly (typically 12–16 inches apart)
-
Secure joists to the frame using galvanized screws or nails
-
Check alignment and spacing carefully
Spacing is important. Too wide, and your floor may sag. Too tight, and you’ll use unnecessary materials.
Experts from Fine Woodworking Magazine recommend using pressure-treated wood for joists, especially for outdoor builds, to resist moisture and decay.
👉 To simplify your layout and spacing, Check out these affordable woodworking plans that include precise measurements and framing guides.
Securing the Plywood Base Properly
After installing the joists, the next step is attaching the floor surface. This is where your shed starts to feel like a real structure.
When you build a small shed, the most common materials for flooring are:
-
Plywood (recommended) – strong and smooth
-
OSB boards – more affordable but slightly less durable
Installation Steps:
-
Place plywood sheets across the joists
-
Align edges carefully to avoid gaps
-
Secure using screws every 6–8 inches
-
Stagger joints for added strength
Using screws instead of nails is often considered the best solution, as screws provide stronger and longer-lasting connections.
For more finishing insights, you can explore top wood finishing techniques to protect your flooring from wear and moisture.
👉 Want a complete materials checklist and layout? See how you can build your own shed with this step-by-step guide designed for beginners.
Ensuring Stability and Leveling the Shed Floor
Even a small mistake in leveling can cause big problems later. When you build a small shed, an uneven floor can lead to crooked walls and roofing issues.
How to Check Stability:
-
Use a spirit level across multiple points
-
Adjust joists if needed before securing fully
-
Ensure all corners are square (90 degrees)
-
Reinforce weak areas with additional supports
The National Association of Home Builders (NAHB) emphasizes that proper leveling at this stage prevents structural misalignment in later steps.
DIY Floor vs Pre-Built Floor Kits: Pros and Cons
You may also consider whether to build your floor from scratch or use a pre-made kit.
| Feature | DIY Floor Construction | Pre-Built Floor Kits |
|---|---|---|
| Cost | Lower | Higher |
| Customization | Fully customizable | Limited |
| Ease of Use | Moderate | Beginner-friendly |
| Time Required | Longer | Faster |
For beginners, DIY floors are a great learning experience, while kits offer convenience. Choosing between them depends on your comfort level and time availability.
👉 If you want a guided approach, Click here to explore this recommended DIY solution that simplifies floor construction with ready-to-follow plans.
Common Mistakes to Avoid When Building a Shed Floor
Avoid these common beginner errors when you build a small shed:
-
Using untreated wood (leads to rot)
-
Incorrect joist spacing
-
Not securing plywood properly
-
Skipping leveling checks
-
Ignoring moisture protection
DIY communities like Reddit DIY frequently highlight that poor floor framing leads to long-term structural issues—so it’s worth taking your time here.
Pro Tips for a Durable Shed Floor
To make your shed floor last longer:
-
Use pressure-treated lumber for all base components
-
Apply a sealant or protective coating
-
Elevate the floor slightly above ground level
-
Double-check all measurements before securing
For more curated DIY insights and project resources, explore , which includes helpful woodworking guides and beginner-friendly tutorials.
Final Thoughts on Building Your Shed Floor
Building the floor is a major milestone. Once completed, your project starts to take shape, and the remaining steps become much easier.
Next up, you’ll move on to framing and constructing the shed walls—where your structure truly begins to stand tall.
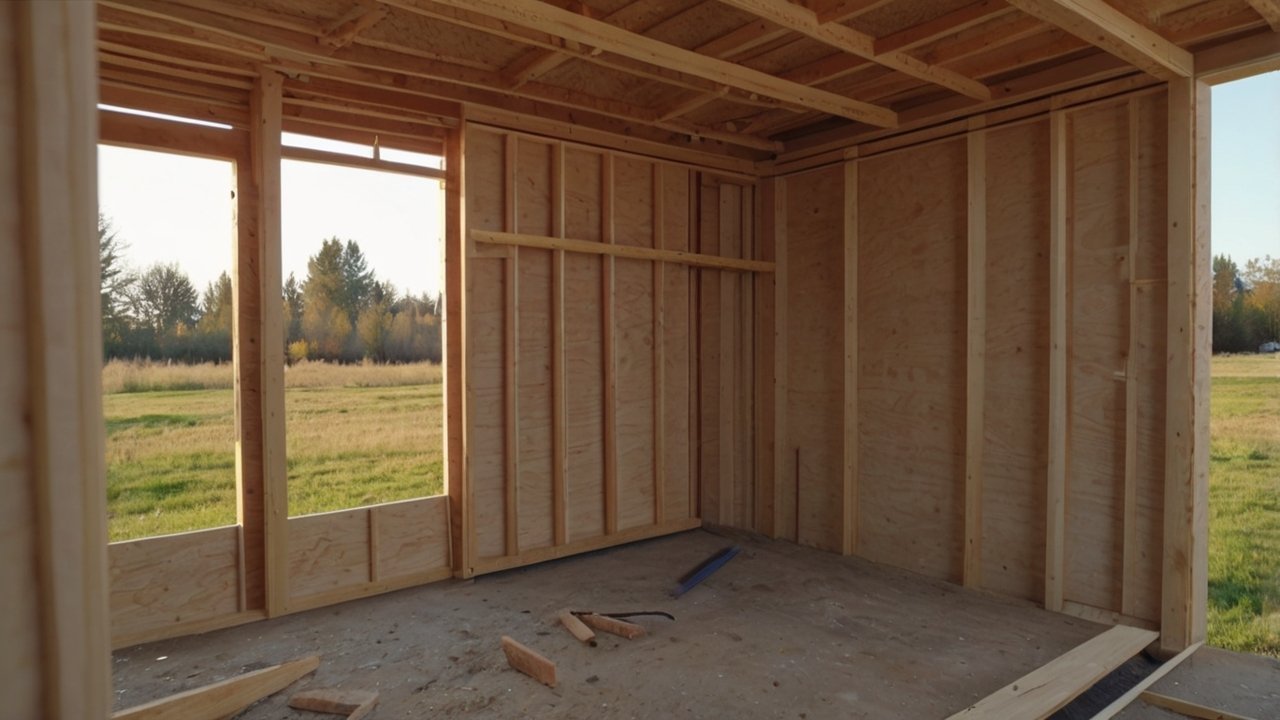
Chapter 7: Constructing the Shed Walls to Build a Small Shed Step by Step
How to Build a Small Shed Walls Step by Step (Framing Basics)
Now that your floor is complete, it’s time to bring your structure to life by building the walls. When you build a small shed, wall framing is where your project starts to truly take shape.
Wall framing provides:
-
Structural support for the roof
-
Space for doors and windows
-
Stability against wind and weather
According to Fine Woodworking Magazine, accurate wall framing is essential for maintaining the overall integrity of small outdoor structures. Even minor misalignments at this stage can affect the roof and door installation later.
If you’re new to framing concepts, reviewing wood joints explained for beginners can help you understand how different joints strengthen your structure.
Framing the Walls Properly for Strength and Stability
When you build a small shed, each wall is typically constructed flat on the floor and then raised into position. This method is beginner-friendly and ensures better accuracy.
Basic Wall Framing Components:
-
Top plate – horizontal beam at the top
-
Bottom plate – base of the wall frame
-
Wall studs – vertical supports (usually spaced 16 inches apart)
Step-by-Step Wall Framing:
-
Measure and cut your top and bottom plates
-
Mark stud positions evenly (12–16 inches apart)
-
Attach studs using nails or screws
-
Assemble the frame flat on the floor
-
Double-check measurements and squareness
Using consistent spacing is key. It ensures your walls are strong and can support the roof evenly.
👉 To simplify measurements and framing layouts, Check out these affordable woodworking plans that include detailed wall construction guides.
Installing Wall Panels and Sheathing
Once your frame is ready, the next step is adding wall panels. When you build a small shed, this step strengthens the structure and prepares it for exterior finishing.
Common materials include:
-
Plywood (recommended) – strong and durable
-
OSB boards – budget-friendly alternative
Installation Tips:
-
Align panels with the edges of the frame
-
Secure using screws every 6–8 inches
-
Leave small gaps for expansion (especially in humid climates)
-
Stagger panel joints for added strength
Using screws instead of nails is often the best solution, as they hold panels more securely over time.
For additional finishing ideas, you can explore best paint for wood furniture to protect your shed exterior later on.
👉 Want a full wall layout and material list? See how you can build your own shed with this step-by-step guide designed specifically for beginners.
Adding Openings for Doors and Windows
Planning openings correctly is crucial when you build a small shed. Poor placement can lead to structural weaknesses or difficulty during installation.
Key Tips for Openings:
-
Frame door openings using header beams for support
-
Leave extra clearance for door installation
-
Reinforce window areas with additional studs
-
Ensure all openings are level and square
The National Association of Home Builders (NAHB) recommends reinforcing door frames to handle repeated use and weight stress over time.
DIY Wall Framing vs Pre-Built Panels: Pros and Cons
You may wonder whether to build walls yourself or use pre-made panels. Here’s a quick comparison:
| Feature | DIY Wall Framing | Pre-Built Panels |
|---|---|---|
| Cost | Lower | Higher |
| Customization | Full flexibility | Limited |
| Ease of Use | Moderate | Beginner-friendly |
| Time Required | Longer | Faster |
For beginners, pre-built panels can be a recommended tool to speed up the process. However, DIY framing offers better customization and learning experience.
👉 If you want an easier approach, Click here to explore this recommended DIY solution that includes pre-designed wall layouts and instructions.
Common Mistakes to Avoid When Building Shed Walls
Avoid these common errors when you build a small shed:
-
Incorrect stud spacing
-
Not checking for square alignment
-
Weak door or window framing
-
Using low-quality materials
-
Skipping measurement checks
DIY communities like Instructables often highlight that improper wall alignment can cause major issues during roof installation—so precision is key.
Pro Tips for Strong and Durable Shed Walls
To ensure your walls last for years:
-
Use pressure-treated wood for bottom plates
-
Double-check all measurements before assembly
-
Reinforce corners for added strength
-
Work on a flat surface for accurate framing
For more curated woodworking insights and beginner-friendly guides, explore , which includes valuable DIY resources and project tutorials.
Final Thoughts on Shed Wall Construction
Building the walls is one of the most exciting stages. Once they’re up, your shed starts to feel like a real structure.
Next, you’ll move on to constructing the roof—bringing your shed one step closer to completion.

Chapter 9: Installing Roofing Material to Build a Small Shed Step by Step
How to Install Roofing When You Build a Small Shed Step by Step
Once your roof structure is complete, the next step is protecting your shed from the elements. When you build a small shed, installing the right roofing material ensures durability, weather resistance, and long-term performance.
A properly installed roof helps:
-
Prevent water leaks and moisture damage
-
Protect stored items inside the shed
-
Extend the lifespan of your structure
-
Improve overall appearance
According to The Family Handyman, poor roofing installation is one of the leading causes of early shed deterioration. That’s why this step deserves careful attention.
If you’re still exploring outdoor build ideas, you can check out outdoor woodworking projects for additional inspiration.
Choosing the Right Roofing Material for Your Shed
When planning to build a small shed, selecting the right roofing material depends on your budget, climate, and design preference.
Here are the most common options:
1. Asphalt Shingles (Most Popular)
-
Affordable and widely available
-
Easy for beginners to install
-
Good weather resistance
2. Metal Roofing (Most Durable)
-
Long lifespan (20–40 years)
-
Excellent water resistance
-
Slightly higher cost
3. Roll Roofing (Budget Option)
-
Quick and easy to install
-
Best for small or temporary sheds
-
Less durable over time
| Roofing Type | Cost | Durability | Difficulty | Best For |
|---|---|---|---|---|
| Asphalt Shingles | Medium | High | Moderate | Most DIY projects |
| Metal Roofing | High | Very High | Moderate | Long-term use |
| Roll Roofing | Low | Medium | Easy | Budget builds |
For beginners, asphalt shingles are often the best solution because they balance cost, durability, and ease of installation.
👉 If you want a complete material guide, Check out these affordable woodworking plans that include roofing recommendations and exact quantities.
Step-by-Step Roofing Installation Guide
To successfully build a small shed, follow these simple roofing steps:
Step 1: Install Roof Underlayment
Lay a waterproof underlayment (felt paper) over the roof sheathing. This adds an extra layer of protection against moisture.
Step 2: Start from the Bottom Edge
Begin installing shingles or panels from the bottom edge of the roof, working your way upward. This ensures proper water runoff.
Step 3: Overlap Each Layer
Each row should overlap the previous one to prevent leaks.
Step 4: Secure Properly
Use roofing nails or screws designed for your material. Avoid over-tightening, which can damage materials.
Step 5: Install Ridge Cap
Finish the top of the roof with ridge caps to seal the highest point.
Experts from Fine Woodworking Magazine recommend taking your time during this step to ensure proper alignment and sealing.
👉 For a guided installation process, See how you can build your own shed with this step-by-step guide that simplifies roofing for beginners.
Weatherproofing Your Shed Roof for Long-Term Protection
When you build a small shed, weatherproofing is just as important as installation. Without it, even the best materials can fail over time.
Key Weatherproofing Tips:
-
Apply roof sealant to edges and joints
-
Ensure proper overhang to direct rainwater away
-
Install drip edges to prevent water seepage
-
Check for gaps or loose materials
The National Association of Home Builders (NAHB) emphasizes that proper sealing can significantly extend the life of roofing materials.
DIY Roofing vs Pre-Cut Roofing Kits: Pros and Cons
You can either install roofing materials yourself or use pre-cut kits. Here’s a comparison:
| Feature | DIY Roofing | Pre-Cut Kits |
|---|---|---|
| Cost | Lower | Higher |
| Flexibility | High | Limited |
| Ease of Use | Moderate | Beginner-friendly |
| Time Required | Longer | Faster |
For beginners, roofing kits can be a recommended tool for simplifying installation. However, DIY installation offers better customization and cost savings.
👉 If you want an easier approach, Click here to explore this recommended DIY solution with ready-to-use roofing instructions.
Common Roofing Mistakes to Avoid
Avoid these common issues when you build a small shed:
-
Skipping underlayment
-
Incorrect overlapping of shingles
-
Using the wrong fasteners
-
Ignoring weatherproofing
-
Rushing installation
DIY forums like Instructables often highlight that improper overlap is one of the biggest causes of leaks.
Pro Tips for a Durable Shed Roof
To make your roof last longer:
-
Choose materials suited to your climate
-
Double-check alignment during installation
-
Inspect your roof regularly for damage
-
Reinforce edges and corners
For more curated DIY insights and expert resources, explore , which includes valuable woodworking and construction guides.
Final Thoughts on Roofing Installation
Installing the roof is a major milestone. Once completed, your shed is protected from the elements and closer to being fully functional.
Next, you’ll move on to installing doors and windows—adding both accessibility and ventilation to your shed.


Chapter 16: FAQs About How to Build a Small Shed Step by Step
How Long Does It Take to Build a Small Shed Step by Step?
The time required to build a small shed depends on your experience level, shed size, and available tools. For most beginners, a simple shed can take 2 to 5 days to complete.
Here’s a rough timeline:
-
Day 1: Planning and foundation
-
Day 2: Floor and wall framing
-
Day 3: Roof structure and installation
-
Day 4–5: Finishing, doors, and interior setup
According to The Family Handyman, beginners should always allow extra time to avoid rushing and making costly mistakes.
👉 To speed up your project, Check out these affordable woodworking plans with step-by-step instructions.
What Is the Cheapest Way to Build a Small Shed?
The most affordable way to build a small shed is to keep the design simple and use cost-effective materials.
Budget-Friendly Tips:
-
Use reclaimed or recycled wood
-
Choose a lean-to design (requires fewer materials)
-
Use OSB boards instead of plywood
-
Buy materials during discounts or bulk sales
DIY communities like Instructables suggest that smart material choices can reduce costs by up to 30–40%.
👉 For a low-cost solution, Click here to explore this recommended DIY solution with optimized material lists.
Do I Need a Permit to Build a Small Shed?
In many areas, you may not need a permit if your shed is below a certain size—typically 100–120 square feet. However, rules vary depending on your location.
Check for:
-
Local zoning laws
-
Property boundary restrictions
-
Height limitations
The National Association of Home Builders (NAHB) recommends always confirming with local authorities before starting construction.
Can a Beginner Build a Small Shed Alone?
Yes, a beginner can absolutely build a small shed alone—especially with proper planning and guidance.
What Makes It Easier:
-
Using simple designs
-
Following step-by-step plans
-
Working at a steady pace
-
Using beginner-friendly tools
Many first-time DIYers successfully complete shed projects with no prior experience.
👉 If you’re just starting out, See how you can build your own shed with this step-by-step guide designed specifically for beginners.
What Type of Wood Is Best for a Shed?
Choosing the right wood is essential when you build a small shed.
Recommended Options:
-
Pressure-treated pine – best for foundation and framing
-
Cedar – naturally resistant to moisture and insects
-
Plywood – ideal for walls and roofing
For more details, you can explore this guide on types of wood for every project.
How Do I Make My Shed Waterproof?
Waterproofing is crucial when you build a small shed, especially in humid or rainy areas.
Key Steps:
-
Apply weather-resistant paint or sealant
-
Install proper roofing materials
-
Seal all joints and edges
-
Ensure proper drainage around the base
The U.S. Department of Energy also recommends proper sealing to improve durability and energy efficiency.
👉 For complete waterproofing guidance, Check out these affordable woodworking plans with built-in protection strategies.
Is It Better to Build or Buy a Shed?
This depends on your budget, time, and preferences.
| Option | Pros | Cons |
|---|---|---|
| DIY Shed | Lower cost, customizable | Requires time and effort |
| Pre-Built Shed | Quick setup, no skills needed | Higher cost, less flexible |
For most homeowners, DIY is the best solution because it offers better value and customization.
Final Thoughts on Shed Building FAQs
These frequently asked questions cover the most common concerns beginners face when planning to build a small shed. With the right preparation, tools, and guidance, this project is both achievable and rewarding.
For more curated DIY resources, tips, and project guides, explore , where you’ll find helpful woodworking insights and beginner-friendly tutorials.

Conclusion: Successfully Build a Small Shed Step by Step
Recap of Key Steps to Build a Small Shed Step by Step
By now, you’ve learned everything you need to confidently build a small shed step by step—from planning and foundation to roofing, finishing, and maintenance. Each stage plays an important role in ensuring your shed is strong, functional, and long-lasting.
Let’s quickly recap the key steps:
-
Plan your shed size, layout, and location carefully
-
Prepare a solid and level foundation
-
Build a strong floor and wall structure
-
Install a durable roof and proper weatherproofing
-
Add doors, windows, and finishing touches
-
Organize the interior for maximum efficiency
-
Maintain your shed regularly to extend its lifespan
Following these steps ensures your project stays on track and delivers great results.
Encouragement for Beginners and DIY Enthusiasts
If this is your first time taking on a project like this, don’t worry—many beginners successfully build a small shed with no prior experience. The key is to stay patient, follow clear instructions, and learn as you go.
DIY projects like this are not just about saving money—they’re about building skills, confidence, and something you can truly be proud of. Even if you make small mistakes along the way, they’re part of the learning process.
👉 To make your journey easier, Check out these affordable woodworking plans that guide you through every step with beginner-friendly instructions.
Final Pro Tips for a Successful Shed Project
Before you start (or if you’re about to build your next shed), keep these expert tips in mind:
-
Always double-check measurements before cutting
-
Invest in quality materials for long-term durability
-
Work step by step—don’t rush the process
-
Prioritize safety when using tools
-
Keep your design simple for your first build
👉 If you want a complete system to simplify your project, Click here to explore this recommended DIY solution designed for beginners and hobbyists.
Affiliate Disclosure
This article may contain affiliate links. This means we may earn a small commission if you purchase through these links—at no extra cost to you. These commissions help support our content creation and allow us to continue providing valuable DIY guides and resources.
We only recommend tools, plans, and resources that are practical, beginner-friendly, and genuinely useful for helping you successfully build a small shed.
Final Thoughts
Building your own shed is more than just a project—it’s a rewarding experience that adds value to your home and enhances your DIY skills. With the right guidance and mindset, you can successfully build a small shed that meets your needs and lasts for years.
For more curated DIY resources, woodworking tips, and beginner-friendly guides, explore .