Epoxy Resin Woodworking: Beginner-to-Pro Guide
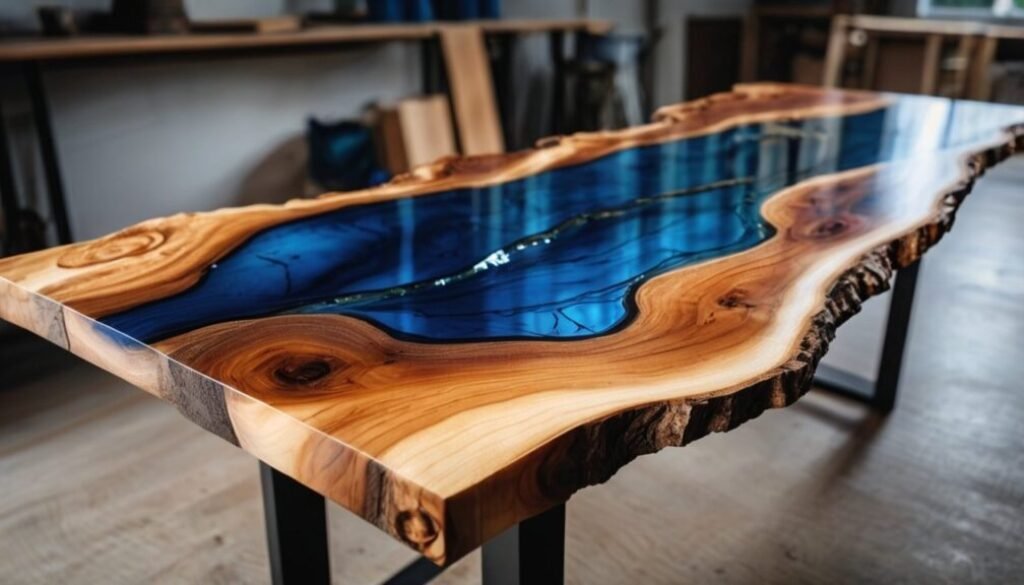
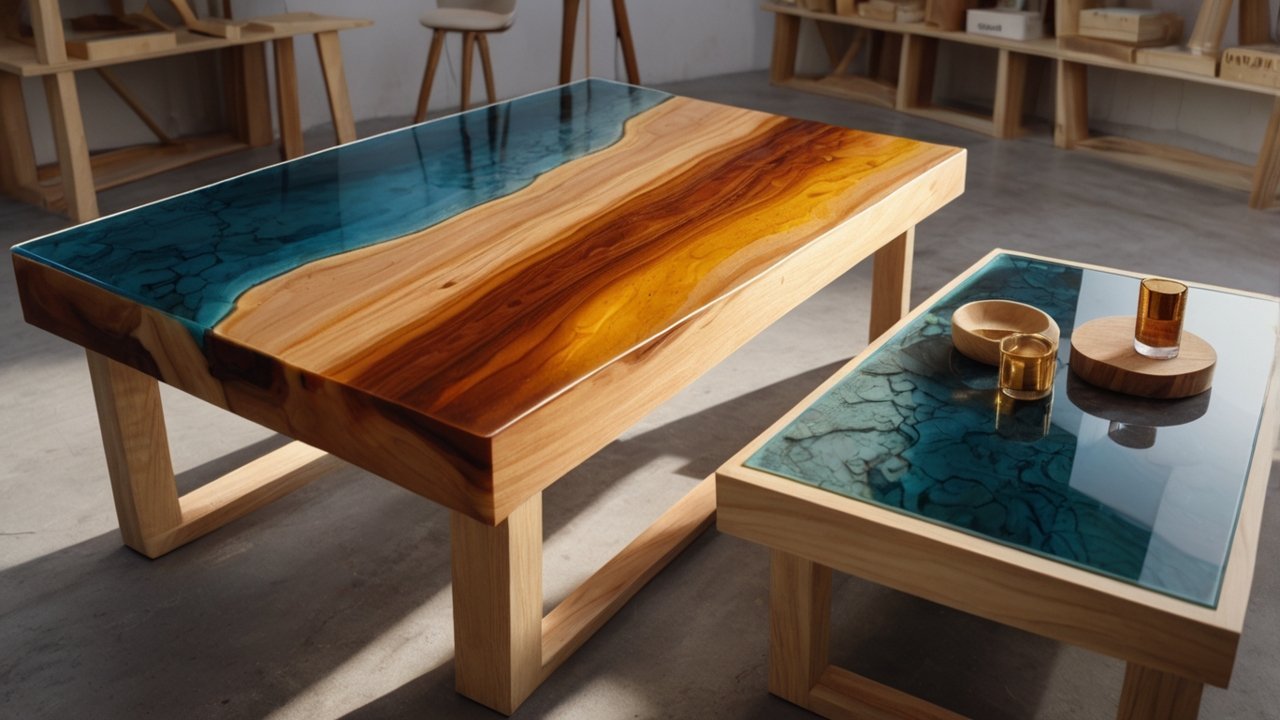
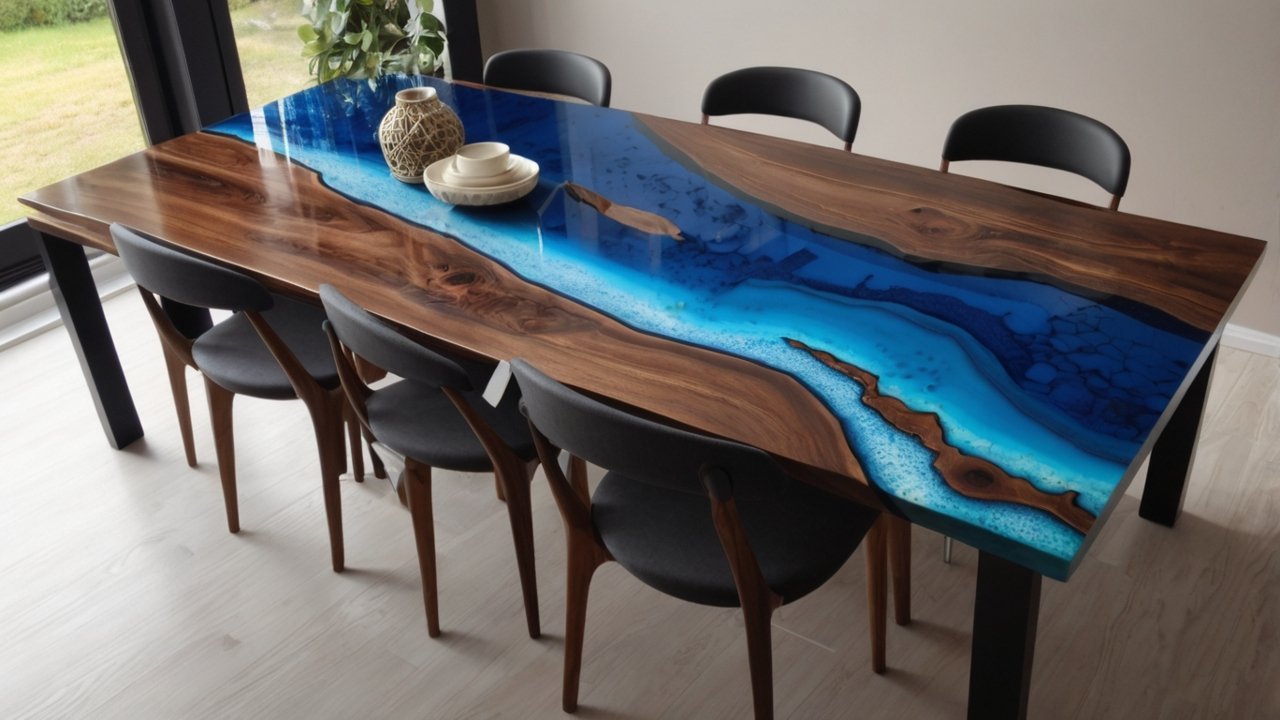
Ever wondered how makers create those jaw-dropping river tables and glass-smooth finishes that stop you mid-scroll? Epoxy resin woodworking has become one of the most exciting trends in modern DIY and furniture making, and for good reason. It blends traditional craftsmanship with creative freedom in a way few materials can.
At its core, epoxy resin woodworking lets you do more with wood. You can stabilize cracks, fill voids, and turn imperfect slabs into standout pieces. Whether you’re a beginner looking to try your first resin woodworking projects or an experienced woodworker curious about epoxy resin for wood, understanding this technique opens up a whole new level of possibility. Beyond the visuals, epoxy resin adds strength, durability, and moisture resistance, making projects both beautiful and functional.
That said, working with epoxy isn’t just about pouring and hoping for the best. From choosing the right resin to avoiding common mistakes like bubbles or improper curing, there’s a learning curve that matters if you want professional results. In this guide, we’ll break down everything you need to know about epoxy resin woodworking, step by step, so you can approach your next project with confidence.

Chapter 1: What Is Epoxy Resin Woodworking?
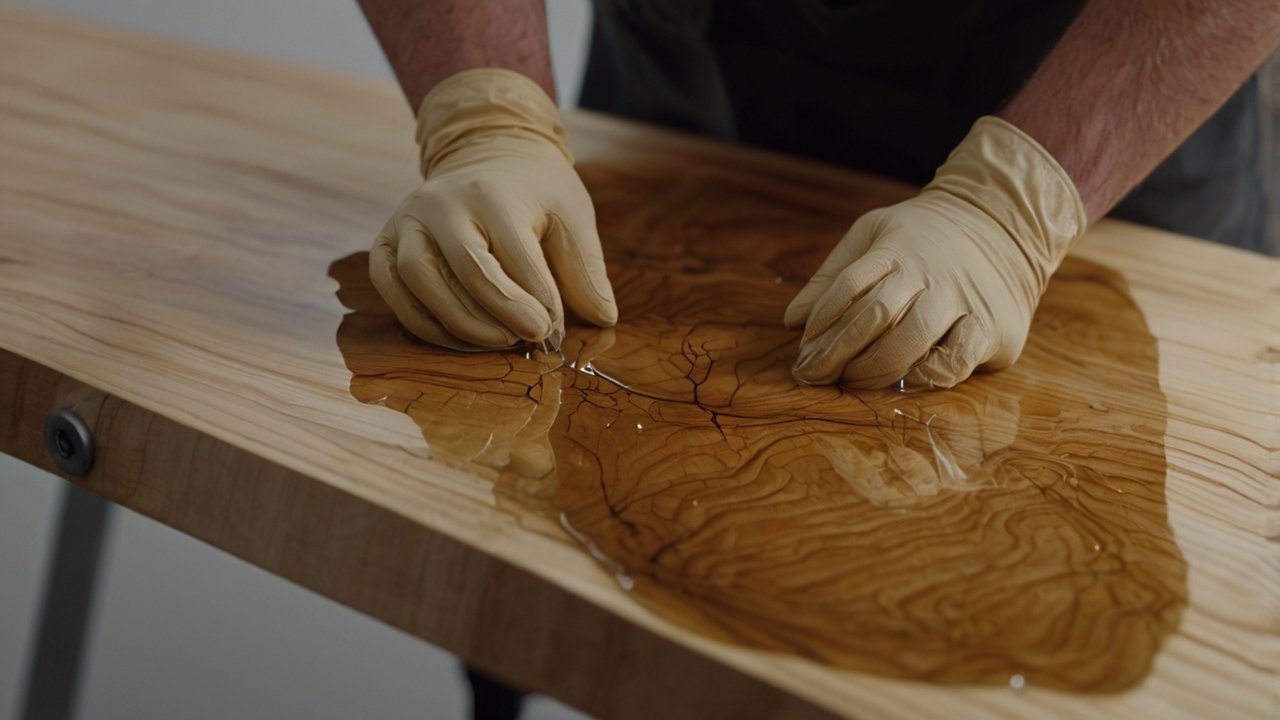
Epoxy resin woodworking is the practice of combining liquid epoxy resin with wood to strengthen, repair, or visually enhance a project. Instead of hiding imperfections, this approach highlights them, turning cracks, knots, and voids into design features. For many DIYers, it’s a way to get more value and creativity out of natural wood.
At its core, epoxy resin woodworking blends traditional craftsmanship with modern materials. While the tools may look familiar, the results often feel more contemporary. As a result, this technique has become especially popular among hobbyists building furniture, décor, and custom pieces at home.
How Epoxy Resin Woodworking Works in Practice
In most projects, epoxy resin is mixed from two components: resin and hardener. Once combined, the mixture is poured onto or into wood and allowed to cure. Over time, it hardens into a durable, plastic-like surface that bonds tightly with wood fibers.
Typically, epoxy is used to:
-
Fill cracks, knots, and natural voids
-
Create smooth, sealed surfaces
-
Add decorative elements like river-style pours
Unlike standard wood filler, epoxy penetrates deeper and cures much harder. Because of this, it’s often chosen for tabletops, desks, and furniture that see daily use.
If you’re still building confidence with tools, pairing resin with simpler builds helps. Many beginners start with projects from beginner woodworking projects before moving on to larger epoxy pours.
Why Epoxy Resin Woodworking Has Become So Popular
Over the past few years, epoxy resin woodworking has gained attention for both practical and visual reasons. On one hand, it allows woodworkers to rescue slabs that might otherwise be unusable. On the other hand, it opens the door to designs that aren’t possible with wood alone.
For example, a cracked live-edge slab may look like scrap at first glance. However, once stabilized with epoxy, that same slab can become a striking table or desk. In addition, epoxy adds moisture resistance, which helps protect furniture in real-world environments.
Workspace accessibility also plays a role. You don’t need an industrial shop to get started. With basic tools and a controlled setup, many DIYers work successfully out of a garage or spare room. If space is tight, you can click here to explore this recommended DIY shop setup that shows how small workshops stay organized and resin-friendly.
Epoxy Resin Woodworking vs Traditional Woodworking
It’s important to understand that epoxy doesn’t replace traditional woodworking skills. Instead, it complements them.
Traditional woodworking focuses on:
-
Joinery and structural strength
-
Natural finishes like oil or polyurethane
-
Precision cuts and tight tolerances
By contrast, epoxy resin woodworking adds:
-
Design flexibility
-
Structural reinforcement for damaged wood
-
Modern visual appeal
For best results, the two approaches work together. Selecting the right wood still matters just as much as choosing the right resin. If you’re unsure where to start, this complete guide to wood types for every project explains which woods pair well with epoxy and which ones cause problems.
DIY Epoxy Projects vs Buying Pre-Built Pieces
At this stage, many readers wonder whether epoxy projects are worth building themselves or better bought pre-made.
DIY epoxy resin woodworking offers:
-
Lower cost for large custom pieces
-
Full control over size, color, and finish
-
Skills that improve with every project
However, DIY also requires:
-
Time and patience
-
Careful preparation
-
A willingness to learn from mistakes
Buying pre-built epoxy furniture saves time, but it comes at a premium. For DIYers planning more than one project, learning the process often delivers better long-term value. Using structured guidance, such as affordable DIY woodworking plans, can significantly reduce wasted materials and frustration.
Is Epoxy Resin Woodworking Beginner-Friendly?
Despite its reputation, epoxy resin woodworking is approachable for beginners when done correctly. Safety and preparation matter more than experience. According to advice shared in Fine Woodworking Magazine and established DIY communities, most epoxy problems come from rushing or skipping steps.
Beginners should focus on:
-
Accurate measuring and mixing
-
Proper ventilation and safety gear
-
Starting with small, manageable projects
Once those habits are in place, epoxy becomes predictable rather than intimidating.
Epoxy resin woodworking isn’t about shortcuts or quick results. It’s about using the right material in the right way. In the next chapter, we’ll look at the specific benefits epoxy brings to woodworking projects and when it’s truly worth using over traditional methods.
Chapter 2: Benefits of Using Epoxy Resin in Woodworking
Epoxy resin woodworking offers more than visual appeal. When used correctly, it improves strength, durability, and flexibility in ways traditional woodworking methods often cannot. For many DIYers, these benefits are what turn epoxy from a design trend into a practical solution.
Rather than replacing woodworking fundamentals, epoxy enhances them. It allows makers to work with imperfect wood, extend the life of furniture, and experiment creatively without sacrificing function.
Added Strength and Long-Term Durability
One of the most important benefits of epoxy resin woodworking is structural reinforcement. Once cured, epoxy bonds tightly with wood fibers and hardens into a dense, durable surface.
This makes epoxy especially useful for:
-
Stabilizing cracked or split boards
-
Reinforcing weak or soft areas
-
Protecting high-use surfaces like desks and tables
Unlike traditional wood fillers, epoxy doesn’t shrink or crumble over time. As a result, it’s often chosen for furniture that needs to handle daily wear. Pairing epoxy with stable lumber choices from the best wood types for furniture projects further improves long-term performance.
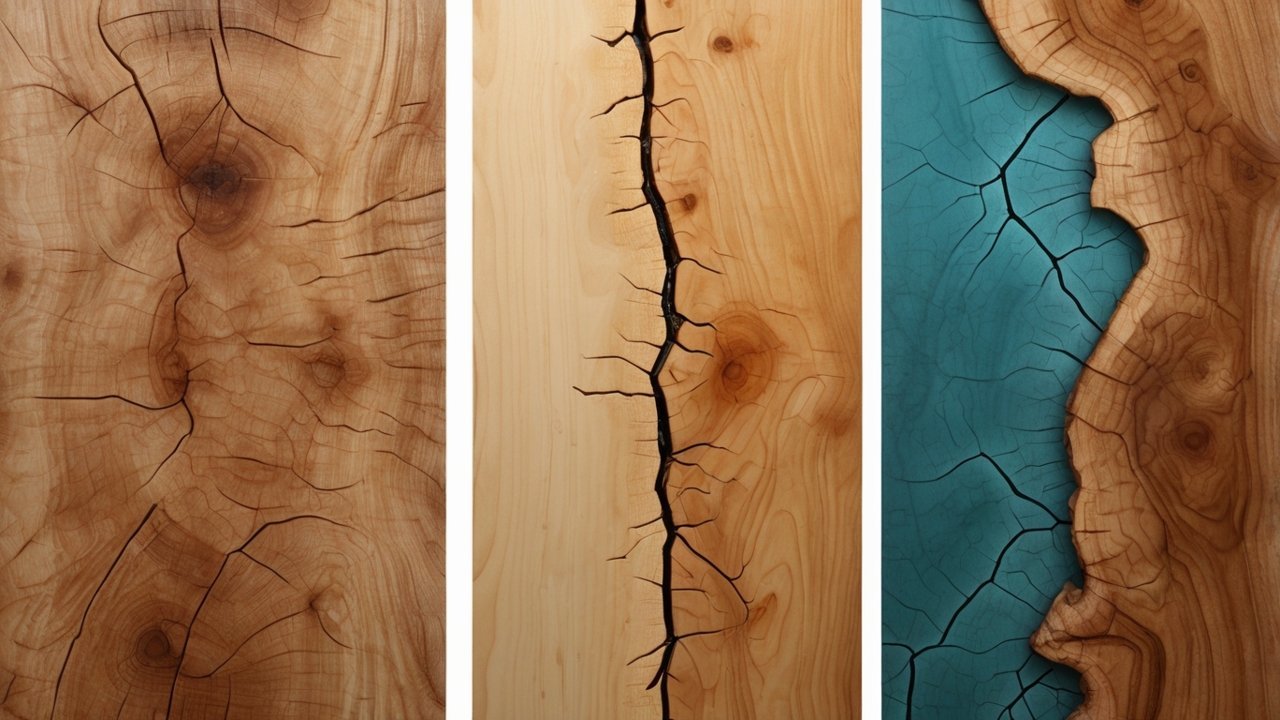
Turning Imperfections Into Design Features
Another major advantage of epoxy resin woodworking is creative freedom. Instead of hiding flaws, epoxy allows you to highlight them.
Natural features such as knots, voids, and live edges become focal points rather than problems. For example, a cracked slab that would normally be discarded can be transformed into a centerpiece table with a clear or tinted resin fill.
Because of this, many DIYers use epoxy selectively rather than covering entire surfaces. Decorative accents, inlays, and partial pours often deliver the best balance between creativity and restraint. If you enjoy small visual upgrades, ideas from DIY wood décor projects pair well with epoxy techniques.
Effective Repairs and Restoration
Epoxy resin woodworking isn’t limited to new builds. It’s also a powerful repair tool.
For restoration projects, epoxy can:
-
Fill deep cracks that traditional fillers can’t handle
-
Strengthen joints weakened by age or moisture
-
Extend the life of damaged furniture
A common real-world example involves old tables with leg cracks. Instead of replacing the piece, epoxy can stabilize the damage and restore functionality. Over time, many hobbyists find epoxy becomes part of their repair toolkit rather than a specialty material.
Smooth, Protective Finishes With Visual Depth
Epoxy creates a self-leveling surface that’s difficult to replicate with conventional finishes alone. When applied correctly, it produces a smooth, seamless look that protects the wood underneath.
Compared to other finishes:
-
Oils enhance grain but offer limited protection
-
Polyurethane adds durability but requires careful layering
Epoxy combines surface protection with visual depth. That said, it’s not always the final step. Many builders still apply a topcoat depending on use and exposure. Guides like professional wood finishing techniques explain when epoxy alone is enough and when additional protection makes sense.
DIY vs Pre-Built: Where Epoxy Adds Real Value
From a cost and customization standpoint, epoxy resin woodworking often favors DIYers.
DIY epoxy projects offer:
-
Custom sizing and design control
-
Lower cost for large furniture
-
Skills that improve with repetition
However, DIY also involves:
-
A learning curve
-
Longer project timelines
-
Careful planning
Buying pre-built epoxy furniture may be convenient, but it often includes high labor and branding markups. For those planning multiple projects, following affordable DIY woodworking plans can significantly reduce mistakes and wasted materials.
Beginner-Friendly When Approached Correctly
Despite its reputation, epoxy resin woodworking is approachable for beginners who start small. Simple projects such as trays, shelves, or surface coatings allow you to practice mixing, pouring, and finishing without high risk.
According to guidance commonly shared in Fine Woodworking Magazine and long-running DIY communities, most epoxy failures stem from rushing rather than lack of skill. Taking time to prepare properly makes a noticeable difference.
If workspace limitations are holding you back, improving organization helps. You can click here to explore this recommended DIY shop solution that shows how hobbyists manage epoxy projects safely in smaller spaces.
When Epoxy Is Not the Best Choice
While epoxy has clear advantages, it isn’t ideal for every project. Traditional joinery-focused builds or quick outdoor projects may benefit more from simpler finishes.
Epoxy resin woodworking works best when:
-
Durability matters
-
Repairs are needed
-
Visual impact is a priority
Understanding when to use epoxy and when to skip it is part of becoming a confident woodworker.
In the next chapter, we’ll look at the essential tools and materials required for epoxy resin woodworking, including what beginners truly need and what can wait until later.
Chapter 3: Essential Tools and Materials for Epoxy Resin Woodworking
Successful epoxy resin woodworking starts long before the first pour. While epoxy itself gets most of the attention, the tools, materials, and workspace you choose have just as much impact on the final result. Fortunately, beginners don’t need a fully equipped professional shop. What matters most is accuracy, safety, and preparation.
Choosing the Right Epoxy Resin for Woodworking Projects
Not all epoxy resins are suitable for woodworking. Different formulas behave very differently once mixed, poured, and cured.
The most common types include:
-
Tabletop epoxy for thin pours and surface coatings
-
Deep-pour epoxy for river tables and thick fills
-
Penetrating epoxy for stabilizing damaged or soft wood
For beginners, tabletop epoxy is often the best starting point. It cures more quickly, is easier to control, and costs less per project. Deep-pour epoxy looks impressive, but it requires tighter temperature control and more patience.
If you’re still learning the basics, pairing resin with smaller builds from easy small woodworking projects is a practical way to gain experience without wasting materials.
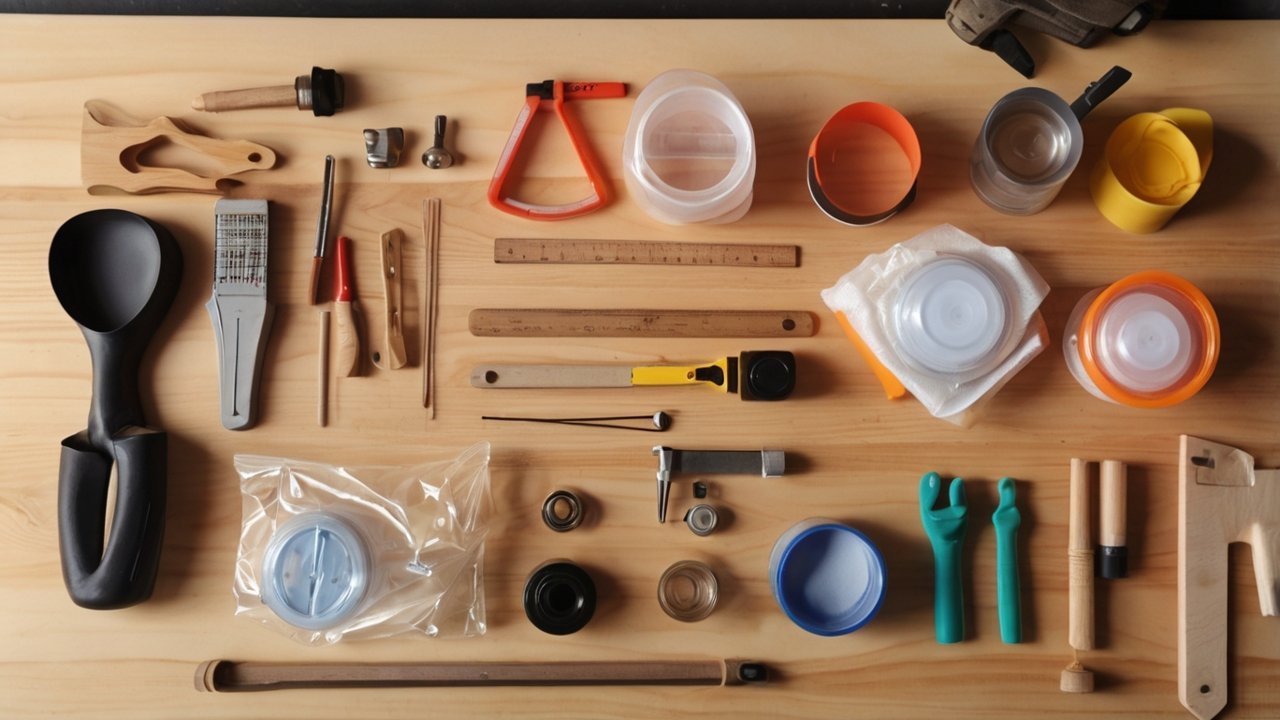
Must-Have Tools vs Nice-to-Have Extras
Epoxy resin woodworking doesn’t require specialized machinery, but precision tools are essential.
Core tools most projects require:
-
Measuring cups or a digital scale
-
Mixing containers and stir sticks
-
Heat gun or small torch for bubble removal
-
Sandpaper or an orbital sander
Helpful but optional tools:
-
Silicone spreaders
-
Painter’s tape and sealants
-
Polishing pads and compounds
Many beginners overspend early by buying tools they don’t yet need. Instead, focus on measuring and mixing accuracy first. As projects become larger or more frequent, upgrades make more sense. If you’re building your tool collection gradually, this guide to woodworking planers and essential shop tools offers useful context for long-term planning.
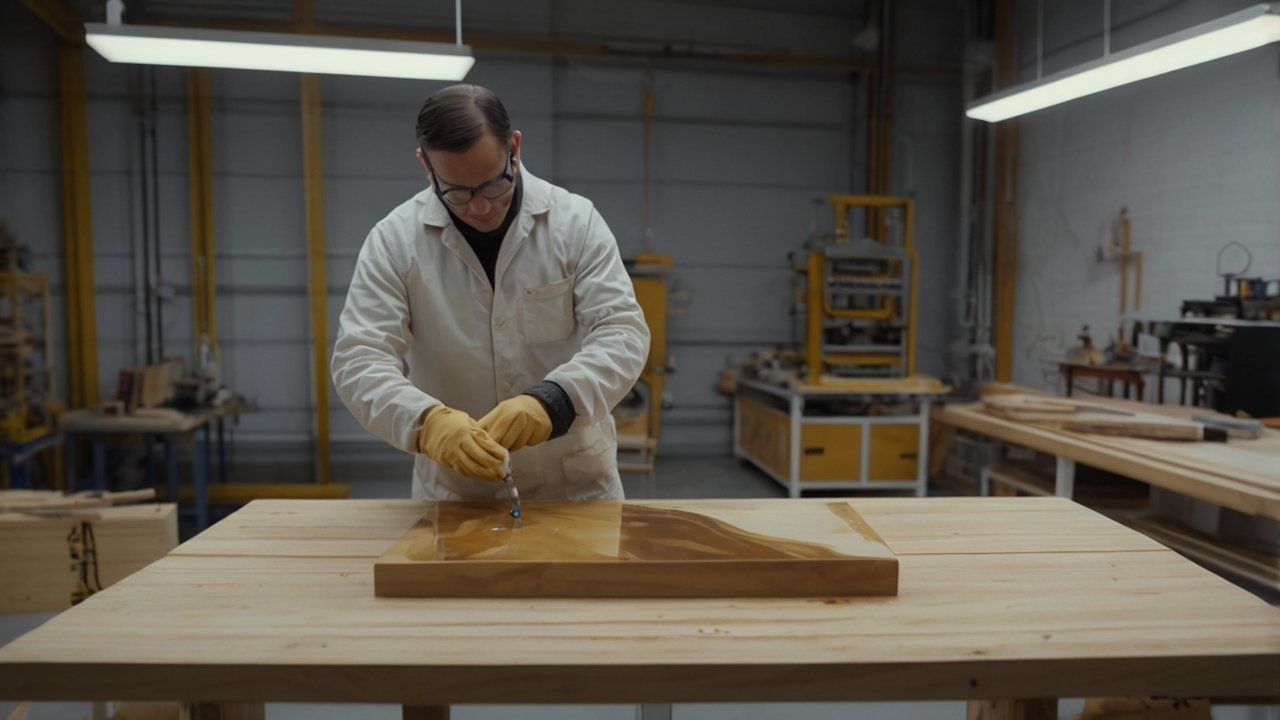
Safety Gear Is Non-Negotiable
One of the most overlooked aspects of epoxy resin woodworking is safety. Epoxy is safe when handled correctly, but improper use can cause irritation or respiratory issues.
At a minimum, you should use:
-
Nitrile gloves
-
Eye protection
-
Proper ventilation or a respirator
According to safety advice frequently shared in Fine Woodworking Magazine and established DIY forums, most epoxy-related problems come from poor airflow or rushed handling. Treat safety gear as part of the process, not an optional extra.
If your current workspace makes ventilation difficult, some DIYers choose to build a dedicated shed workshop using this step-by-step guide to create a safer environment for resin projects.
Setting Up a Workspace That Supports Epoxy Work
Epoxy reacts to its environment more than wood does. Temperature, dust, and level surfaces all matter.
Key workspace considerations include:
-
A stable temperature, typically around 70–75°F (21–24°C)
-
A perfectly level surface for pouring
-
Minimal dust and foot traffic during curing
For example, many first-time epoxy pours fail simply because the project wasn’t level. Resin flows wherever gravity takes it, and even small slopes can create uneven surfaces.
If space is limited, organization becomes even more important. You can click here to explore this recommended DIY small-shop solution to see how hobbyists manage epoxy and woodworking tools efficiently in compact areas.
Choosing the Right Wood for Epoxy Resin Woodworking
Epoxy doesn’t fix poor wood choices. Wet, unstable, or inappropriate lumber can still cause failures such as clouding or delamination.
For best results, look for:
-
Kiln-dried wood
-
Stable hardwoods
-
Slabs with character but solid structure
Understanding wood behavior is especially important when pairing it with resin. If you’re unsure which species work best, this complete guide to wood types for every project explains which woods perform well and which ones tend to cause problems.
Starter Kits vs Building Your Own Setup
Some brands sell epoxy starter kits that bundle resin and tools together. These can be convenient, but they aren’t always the best value.
Starter kits – Pros
-
Quick setup
-
Fewer decisions upfront
DIY tool selection – Pros
-
Better quality for the same budget
-
Only buy what you actually need
-
Easier upgrades over time
For hobbyists planning multiple projects, building your own setup usually becomes the better solution. Pairing tools with affordable DIY woodworking plans also helps reduce mistakes by providing clear material estimates and step-by-step guidance.
Beginner Advice Backed by Experience
Experienced woodworkers consistently recommend starting small. Cutting boards, trays, and simple shelves allow you to practice mixing, pouring, and finishing without the pressure of large slab pours.
Advice shared across DIY communities and woodworking publications emphasizes repetition over complexity. Mastering the basics first makes larger epoxy resin woodworking projects far more predictable.
With the right tools, materials, and workspace, epoxy becomes easier to control and far less intimidating. In the next chapter, we’ll explore the best epoxy resin woodworking projects to try and how to choose one that matches your skill level and goals.
Chapter 4: Best Epoxy Resin Woodworking Projects to Try
Choosing the right project is one of the most important decisions in epoxy resin woodworking. While the finished results often look impressive, not every project is beginner-friendly. Starting with the wrong build can lead to wasted materials and unnecessary frustration. The goal is to match the project to your current skill level and workspace.
When approached gradually, epoxy projects become far more enjoyable and predictable.
Beginner-Friendly Epoxy Resin Woodworking Projects
For beginners, smaller projects offer the best learning value. They use less epoxy, cure faster, and allow mistakes to be corrected without major losses.
Good starter projects include:
-
Cutting boards with resin accents
-
Serving trays
-
Small shelves or wall décor
-
Simple tabletop coatings
These builds help you practice mixing ratios, bubble control, and sanding without the pressure of large pours. Many DIYers pair epoxy with ideas from easy small woodworking projects to build confidence early.
Epoxy Resin Cutting Boards and Trays
Cutting boards and trays are often the first successful epoxy resin woodworking projects people complete. They’re manageable in size and forgiving in execution.
Why these projects work well:
-
Thin epoxy layers cure more evenly
-
Sanding and finishing are simpler
-
Design experimentation is low-risk
Although epoxy cutting boards are usually decorative rather than heavy-use kitchen tools, they’re excellent practice pieces. Following affordable DIY woodworking plans can further reduce trial and error by providing clear dimensions and material estimates.
River Tables: High Impact, Higher Difficulty
River tables are the most recognizable epoxy resin woodworking projects, but they’re also among the most challenging.
Common challenges include:
-
Deep pours that generate heat
-
Large epoxy volumes that increase cost
-
Mistakes that are difficult to fix
Because of this, most experienced builders recommend working up to river tables rather than starting with them. Building smaller furniture first helps develop the patience and control required. Projects from DIY wooden furniture ideas for beginners provide a strong foundation before tackling slab pours.
If you plan to attempt a river table, workspace matters. Many makers choose to build a dedicated woodworking shed using this step-by-step guide to ensure stable temperature and ventilation during long curing periods.
Coffee Tables, Desks, and Functional Furniture
Beyond river tables, epoxy works extremely well in functional furniture where durability and surface protection matter.
Common furniture applications include:
-
Sealing live-edge tabletops
-
Filling knots and cracks in desktops
-
Adding subtle resin accents instead of full pours
In these cases, epoxy acts as a supporting element rather than the centerpiece. Combining resin techniques with solid construction methods improves results. Learning from essential wood joinery techniques helps ensure furniture remains strong as well as visually appealing.
Decorative Inlays and Accent Projects
For those who enjoy creative details, decorative epoxy projects offer flexibility without large material commitments.
Popular options include:
-
Resin-filled grooves in shelves
-
Accent strips in tabletops
-
Artistic wall panels
These projects allow experimentation with color and depth while keeping pours shallow. Many DIYers draw inspiration from DIY wood décor ideas and adapt them using epoxy techniques.
DIY vs Buying Pre-Built Epoxy Projects
At some point, it’s natural to wonder whether building epoxy projects yourself is worth the effort.
DIY epoxy resin woodworking offers:
-
Full creative control
-
Lower cost for large items
-
Skills that improve over time
Buying pre-built pieces offers:
-
Immediate results
-
Professional consistency
-
No learning curve
For one-off décor items, buying may make sense. However, for furniture or repeated builds, DIY usually provides better long-term value. Improving your workflow with a smart setup can help. You can click here to explore this recommended DIY small-shop solution to see how hobbyists manage furniture-scale projects efficiently.
Realistic Project Progression for Beginners
Based on advice commonly shared in Fine Woodworking Magazine and long-standing DIY communities, a gradual project path works best:
-
Small epoxy accent project
-
Functional tray or shelf
-
Furniture with epoxy details
-
Large slab or river table
Skipping steps often leads to burnout. Progressing steadily builds confidence and skill without overwhelming costs.
Choosing the right epoxy resin woodworking project sets the tone for everything that follows. In the next chapter, we’ll walk through the full step-by-step epoxy resin woodworking process, from preparation to curing, so you know exactly what to expect before you pour.
Chapter 5: Step-by-Step Epoxy Resin Woodworking Process
Epoxy resin woodworking becomes far less intimidating once you understand the full process from start to finish. While epoxy itself is easy to pour, good results depend on preparation, timing, and patience. Skipping steps or rushing the process is where most problems begin.
This chapter breaks the workflow into clear, manageable stages so you know exactly what to expect before you mix your first batch.
Step 1: Preparing and Sealing the Wood
Every successful epoxy project starts with proper wood preparation. Epoxy bonds best to clean, dry, and stable surfaces.
Before pouring, you should:
-
Sand the wood to remove dirt, oils, and loose fibers
-
Clean thoroughly using compressed air or a tack cloth
-
Check that the wood is fully dry and acclimated
For porous or cracked wood, sealing is essential. A thin seal coat of epoxy prevents trapped air from escaping during the main pour. Without it, bubbles often appear continuously and are difficult to control later.
Beginners commonly skip this step, assuming epoxy will self-correct. In reality, preparation does more for final quality than the pour itself.
Step 2: Measuring and Mixing Epoxy Correctly
Accurate mixing is non-negotiable in epoxy resin woodworking. Even small ratio errors can prevent epoxy from curing properly.
Best practices include:
-
Use a digital scale or clearly marked mixing cups
-
Follow the manufacturer’s ratio exactly
-
Mix slowly, scraping the sides and bottom of the container
Rushing this step is one of the most common causes of sticky or soft epoxy. According to advice frequently shared in Fine Woodworking Magazine and experienced DIY forums, slow and thorough mixing matters more than speed.
If you’re following structured builds, affordable DIY woodworking plans can help estimate resin quantities accurately and reduce waste.
Step 3: Pouring Epoxy Resin the Right Way
Pouring epoxy isn’t difficult, but technique matters. Instead of dumping all the resin at once, controlled pours usually produce better results.
Helpful pouring tips:
-
Pour slowly and evenly
-
Allow epoxy to self-level naturally
-
Use layered pours for deeper fills
For furniture projects, pouring in stages reduces heat buildup and minimizes cracking or cloudiness. Practicing on smaller builds from easy beginner woodworking projects is a smart way to learn how epoxy behaves before committing to large slabs.
Step 4: Managing Bubbles and Surface Issues
Air bubbles are normal in epoxy resin woodworking, especially when working with live-edge or porous wood. The goal isn’t perfection but control.
Common bubble-removal methods include:
-
Light passes with a heat gun or torch
-
Gentle tapping along edges
-
Proper seal coats to reduce trapped air
Overheating is a common mistake. Too much heat can cause ripples, discoloration, or premature curing. Short, controlled passes are far more effective than prolonged exposure.
A clean, organized workspace also helps you react quickly during this stage. You can click here to explore this recommended DIY shop setup to see how resin-friendly work areas are arranged.
Step 5: Curing Time and Environmental Control
Curing is where patience matters most. Epoxy may feel hard within hours, but full curing often takes days.
Ideal curing conditions include:
-
Stable temperatures around 70–75°F (21–24°C)
-
Minimal dust and airflow
-
No movement of the project
Sanding or finishing too early can permanently damage the surface. Woodworking publications and long-standing DIY communities consistently stress respecting full cure times, even when the epoxy looks ready.
If you’re working indoors and space is limited, fumes and dust can be an issue. Some DIYers choose to build a dedicated woodworking shed using this step-by-step guide to separate epoxy work from living areas.
Step 6: Light Sanding Between Pours (When Needed)
For multi-layer epoxy projects, light sanding between pours improves adhesion.
Use:
-
Fine-grit sandpaper (220–320 grit)
-
Light pressure to scuff the surface
Clean thoroughly before applying the next layer. Skipping this step can lead to weak bonding, especially on glossy cured epoxy.
DIY vs Pre-Built: Why Learning the Process Matters
Buying pre-built epoxy furniture skips this entire process, but it also skips the learning. DIY epoxy resin woodworking builds problem-solving skills that transfer to future projects.
DIY process – Pros
-
Full control over quality
-
Ability to fix mistakes
-
Long-term skill growth
DIY process – Cons
-
Time investment
-
Trial and error
Most experienced woodworkers agree that understanding the process is where the real value lies.
Mastering the epoxy resin woodworking process takes practice, not perfection. In the next chapter, we’ll focus on finishing and polishing techniques that turn cured epoxy into a smooth, professional surface.
Chapter 6: Finishing and Polishing Epoxy Resin Wood Projects
Finishing is the stage where epoxy resin woodworking either looks amateur or truly professional. Even a perfect pour can fall flat if sanding and polishing are rushed. While this part of the process takes time, it’s also where your project gains clarity, depth, and durability.
With the right approach, finishing transforms cured epoxy into a smooth, refined surface that highlights both the resin and the wood.
Why Proper Finishing Matters
Epoxy cures hard, but it doesn’t cure flawless. Dust particles, uneven edges, and minor surface defects are common. Finishing corrects these issues and prepares the surface for long-term use.
A well-finished epoxy surface:
-
Feels smooth and even
-
Reflects light clearly
-
Resists scratches and moisture better
According to guidance commonly shared in Fine Woodworking Magazine and experienced DIY communities, many epoxy failures happen after curing, not during pouring. That’s why this stage deserves just as much attention.
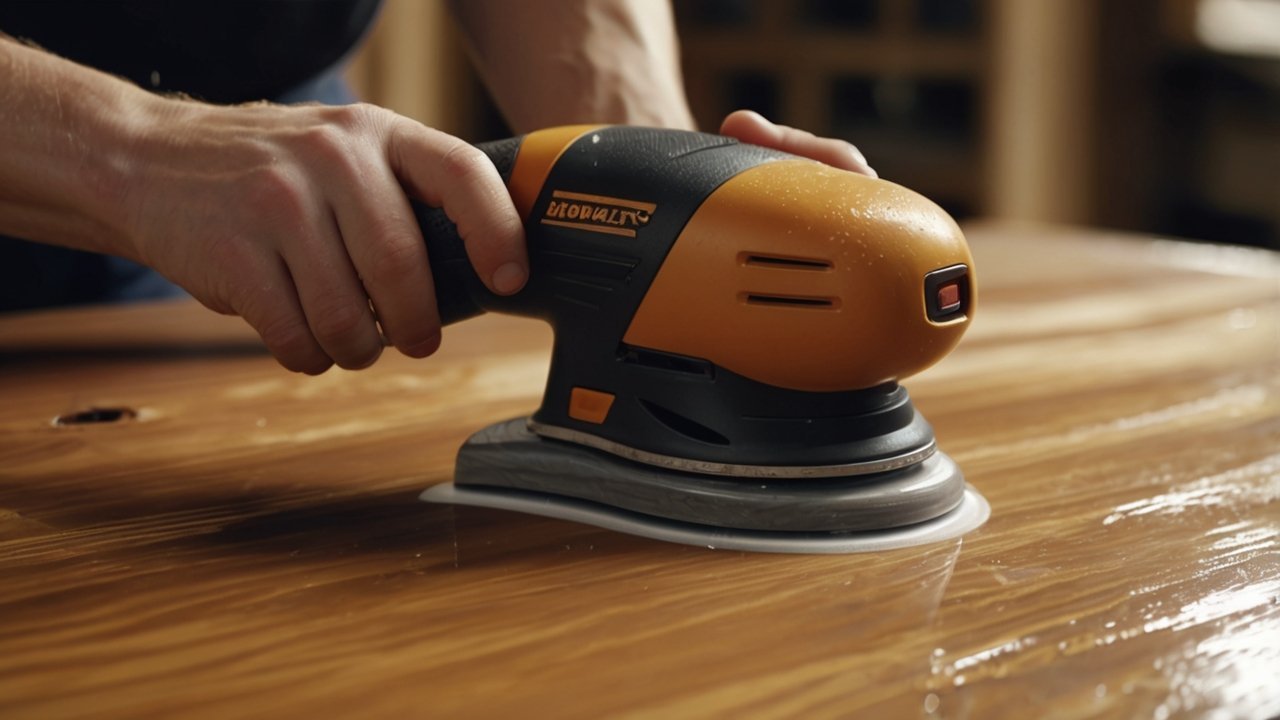
Sanding Epoxy Resin Safely and Effectively
Sanding epoxy is different from sanding bare wood. Epoxy is harder, heats up faster, and shows scratches more easily.
Best sanding practices include:
-
Start at the lowest grit needed to level the surface
-
Progress gradually through finer grits
-
Avoid skipping grit levels
For most projects:
-
Begin around 120–150 grit only if leveling is required
-
Move through 220, 320, and 400 grit
-
Stop sanding only when scratches are uniform
Use light pressure and let the sander do the work. Pressing too hard can cause heat buildup, leading to swirl marks or cloudy spots.
If you’re still building your finishing setup, learning how tools work together matters. This guide to woodworking planers and finishing tools offers useful insight for long-term planning.
Wet Sanding for High-Gloss Results
For projects where clarity matters, wet sanding is often the key step. It removes fine scratches left behind by dry sanding and prepares the surface for polishing.
Wet sanding tips:
-
Start around 600 grit and work up to 1500–2000 grit
-
Keep the surface wet to reduce friction
-
Rinse and clean between grit changes
Many beginners skip wet sanding and wonder why their epoxy looks dull. In reality, polishing compounds can’t fix scratches that haven’t been removed first.
Polishing and Buffing the Epoxy Surface
Once sanding is complete, polishing restores clarity and shine. Compounds designed for plastics or automotive finishes work well on epoxy resin woodworking projects.
Common polishing tools include:
-
Foam polishing pads
-
Microfiber cloths
-
Variable-speed polishers
Work slowly and avoid high speeds. Overheating during polishing can soften the epoxy surface and undo previous work. Short passes and patience produce the best results.
A dedicated finishing area helps keep dust under control. If your workspace feels cramped, you can click here to explore this recommended DIY small-shop solution to see how hobbyists organize sanding and polishing zones efficiently.
Should You Apply a Topcoat Over Epoxy?
Epoxy provides excellent protection, but it isn’t always the final finish. In some epoxy resin woodworking projects, a topcoat adds extra durability or UV resistance.
Common topcoat options include:
-
Polyurethane for added scratch resistance
-
Hardwax oils for a softer, natural feel
-
UV-resistant clear coats for sun exposure
Each option has trade-offs. For indoor furniture, epoxy alone may be enough. For sunlit areas or heavy use, a topcoat is often worth it. This guide to polyurethane wood finishes and application methods explains when additional protection makes sense.
Fixing Imperfections After Curing
One advantage of epoxy resin woodworking is repairability. Minor issues don’t usually require starting over.
Common fixes include:
-
Light polishing for fine scratches
-
Spot wet sanding for dull areas
-
Thin flood coats to restore gloss
For example, many DIYers notice small scratches weeks after a project is finished. A light polish often restores clarity without redoing the entire surface.
DIY Finishing vs Professional Refinishing
Some builders consider professional finishing, especially for large furniture pieces. While that can work, it’s rarely necessary for hobbyists.
DIY finishing offers:
-
Lower cost
-
Full control over sheen and feel
-
Skills that improve with each project
Professional finishing may help when:
-
Damage is severe
-
Time constraints exist
-
Commercial quality is required
For most DIYers, learning to finish epoxy themselves is part of the reward. Following affordable DIY woodworking plans also makes finishing easier because dimensions and processes are clearly defined.
Beginner Tips for Better Finishing Results
Based on advice from woodworking publications and long-time DIY builders:
-
Don’t rush sanding stages
-
Practice polishing on scrap pieces
-
Finish in a clean, dust-controlled space
If sanding and polishing are difficult in your current setup, upgrading your workspace can help. Some DIYers choose to build a dedicated shed workshop using this step-by-step guide to separate finishing work from daily living areas.
Finishing is where epoxy resin woodworking truly comes together. Once you master sanding and polishing, even simple projects can look high-end. In the next chapter, we’ll cover the most common epoxy resin woodworking mistakes and how to avoid them before they cost you time, money, and motivation.
Chapter 8: How Much Does Epoxy Resin Woodworking Cost?
Cost is one of the biggest deciding factors for anyone considering epoxy resin woodworking. While the finished projects often look expensive, the actual cost varies widely depending on project size, materials, and how well you plan. For beginners especially, understanding where the money goes helps prevent overspending and frustration.
The key is knowing which costs are unavoidable and which ones you can control.
Material Costs: Epoxy Resin and Wood
Epoxy resin is usually the largest single expense in epoxy resin woodworking. Prices depend on the type of resin, pour depth, and overall volume required.
Typical cost factors include:
-
Tabletop epoxy for thin pours and coatings
-
Deep-pour epoxy for river tables and thick fills
-
Pigments or colorants, which add small but noticeable costs
Wood choice also plays a major role. Live-edge slabs and premium hardwoods cost more upfront, but they reduce failure risk. Using unstable or wet wood often leads to wasted epoxy, which increases costs quickly.
If you’re unsure which materials are worth the investment, this complete guide to wood types for every project helps beginners avoid expensive mistakes.
Tool and Equipment Costs
The good news is epoxy resin woodworking doesn’t require industrial machinery. Most tools overlap with standard woodworking setups.
Common tool expenses include:
-
Mixing containers and measuring tools
-
Safety gear (gloves, respirator, eye protection)
-
Heat gun or small torch
-
Sander and sandpaper
Many beginners already own part of this list. If you’re still building your workspace, this guide to essential woodworking shop layouts and tools explains what to prioritize and what can wait.
Hidden Costs Beginners Often Overlook
While epoxy itself gets most of the attention, hidden costs add up quickly if you’re not prepared.
Common overlooked expenses:
-
Extra resin for seal coats
-
Sandpaper and polishing compounds
-
Test pours and early mistakes
A common real-world example involves resin leaks from poorly sealed molds. One small leak can waste a surprising amount of epoxy. This is why experienced DIYers recommend starting with proven designs. Using affordable DIY woodworking plans helps control material use and reduces trial-and-error waste.
DIY vs Buying Pre-Built: Cost Comparison
When comparing DIY epoxy resin woodworking to buying finished pieces, the cost difference becomes clear, especially for furniture.
DIY epoxy projects usually offer:
-
Lower cost for large, custom pieces
-
Full control over materials and design
-
Tools that can be reused across projects
Buying pre-built epoxy furniture often includes:
-
High labor and branding markup
-
Limited customization
-
Shipping costs for heavy items
For small décor pieces, buying may be practical. For tables, desks, or repeated builds, DIY often becomes more cost-effective over time.
Can Epoxy Resin Woodworking Be Profitable?
Some hobbyists wonder if epoxy resin woodworking can turn into a side income. It can, but expectations should stay realistic.
Profitability depends on:
-
Material waste control
-
Time spent on curing and finishing
-
Local demand and pricing
According to discussions in established DIY communities and publications like Fine Woodworking Magazine, most successful sellers refine their process on personal projects first. Efficiency, not complexity, is what improves margins.
If you’re considering frequent builds or selling finished pieces, workspace matters. Many makers build a dedicated shed workshop using this step-by-step guide to separate hobby work from production and improve consistency.
Budget-Friendly Approach for Beginners
For beginners, the most cost-effective path is gradual investment.
A smart cost strategy looks like this:
-
Start with small epoxy accent projects
-
Buy only essential tools
-
Reinvest savings into better materials
-
Scale up as skills improve
Avoid buying everything at once. Skill development saves more money than premium tools early on.
Evidence-Based Cost Advice
Based on guidance commonly shared in Fine Woodworking Magazine and long-running DIY forums:
-
Most epoxy waste comes from poor planning
-
Smaller projects deliver better learning value per dollar
-
Organized workspaces reduce costly mistakes
If you’re working in a tight or shared space, efficiency matters even more. You can click here to explore this recommended DIY small-shop solution to see how hobbyists control costs through better organization.
Epoxy resin woodworking doesn’t have to be expensive, but it does reward planning. When you understand the true costs upfront, you’re far more likely to enjoy the process and stick with it long-term.
Chapter 9: Maintenance and Care for Epoxy Resin Wood Furniture
Epoxy resin woodworking projects are built for durability, but they still require proper care. While epoxy adds strength and moisture resistance, neglect or improper use can shorten the lifespan of even the best-made pieces. The good news is maintenance is simple once you know what to watch for.
This chapter explains how to keep epoxy resin wood furniture looking clean, clear, and functional over the long term.
Everyday Cleaning and Basic Care
Daily care is the easiest way to protect epoxy resin woodworking projects. In most cases, gentle cleaning is all that’s needed.
Best practices include:
-
Wiping surfaces with a soft microfiber cloth
-
Using mild soap and water when necessary
-
Cleaning spills promptly
Avoid abrasive pads or harsh chemical cleaners. Over time, these can dull the epoxy surface and reduce clarity. According to advice commonly shared in woodworking publications and DIY communities, most surface wear comes from repeated abrasion rather than major damage.
Heat, Sunlight, and Moisture: Understanding Epoxy’s Limits
Epoxy handles moisture better than many traditional finishes, but it’s not indestructible. Understanding its limits helps prevent long-term issues.
Epoxy performs well with:
-
Occasional water exposure
-
Normal indoor humidity
-
Everyday household temperatures
Extra care is needed with:
-
Hot cookware or appliances
-
Prolonged direct sunlight
-
Outdoor exposure without protection
Extended UV exposure can cause yellowing over time, especially with clear epoxy. For furniture near windows, adding a protective topcoat may be worthwhile. This is where finishes like polyurethane come into play. For guidance, this article on polyurethane wood finishes and how to apply them explains when extra protection makes sense.
Preventing Scratches and Surface Wear
Although epoxy cures hard, it can still scratch under repeated use. High-traffic furniture such as desks and dining tables benefit from preventive habits.
Helpful prevention tips:
-
Use coasters and placemats
-
Avoid dragging heavy objects across surfaces
-
Add felt pads under items that move frequently
A common misconception is that epoxy behaves like glass. In reality, treating it like a premium wood finish leads to better long-term results.
If you’re designing furniture with durability in mind, pairing epoxy with smart finishing strategies from professional wood finishing techniques can reduce wear in high-contact areas.
Repairing Minor Scratches and Dull Areas
One advantage of epoxy resin woodworking is that most damage is repairable. Small imperfections don’t usually require full refinishing.
Common fixes include:
-
Light polishing for fine scratches
-
Spot wet sanding for dull patches
-
Thin touch-up epoxy for small chips
For example, many DIYers notice light desk scratches months after finishing a project. In most cases, a simple polish restores clarity without sanding the entire surface.
Long-Term Maintenance for High-Use Furniture
Furniture that sees daily use benefits from occasional checkups rather than constant attention.
A realistic maintenance routine:
-
Inspect surfaces every few months
-
Address scratches early
-
Reapply a topcoat if wear becomes noticeable
Woodworking publications and experienced builders consistently note that early maintenance prevents more expensive refinishing later.
If you build frequently, having a small finishing and maintenance area helps streamline repairs. You can click here to explore this recommended DIY small-shop setup to see how hobbyists manage sanding, polishing, and storage efficiently.
Indoor vs Outdoor Epoxy Resin Wood Furniture
Most epoxy resin woodworking projects are intended for indoor use. Outdoor exposure introduces additional challenges.
Indoor furniture
-
Minimal maintenance
-
Stable conditions
-
Longer lifespan
Outdoor furniture
-
Requires UV-resistant coatings
-
Needs periodic refinishing
-
Has a shorter overall service life
If outdoor projects are part of your plan, epoxy alone isn’t enough. Proper wood selection and protective finishes become critical. Planning carefully using ideas from outdoor woodworking projects helps set realistic expectations.
DIY Maintenance vs Professional Refinishing
Most epoxy resin woodworking maintenance tasks are DIY-friendly.
DIY maintenance offers:
-
Lower cost
-
Faster turnaround
-
Better understanding of your own work
Professional refinishing may help when:
-
Damage is severe
-
Time is limited
-
Commercial-quality results are required
For hobbyists, maintaining your own work is part of the value. Using structured builds from affordable DIY woodworking plans also makes maintenance easier because construction methods are already familiar.
Evidence-Based Care Tips
Based on advice from woodworking magazines and long-running DIY communities:
-
Most epoxy damage is cosmetic
-
Early repairs save time and money
-
Gentle care outperforms aggressive cleaning
Epoxy resin woodworking furniture doesn’t require constant upkeep. With simple habits and occasional touch-ups, your projects can remain durable and visually appealing for many years.

Chapter 10: Is Epoxy Resin Woodworking Right for You?
By this point, you’ve seen what epoxy resin woodworking can do, how much it costs, and what it takes to maintain finished projects. The final question is a personal one: is this approach actually right for you, your goals, and your working style? The answer isn’t the same for everyone, and that’s okay.
This chapter helps you decide realistically, without hype.
Skill Level: Who Benefits Most from Epoxy Resin Woodworking
Epoxy resin woodworking works best for DIYers who already have basic woodworking habits. You don’t need to be an expert, but comfort with measuring, sanding, and patience goes a long way.
Epoxy may be a good fit if you:
-
Enjoy problem-solving and experimentation
-
Are comfortable following step-by-step processes
-
Don’t mind slower project timelines
If you’re brand new to woodworking, starting with traditional builds first often leads to better results. Projects from easy beginner woodworking builds help you develop fundamentals before adding resin into the mix.
Time Commitment: Patience Is Not Optional
One of the biggest surprises for newcomers is how much waiting epoxy involves. Mixing and pouring are quick. Curing, sanding, and finishing are not.
Realistically, epoxy resin woodworking requires:
-
Multi-day curing windows
-
Extra sanding and polishing stages
-
Willingness to pause instead of rushing
If your schedule demands fast turnaround, epoxy may feel frustrating. Traditional woodworking with oil or polyurethane finishes is often faster for functional builds. This comparison of wood finishing techniques helps clarify when epoxy adds value and when it slows things down unnecessarily.
Workspace Reality: Do You Have the Right Environment?
Epoxy is sensitive to temperature, dust, and ventilation. Your workspace plays a major role in success.
Epoxy resin woodworking works best if you have:
-
A level surface that won’t be disturbed
-
Controlled temperature and airflow
-
Adequate ventilation
Many failed projects aren’t skill-related. They’re environment-related. Hobbyists working in shared spaces often struggle with dust and curing issues. That’s why some choose to build a dedicated woodworking shed using this step-by-step guide to gain consistency and safety.
If space is limited, organization matters even more. You can click here to explore this recommended DIY small-shop solution to see how others manage epoxy projects in compact setups.
Creative Goals vs Practical Needs
Epoxy resin woodworking shines when creativity matters. River tables, accent pieces, and statement furniture are where it stands out.
However, epoxy may not be ideal if:
-
You prefer purely traditional joinery
-
Projects are primarily outdoor or structural
-
You value speed over aesthetics
Many experienced woodworkers use epoxy selectively. Instead of building entire resin-heavy pieces, they use it to stabilize cracks, fill knots, or enhance details. Combining epoxy techniques with traditional furniture plans from DIY wooden furniture projects often delivers the best balance.
Cost vs Value: Is the Investment Worth It for You?
Epoxy resin woodworking isn’t cheap, but it can be cost-effective when used intentionally.
It’s usually worth it if:
-
You plan multiple projects
-
You value customization over speed
-
You enjoy skill-building
It may not be worth it if:
-
You only want one finished piece
-
You dislike trial and error
-
You don’t want to invest in tools or space
For those who decide to commit, working from structured guidance matters. Using affordable DIY woodworking plans helps reduce waste, mistakes, and frustration, especially in the early stages.
DIY vs Buying Pre-Built: The Final Comparison
At the end of the day, epoxy resin woodworking is about choice.
DIY epoxy projects offer
-
Creative control
-
Skill development
-
Lower long-term cost
Buying pre-built offers
-
Immediate results
-
Professional consistency
-
No learning curve
According to discussions in established DIY communities and publications like Fine Woodworking Magazine, most people who enjoy epoxy aren’t chasing perfection. They enjoy the process itself.
Evidence-Based Recommendation for Beginners
Based on advice consistently shared by experienced woodworkers:
-
Start small and repeat simple projects
-
Focus on process, not perfection
-
Add epoxy as a tool, not a crutch
Epoxy resin woodworking isn’t for everyone, and it doesn’t need to be. But for DIYers who enjoy blending craftsmanship with creativity, it can be deeply rewarding.
If you decide to move forward, the key is intention. Choose the right projects, control your environment, and give yourself room to learn. Done that way, epoxy becomes a powerful addition to your woodworking skill set, not a source of frustration.

Chapter 11: Conclusion + Affiliate Disclosure
Epoxy resin woodworking isn’t just a trend. For many DIYers and hobbyists, it becomes a long-term skill that blends creativity, problem-solving, and craftsmanship. Throughout this guide, we’ve covered what epoxy does well, where it can go wrong, and how to approach it realistically. If there’s one takeaway, it’s this: epoxy works best when you treat it as a tool, not a shortcut.
Used intentionally, epoxy resin woodworking allows you to rescue imperfect wood, create durable furniture, and add design elements that traditional woodworking alone can’t easily achieve. But success comes from preparation, patience, and learning the fundamentals first. Rushing into complex builds or ignoring workspace and safety considerations is what leads most people to frustration.
For beginners, the most reliable path forward is simple:
-
Start with small, low-risk projects
-
Follow proven processes instead of guessing
-
Invest gradually in tools and workspace upgrades
If you’re still building confidence, revisiting beginner woodworking projects or refining your shop setup with essential woodworking shop layout tips can make epoxy projects far more manageable.
Many successful DIYers also rely on structured guidance instead of trial and error. If you’re looking for the best solution to reduce mistakes and wasted materials, you can check out these affordable DIY woodworking plans that pair well with epoxy-enhanced builds. Clear plans often save more money than cutting corners ever will.
If space or ventilation has been holding you back, it may be worth taking a bigger step. Some makers build their own dedicated shed workshop with this step-by-step guide to create a safer, more consistent environment for resin work. Others optimize small spaces with this recommended DIY small-shop setup, proving you don’t need a massive shop to produce quality results.
Ultimately, epoxy resin woodworking rewards people who enjoy learning and refining their process. You don’t need perfection. You need consistency, curiosity, and a willingness to improve with each project. If that sounds like you, epoxy can become one of the most versatile tools in your woodworking skill set.
Affiliate Disclosure
Some links in this article are affiliate links. This means we may earn a small commission if you choose to purchase through them, at no extra cost to you. These recommendations are based on practical DIY use and are shared to help support this site and keep our woodworking guides free and up to date.

📘10 Easy DIY Wood Projects for the Weekend
Looking for a fun and rewarding weekend activity?
With this FREE eBook, you’ll discover 10 beginner-friendly wood projects that you can build with simple tools and a little creativity.
Inside, you’ll find:
🪵 Step-by-step instructions for each project
🛠️ Easy-to-follow designs—perfect for beginners
🌿 Functional and stylish pieces you’ll actually use
🎉 Projects you can complete in just a weekend
Whether you want to craft a garden bench, a planter box, or a simple home décor piece, this guide will help you turn raw wood into something beautiful and useful.
👉 Enter your email below to claim your FREE copy and start your DIY journey today!
Please log in to access your exclusive content.
Don’t have an account? Click the “Register” button below to sign up.
Related Posts