
Wood Joinery Techniques: 10 Must-Know Types for DIY Projects
Ever tried building something from wood, only to realize you have no idea how the pieces actually fit together? That’s where wood joinery techniques come in — the unsung heroes of strong, beautiful, long-lasting woodwork.
Whether you’re new to beginner woodworking or simply want cleaner results on your next DIY project, understanding wood joinery techniques is a game-changer. These methods aren’t just about holding two boards together — they determine the durability, style, and overall quality of what you build. From classic dovetail joints to modern biscuit joins, each type has its own purpose and personality.
In this guide, we’ll break down 10 essential wood joinery techniques every beginner should know — complete with visuals, tool tips, and even a free downloadable PDF. Ready to take your woodworking joints to the next level? Let’s get started.
Chapter 1: What Is Wood Joinery and Why It Matters
Understanding Wood Joinery Techniques (For Beginners & Hobbyists)
If you’ve ever wondered how handcrafted furniture holds together without visible screws or nails, the answer lies in wood joinery techniques. These methods — developed over centuries — allow woodworkers to connect pieces of timber securely, often with nothing more than precision cuts and clever geometry.
Whether you’re a total beginner or a weekend DIYer, learning the basics of woodworking joints can level up your skills and boost your confidence. Joinery isn’t just a technical skill; it’s the backbone of every successful build — from rustic shelves to intricate Japanese shoji screens.
Why Wood Joinery Techniques Matter in DIY Projects
At first glance, joinery might seem complicated, but it’s one of the most rewarding aspects of woodworking. Good joinery improves:
-
Strength: Proper joints create structural integrity without over-reliance on screws or glue.
-
Aesthetics: Hidden joints give furniture a clean, seamless appearance.
-
Longevity: Well-crafted joints can last for generations — unlike cheap pressboard furniture.
“Joinery separates store-bought from handmade. It’s the mark of craftsmanship.” – Woodworker’s Journal
The Most Common Woodworking Joints You’ll Encounter
Let’s break down the main types of joints every beginner should know:
-
Butt Joint – Easy to cut, but weak on its own.
-
Dowel Joint – Uses wooden pins for alignment and strength.
-
Mortise & Tenon – A classic for tables and chairs.
-
Dovetail Joint – Popular in drawers for beauty and durability.
-
Lap Joint – Great for frames and box structures.
-
Rabbet & Dado – Ideal for shelving and cabinetry.
Each of these has specific use cases depending on the project and wood type. Not sure what wood to use? Check out this complete guide on wood types for every project →
DIY vs Buying Pre-Built: Pros & Cons of Learning Joinery
| Option | Pros | Cons |
|---|---|---|
| DIY Joinery | Custom sizing, cost-effective, sense of achievement | Steep learning curve, requires tools |
| Pre-Built | Quick setup, polished finish | Expensive, limited customization, weaker construction |
If you’re new to woodworking, we recommend starting with these 10 easy beginner projects →. These will help you apply joinery techniques without being overwhelmed.
A Real-World Example: Learning Mortise & Tenon
When I started building my first workbench, I used screws and brackets. It wobbled after two months. Then I learned the mortise and tenon joint. It took longer, sure — but that bench is rock-solid and still in use three years later.
This one switch from shortcut methods to proper wood joinery techniques made all the difference. And you can make that same leap.
Safety & Best Practices for Wood Joinery
According to Fine Woodworking Magazine and the U.S. Consumer Product Safety Commission:
-
Always clamp your work before making cuts.
-
Use sharp tools to avoid kickback and splinters.
-
Wear safety goggles — especially when using power tools.
For beginners, it’s better to start with hand tools. They give you control and help you understand the material. As you grow more confident, you can transition to routers, joiners, and table saws.
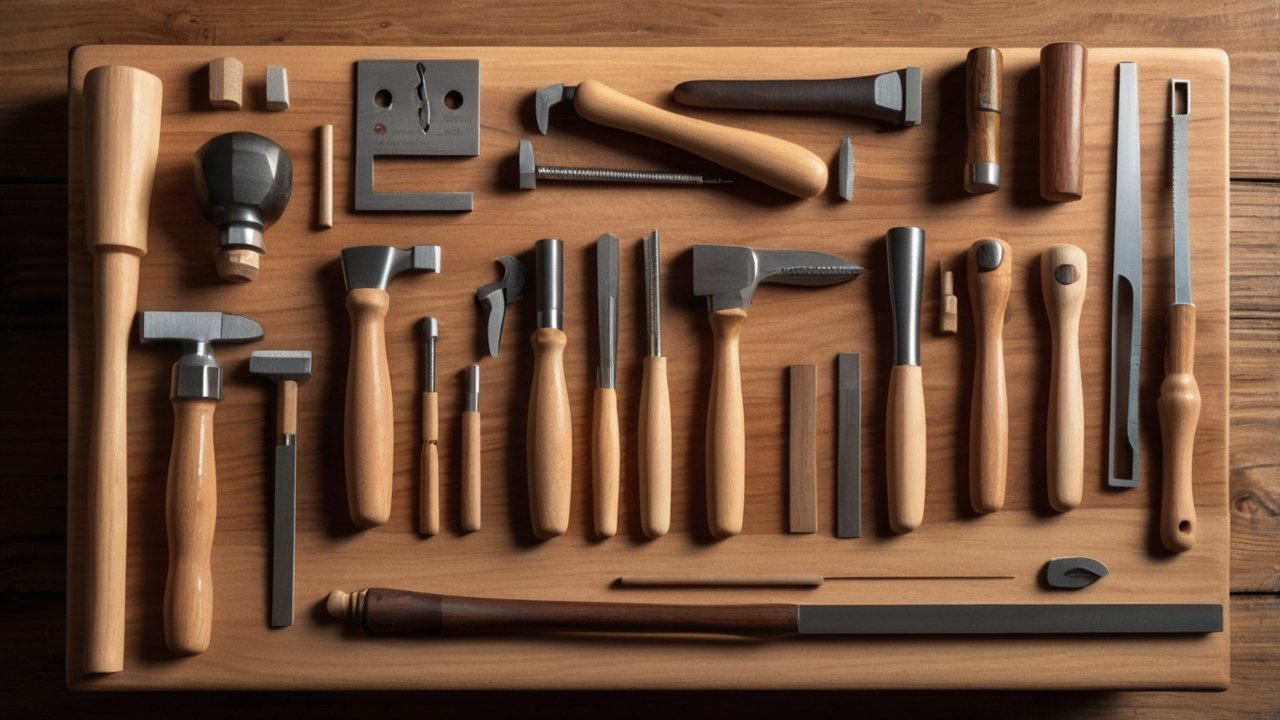
Tools You Need to Get Started with Joinery (Beginner-Friendly Kit)
Here’s what we recommend for getting started:
-
Chisel set
-
Marking gauge
-
Japanese pull saw or dovetail saw
-
Mallet
-
Combination square
-
Clamps (lots of them!)
👉 Click here to explore this recommended DIY solution: Ultimate Small Shop – Affordable tools for serious beginners →
Want a Hands-On Start? Get Affordable Plans
Don’t just watch videos — build something.
These step-by-step guides walk you through real projects using the joinery techniques you’re learning here.
TL;DR – Why Joinery Is the Foundation of Quality Woodworking
-
It’s how you turn cut boards into real furniture.
-
It’s essential if you want your work to last.
-
And once you learn it, the creative possibilities are endless.
Now that you know why wood joinery techniques matter, let’s dive into the 10 most essential types every beginner should master — coming up next.
Chapter 2: Tools You’ll Need for Joinery Work
Essential Tools for Wood Joinery Techniques (Beginner to Intermediate)
Mastering wood joinery techniques doesn’t require a massive workshop or expensive machines. In fact, some of the most reliable joints in history were crafted using basic hand tools. If you’re serious about woodworking — or even just exploring it as a hobby — investing in the right joinery tools is a smart first step.
This chapter will walk you through the must-have wood joinery tools every beginner needs, plus pro tips on what to upgrade (and what to skip) as you grow.
Why the Right Tools Matter in Woodworking Joints
The best joint is only as good as the cut that forms it. A chisel that’s too dull or a square that’s slightly off can ruin your entire build. With precise tools, however, even a first-time hobbyist can create tight-fitting joints that hold strong.
Whether you’re tackling a simple bookshelf or your first coffee table, your tools will shape every cut, corner, and connection.
“A good chisel set and a sharp saw can take you farther than a garage full of cheap gear.” – Fine Woodworking Magazine
Must-Have Hand Tools for Wood Joinery (Affordable & Effective)
If you’re just starting out, focus on hand tools first. They’re easier to control, safer for beginners, and force you to understand how wood behaves.
Here’s your core kit:
🛠️ Chisels (¼”, ½”, ¾”, 1″ sizes)
-
For cutting and fine-tuning joints like mortises and dovetails.
-
Keep them razor sharp for clean results.
-
Look for a set with beveled edges and hardwood handles.
🛠️ Japanese Pull Saw or Dovetail Saw
-
Ideal for precise cuts across and along the grain.
-
A pull saw gives more control with less force — great for dovetail and tenon joints.
🛠️ Marking Gauge
-
Ensures consistent layout lines for tenons, mortises, rabbets, and dados.
-
A crucial tool for repeatable accuracy.
🛠️ Mallet (Wood or Rubber)
-
Used to tap chisels or joints into place without damaging the wood.
🛠️ Combination Square
-
For marking perfect 90° and 45° angles.
-
Also helpful for checking the squareness of joints.
🛠️ Clamps (Get at least 4–6)
-
For securing your work when cutting or gluing joints.
-
Quick-grip or bar clamps are perfect for joinery projects.
Want a visual shopping list? Explore our recommended woodworking tools for beginners →
Optional (But Helpful) Power Tools for Joinery
As your projects get bigger or more frequent, consider these power tools:
-
Router – For fast and repeatable dadoes, rabbets, and grooves.
-
Table Saw with Dado Blade – Makes clean dado and rabbet joints fast.
-
Biscuit Joiner – A must-have if you love edge joining panels.
👉 Click here to explore this complete small-shop setup → Ultimate Small Shop Guide →
Beginner-Friendly Tool Tips (from Real DIYers)
-
Tip 1: Spend more on your chisels and saws, and less on gimmicky gadgets.
-
Tip 2: Keep a sharpening stone or strop — dull tools are dangerous.
-
Tip 3: Store tools in a dry, organized space. Moisture warps blades and wood.
Join the community at DIY Wood Haven for tutorials and tool reviews from real builders.
DIY vs Full Workshop: What’s the Best Solution?
If you’re tight on space or budget, you don’t need a full garage workshop. Many successful hobbyists build furniture from a corner of their apartment with basic tools and a folding workbench.
| Setup | Pros | Cons |
|---|---|---|
| Minimal DIY Setup | Low cost, small footprint, mobile | More manual effort |
| Full Workshop | Faster, scalable, efficient | Expensive, space-hungry |
Looking for budget-friendly plans to build your own compact setup?
👉 Check out this small workshop blueprint for under $1,000 →
Still Not Sure Where to Start?
If you’re overwhelmed by choices, try this:
-
Pick one joint (e.g., butt or lap joint).
-
Buy only the tools needed for that joint.
-
Practice on scrap wood before building anything real.
Then move on to more advanced joints like mortise & tenon or dovetails once you’re confident.
Want some ideas for beginner-friendly builds?
👉 Check out these 10 easy woodworking projects →
Final Word on Wood Joinery Tools
You don’t need everything at once. But having the right tools for wood joinery techniques will make your woodworking journey more enjoyable, accurate, and rewarding.
Up next, we’ll explore the first joinery technique you should try — the butt joint. Simple, fast, and surprisingly versatile for quick builds and frames.
Chapter 3: Joinery Technique #1: Butt Joint (Simple but Essential)
What Is a Butt Joint in Wood Joinery Techniques?
The butt joint is often the very first joint beginner woodworkers learn — and for good reason. It’s the simplest of all wood joinery techniques, requiring nothing more than two pieces of wood joined at a right angle or in a straight line by “butting” them together. Think of a basic wooden picture frame or a quick DIY shelf. Those are classic examples of butt joints in action.
While it’s not the strongest joint out there, its ease of use and speed make it an excellent starting point for DIY enthusiasts. Whether you’re building a rustic planter box or a basic tool organizer, the butt joint gets the job done — fast.
Where You’ll Commonly Use Butt Joints in Woodworking
Butt joints are ideal for:
-
Basic box or frame construction
-
Wall-mounted shelves
-
Simple cabinets or storage cubes
-
Quick woodworking mockups and prototypes
You’ve likely already used this joint without knowing its name — that’s how intuitive it is. And when reinforced properly, it can be surprisingly durable for indoor furniture.
Pros & Cons of the Butt Joint (Is It Worth Learning?)
| Pros | Cons |
|---|---|
| Incredibly simple to make | Not very strong without reinforcements |
| Requires only a saw and screws | Doesn’t resist racking or twisting |
| Great for fast builds or beginners | Visible fasteners unless hidden or filled |
So, should you avoid it? Not at all. In fact, for many projects, it’s the best solution for quick assembly or as a foundation for more advanced joinery techniques.
“Every woodworker should master the butt joint — it’s the entry point into real-world joinery.” — Wood Magazine
Tools Needed to Create a Butt Joint (Minimal Setup)
One of the biggest perks of the butt joint is how little it asks of your tool kit:
🔧 Basic Tools:
-
Handsaw or circular saw
-
Tape measure
-
Pencil
-
Power drill or screwdriver
-
Wood glue (optional)
🔧 Optional Add-ons for Strength:
-
Clamps
-
Corner braces or metal brackets
-
Pocket hole jig (for hidden screws)
👉 Want a complete setup you can build in your garage or shed?
Check out this affordable small workshop plan →
How to Make a Butt Joint (Step-by-Step Guide)
Here’s a quick rundown for making a simple butt joint:
-
Measure and Cut:
-
Use a combination square to ensure clean 90° angles.
-
Cut your two pieces to the required length.
-
-
Apply Glue (Optional):
-
If extra strength is needed, apply wood glue to the edge before joining.
-
-
Align the Pieces:
-
Clamp them together or use a right-angle jig to hold them steady.
-
-
Drill Pilot Holes:
-
Prevents splitting when inserting screws.
-
-
Insert Screws or Fasteners:
-
Use wood screws for most materials.
-
Optional: Add brackets for reinforcement.
-
🛠️ Pro Tip: Use pocket holes with a jig for a cleaner look and stronger joint — Click here to explore this DIY pocket hole system →
Enhancing the Butt Joint: Tips for Strength & Aesthetics
A plain butt joint can be weak on its own, but with some simple enhancements, it becomes much more reliable:
-
Glue + Screw Combo: Increases the shear strength of the joint.
-
Use Corner Blocks or Cleats: Adds stability from the inside.
-
Pocket Hole Joinery: Hides screws and pulls joints tighter together.
-
Dowels or Biscuits: These can also reinforce butt joints without visible hardware.
👉 Want to see how this compares to other joints?
Read our complete guide to 10 types of woodworking joints →
Real-Life DIY Example: Building a Simple Storage Cube
In one beginner project, I built a basic cube organizer using only butt joints, a circular saw, and wood glue. After reinforcing it with pocket holes and painting it white, it’s still holding up years later in my entryway, loaded with shoes and bags. It wasn’t fancy, but it was functional — and a great confidence builder.
For plans like this and more,
👉 Check out these beginner-friendly woodworking blueprints →
When to Use (or Avoid) the Butt Joint
Use it when:
-
Speed and simplicity matter more than aesthetics.
-
You’re prototyping or mocking up a design.
-
Working on lightweight or temporary furniture.
Avoid it when:
-
You need a joint to hold heavy loads or resist racking.
-
The joint will be under constant movement or stress.
-
You want seamless, hidden joinery for a high-end project.
If you’re aiming for stronger connections, you’ll want to learn about mortise & tenon or dovetail joints — coming up next in this series.
Final Thoughts: Why the Butt Joint Belongs in Every DIYer’s Toolkit
Simple doesn’t mean useless. The butt joint may be the most basic of all wood joinery techniques, but it’s also the most accessible. It teaches you measurement, alignment, clamping, and fastener placement — the fundamentals of woodworking.
As you gain experience, you’ll naturally move into stronger and more elegant joints. But every skillset needs a solid foundation. For most woodworkers, that foundation starts with the humble butt joint.
👉 Ready to put your joinery skills to the test?
Explore these 10 beginner woodworking projects you can build this weekend →
Chapter 4: Joinery Technique #2: Dowel Joint – Stronger, Cleaner, and Beginner-Friendly
What Is a Dowel Joint in Wood Joinery Techniques?
A dowel joint is one of the most practical and accessible wood joinery techniques for beginners and hobbyists. It uses small, round wooden pins — called dowels — inserted into matching holes in two joining boards to align and reinforce the connection. The result? A clean, hidden joint with far greater strength than a simple butt joint.
Dowels can be used in furniture, cabinets, frames, or any project where appearance and strength both matter. If you’re looking for a next step up from butt joints without diving into traditional mortise and tenon, this is it.
Why Use Dowel Joints in DIY Woodworking?
Dowel joints offer an ideal balance between ease of use and structural integrity. They’re great for projects where you want the joint hidden, and they provide solid resistance to twisting or pulling apart.
✅ Key Benefits:
-
Stronger than nails or screws alone
-
No visible hardware — perfect for clean finishes
-
Repeatable accuracy using a dowel jig
-
Great for edge, corner, and face joints
“Dowel joinery gives you near-mortise-and-tenon strength with a fraction of the effort.” — Popular Woodworking
Tools You Need to Make a Dowel Joint
You don’t need expensive gear — just a few well-chosen tools will do:
🔧 Basic Tools:
-
Power drill or hand drill
-
Drill bit (same diameter as dowel pins)
-
Dowel pins (usually hardwood)
-
Wood glue
-
Clamps
🧰 Recommended Upgrade:
-
Dowel jig – for precise alignment of holes
👉 Want a reliable, budget-friendly dowel jig?
Click here to explore this recommended DIY solution →
How to Make a Dowel Joint (Step-by-Step Guide)
Follow these simple steps to master your first dowel joint:
-
Mark the Joint Area:
-
Align the two pieces of wood and draw reference lines across both.
-
-
Set Up the Dowel Jig:
-
Clamp the jig to the first board and drill the holes. Repeat for the second board using the same alignment marks.
-
-
Insert Dowels:
-
Add wood glue into the holes, then insert dowel pins.
-
-
Join the Boards:
-
Push the pieces together until the dowels seat fully. Wipe away any excess glue.
-
-
Clamp & Cure:
-
Clamp the joint and let the glue cure (usually 30–60 minutes depending on type).
-
🪵 For best results, use hardwood dowels slightly longer than the depth of one hole to ensure a tight, locked fit.
Common Dowel Joint Applications
Dowels are incredibly versatile. You’ll often see them used in:
-
Cabinet frames
-
Table legs
-
Bookshelves
-
Picture frames
-
Wooden toys
Need a solid weekend build that uses dowel joints?
👉 Check out these 10 easy DIY woodworking projects →
Dowel Joint vs Other Joinery Types: Pros & Cons
| Joint Type | Strength | Difficulty | Appearance |
|---|---|---|---|
| Butt Joint | Weak | Very Easy | Visible fasteners |
| Dowel Joint | Medium–High | Easy–Moderate | Hidden |
| Mortise & Tenon | Very High | Moderate–Hard | Hidden |
| Pocket Hole | Medium | Easy | Visible holes (unless plugged) |
As you can see, dowel joints hit a sweet spot — stronger than basic joints but easier to execute than traditional methods.
Pro Tips for Perfect Dowel Joinery
-
Use a dowel jig to avoid misaligned holes — this is crucial.
-
Drill to the correct depth using a stop collar or tape on your drill bit.
-
Clamp evenly to avoid misalignment when the glue sets.
-
Choose dowels made of hardwood like birch or oak — they hold better than soft pine.
🛠️ Want a complete beginner’s toolkit for less than $500?
Check out this affordable woodworking setup guide →
Real-Life DIY Example: Building a Bookshelf with Dowels
When I built my first 4-tier bookshelf, I didn’t want visible screws or brackets. Using dowel joints, I was able to keep everything hidden while maintaining a clean, minimalist look. The dowels aligned each shelf perfectly, and the glue bond kept it solid. It’s now holding over 80 pounds of books — no creaks, no wobble.
If you’re aiming for similar results, consider starting with simple flat-panel furniture and working your way up.
👉 Need plans? These step-by-step builds are a great place to start →
Dowel Joint Mistakes to Avoid (Learn the Easy Way)
-
Skipping the jig — freehand drilling is almost never precise enough.
-
Using short dowels — aim for at least 1–1.5 inches deep on each side.
-
No glue or too much glue — both extremes weaken the bond.
-
Poor wood alignment — always dry fit before applying glue.
Final Thoughts: Is the Dowel Joint Right for You?
If you’re ready to upgrade your woodworking skills, dowel joints are the next logical step after butt joints. They give your projects added strength, professional appearance, and cleaner results — all without a steep learning curve.
They’re affordable to try, easy to repeat, and scalable for everything from tiny boxes to full-sized furniture. Plus, once you master them, you’ll gain confidence for even more advanced wood joinery techniques.
Chapter 5: Joinery Technique #3: Mortise and Tenon – Traditional Strength That Lasts
What Is a Mortise and Tenon Joint? (And Why It’s Still the Gold Standard)
The mortise and tenon joint is one of the oldest and most trusted wood joinery techniques in woodworking history — and for good reason. This classic joint has been used for thousands of years in everything from timber-framed buildings to fine furniture. It connects two pieces of wood at a 90-degree angle by inserting a tenon (a tongue) into a corresponding mortise (a hole or slot).
Done right, this joint is rock-solid. It resists twisting, racking, and separation — all without a single screw. That’s why it remains the go-to for heavy-load furniture, doors, and structural frames.
Why Choose Mortise and Tenon Over Other Woodworking Joints?
If you’re looking to build something that lasts for generations, this is the best solution. While it takes more time and precision than simpler joints, the strength it offers is unmatched — especially when reinforced with glue or a peg.
💪 Key Benefits:
-
Extremely strong even without fasteners
-
Traditional craftsmanship appeal
-
Perfect for chairs, tables, beds, and frames
-
Adds real value to custom furniture builds
“Mortise and tenon joints are the backbone of heirloom-quality furniture.” — Fine Woodworking Magazine
Anatomy of the Mortise and Tenon Joint
Understanding the components helps you cut it accurately:
-
Tenon: The projecting tongue, cut on the end of one board.
-
Mortise: The slot or cavity that receives the tenon.
-
Shoulders: The flat faces that meet flush with the mating surface.
-
Cheeks: The wide faces of the tenon, which bear the load.
This design gives the joint superior mechanical strength — even before glue is applied.
Tools You’ll Need for Mortise and Tenon Joinery
While this joint can be made entirely by hand, power tools can help if you want speed or repeatability.
🛠️ By Hand:
-
Mortise chisel (or standard chisel set)
-
Mallet
-
Marking gauge
-
Tenon saw or dovetail saw
-
Square
-
Clamps
⚡ With Power Tools:
-
Drill press (for mortise hole starter)
-
Table saw (for tenon shoulders)
-
Router with a straight bit
-
Mortising machine (optional but effective)
👉 Want the full setup for under $1,000?
Explore this compact, budget-friendly workshop plan →
How to Make a Mortise and Tenon Joint (Step-by-Step)
-
Measure and Mark:
-
Use a marking gauge to lay out the width of the mortise and tenon.
-
Ensure a tight but not overly snug fit.
-
-
Cut the Mortise:
-
Drill out the bulk of the waste or chop it with a mortise chisel.
-
Square up the edges for a clean fit.
-
-
Cut the Tenon:
-
Use a saw or router to cut to the marked lines.
-
Test-fit frequently for accuracy.
-
-
Dry Fit:
-
Ensure the pieces fit together flush with no large gaps.
-
-
Glue and Clamp:
-
Apply glue inside the mortise.
-
Tap the tenon in, clamp, and let dry.
-
🔗 Need help picking the right wood for mortise work?
Check out our complete guide to wood types for furniture →
Best Use Cases for Mortise and Tenon Joints
This joint really shines in:
-
Chair legs and arms
-
Table frames
-
Workbenches
-
Doors
-
Heavy-duty storage units
In fact, if you’re building a shed or timber frame, this joint will show up again and again.
👉 See how you can build your own shed with this step-by-step plan →
Mortise and Tenon Variations to Know
You’ll encounter several versions of this joint depending on the application:
-
Through Tenon – Extends fully through the mortise.
-
Blind Tenon – Hidden inside the mortise, invisible from the outside.
-
Wedged Tenon – Expanded with a wedge for ultra-tight fit.
-
Haunched Tenon – Used in frame-and-panel construction.
Each variation is designed for a specific situation — but the concept remains the same: interlock for strength.
Real-World Example: A Rock-Solid Table Frame
When I built my first farmhouse-style table, I tried using pocket holes. It wobbled within a month. I rebuilt the frame using mortise and tenon joinery and immediately noticed the difference. The table hasn’t budged in over three years — despite kids, spills, and constant use.
If you’re serious about durability, there’s no substitute for the real thing.
Common Mistakes to Avoid
-
Loose fit: Leads to weak glue joints and movement.
-
Too tight: Risks splitting the wood during assembly.
-
Poor marking: Uneven shoulders = gaps.
-
Not drilling deep enough: Leaves the tenon proud or causes stress.
🛠️ Pro tip: Use a depth gauge or stop block when drilling mortises. Precision is everything here.
Dowel vs. Mortise and Tenon — When to Choose Which?
| Feature | Dowel Joint | Mortise & Tenon |
|---|---|---|
| Strength | Moderate | High |
| Skill level | Easy | Intermediate |
| Appearance | Hidden | Hidden or decorative |
| Tools needed | Minimal | Moderate |
If you’re building lightweight shelves, dowels may be enough. But for anything load-bearing, mortise and tenon is the smart choice.
Final Thoughts: Mastering the Mortise and Tenon Joint
This isn’t the quickest joint — but it might be the most important one in woodworking. If your goal is to build sturdy, heirloom-quality furniture that lasts, learning mortise and tenon joinery is a must.
It teaches precision. It demands patience. But it pays off with every slam of a chair leg or every push on a wobbly shelf that refuses to budge.
And once you master it? You’re no longer a beginner — you’re a woodworker.
Chapter 6: Joinery Technique #4: Dovetail Joint – Beautiful, Strong, and Built to Last
What Is a Dovetail Joint in Wood Joinery Techniques?
The dovetail joint is where precision meets beauty in woodworking. Known for its interlocking, trapezoid-shaped “tails” and “pins,” this joint is famous for strength, durability, and clean aesthetics — without the need for nails, screws, or brackets.
Dovetails are a hallmark of quality craftsmanship. From antique drawers to fine wooden boxes and keepsakes, they’re the sign of a builder who knows their stuff. And once you learn this timeless wood joinery technique, your work immediately stands out.
Why Dovetail Joints Are the Signature of Skilled Woodworkers
Unlike a simple butt joint, a properly cut dovetail joint resists being pulled apart — even without glue. That makes it ideal for box-style construction where strength and alignment are crucial.
✅ Key Benefits:
-
Extremely strong against tension and pull
-
Elegant and professional-looking
-
No visible fasteners
-
Ideal for drawers, boxes, and cabinet corners
“A clean dovetail joint shows both confidence and capability. It’s functional art.” — Woodsmith Magazine
Types of Dovetail Joints You Should Know
There’s more than one way to cut a dovetail — and each has its place:
-
Through Dovetail: Both sides are visible. Great for boxes and exposed joinery.
-
Half-Blind Dovetail: Tails are hidden from the front. Perfect for drawer fronts.
-
Secret Mitered Dovetail: Hidden completely. Used in high-end cabinetry.
-
Sliding Dovetail: Used to join shelves or dividers to cabinet sides.
Where Dovetail Joints Shine in DIY Projects
Dovetails are most often used in:
-
Drawers (especially hand-pulled)
-
Keepsake boxes
-
Cabinet and case construction
-
Fine furniture corners
-
Heirloom-quality builds
If you’re crafting a drawer set, dovetails give that premium touch and unbeatable durability.
👉 Looking for detailed woodworking plans that use dovetails?
Check out these beginner-to-pro level plans →
Tools Needed for Cutting Dovetail Joints
You can go full traditional or use modern tools — both work.
🛠️ Hand Tool Setup:
-
Dovetail saw or Japanese pull saw
-
Sharp chisels (¼” and ½” ideal)
-
Marking gauge
-
Dovetail marker or bevel gauge
-
Mallet
-
Clamps
⚡ Power Tool Add-Ons:
-
Dovetail jig + router (for perfect repeatability)
-
Bandsaw (for fast tail cutting)
👉 Want to explore tools without breaking the bank?
Click here for this small-shop setup guide →
How to Cut a Dovetail Joint by Hand (Step-by-Step)
-
Mark the Tails First:
-
Use a dovetail marker or angle gauge.
-
Draw tail shapes on the end grain.
-
-
Cut the Tails:
-
Use a dovetail saw to cut along the lines.
-
Remove waste with a chisel.
-
-
Transfer Tails to the Second Board:
-
Place tail board on pin board, mark outlines.
-
-
Cut the Pins:
-
Saw carefully to match the tail outline.
-
Remove waste precisely.
-
-
Test Fit:
-
Trim if needed. Aim for snug, not tight.
-
-
Glue & Clamp:
-
Apply wood glue, tap together, and clamp.
-
🪚 Pro Tip: Practice on scrap wood before committing to your final piece. Dovetails reward patience and precision.
Common Mistakes with Dovetail Joinery (And How to Avoid Them)
-
Forgetting to mark waste areas – leads to cutting the wrong side.
-
Cutting too deep or wide – results in loose joints.
-
Forcing the joint together – can split the wood.
-
Not keeping chisels sharp – tears fibers instead of slicing.
🛠️ Want to avoid all that? Consider a dovetail jig if you want speed and consistency.
👉 Click here to explore the most beginner-friendly jigs →
Real DIY Example: Heirloom Drawer Box with Dovetails
I built a keepsake box as a wedding gift — walnut and maple, finished in Danish oil. I cut the dovetails by hand, which took time, but the result was stunning. The bride cried when she saw it.
That’s the power of dovetails: they tell a story. They say, “This wasn’t rushed. This was crafted.”
Dovetail vs. Other Joints: Which One Wins?
| Joint | Strength | Appearance | Difficulty |
|---|---|---|---|
| Dovetail | Very High | Premium/Visible | Intermediate–High |
| Butt Joint | Low | Plain | Very Easy |
| Dowel Joint | Medium | Hidden | Easy |
| Mortise & Tenon | Very High | Hidden | Medium–Hard |
Dovetails take time. But the strength-to-weight ratio and stunning appearance are second to none.
Tips for Clean, Consistent Dovetails
-
Use a sharp marking knife instead of a pencil.
-
Always cut the tails first. It’s easier to trace than guess.
-
Test-fit often. Don’t rush glue-up.
👉 Want to practice on real projects?
Try these woodworking builds designed for skill progression →
Final Thoughts: Should You Learn Dovetail Joinery?
Absolutely. If you’re serious about taking your woodworking from “DIY” to “artisan,” dovetail joints are a rite of passage.
They demand precision. They teach patience. But they reward you with joints that are both mechanically strong and visually impressive — a rare combination in any craft.
Even if you mess up the first few, keep going. Because once you master dovetails, you’re not just building furniture — you’re building legacy.

Chapter 7: Joinery Technique #5: Box Joint – Fast, Strong, and Perfect for DIY Boxes
What Is a Box Joint in Wood Joinery Techniques?
Also known as a finger joint, the box joint is a series of interlocking “fingers” cut into two pieces of wood that fit tightly together at a right angle. It’s one of the most accessible wood joinery techniques for beginners, offering an excellent mix of strength, ease, and visual appeal.
Though it’s sometimes overshadowed by the dovetail joint, the box joint is faster to cut (especially with a jig) and ideal for square or rectangular assemblies like toolboxes, kitchen drawers, and decorative crates.
If you’re just getting into precision joinery, the box joint is one of the best places to start.
Why Use Box Joints for DIY Projects?
Box joints are not only strong and attractive — they’re highly repeatable. That makes them perfect for anyone who wants to build multiple boxes, bins, or frames with consistent, clean results.
✅ Key Benefits:
-
High tensile and racking strength
-
Easier to cut than dovetails
-
Visually striking with contrasting woods
-
Great for repetitive box-style builds
“The box joint is a power joiner’s best friend — fast, forgiving, and repeatable.” — Woodworker’s Journal
Where to Use Box Joints in Your Builds
Box joints work best in any right-angle corner joint application. You’ll see them used in:
-
Storage boxes and crates
-
Drawer construction
-
Toolboxes and organizers
-
Cabinet corners
-
Keepsake or recipe boxes
They’re also popular in gift builds, where contrasting wood tones highlight the joint’s layered look.
👉 Looking for plans that feature box joints?
Check out these affordable woodworking blueprints →
Box Joint vs. Dovetail Joint: What’s the Difference?
| Feature | Box Joint | Dovetail Joint |
|---|---|---|
| Ease of Cutting | Easier (especially with jigs) | Harder, requires precision |
| Appearance | Blocky, geometric | Elegant, angled |
| Strength | Very strong | Extremely strong |
| Skill Level | Beginner–Intermediate | Intermediate–Advanced |
If you like the idea of dovetails but want something easier and faster to execute, the box joint is your go-to.
Tools You’ll Need to Cut Box Joints
You can cut box joints by hand, but most woodworkers use jigs or table saws for perfect spacing.
🛠️ Power Tool Setup (Recommended):
-
Table saw with a dado blade
-
Box joint jig (can be homemade or store-bought)
-
Push block
-
Clamps
🛠️ Optional Hand Tool Setup:
-
Marking gauge
-
Chisel set
-
Dovetail saw or fine-tooth tenon saw
👉 Want to build your own jig for under $20?
Click here to explore this DIY workshop setup guide →
How to Cut a Box Joint (Step-by-Step)
-
Build or Set Up Your Jig:
-
A box joint jig holds the workpiece and guides the spacing of your cuts.
-
-
Mark and Test:
-
Test your cut width on scrap to ensure fingers fit snugly (not tight).
-
-
Cut the First Piece:
-
Use a dado blade to cut evenly spaced notches across the end grain.
-
-
Index the Second Piece:
-
Use the first board as a guide to offset your cuts and create the interlock.
-
-
Dry Fit and Adjust:
-
Fit the boards together — they should slide in with moderate pressure.
-
-
Glue and Clamp:
-
Apply wood glue, press together, and clamp until dry.
-
🪵 For best results, use matching or contrasting hardwoods for visual impact.
Common Box Joint Mistakes to Avoid
-
Cutting too loose: Leads to wobbly, weak joints.
-
Using the wrong blade width: Dado stack should match finger width precisely.
-
Skipping test cuts: Always test on scrap first.
-
Applying too much glue: Causes squeeze-out and mess.
🛠️ Pro Tip: Box joints benefit from clean, squared cuts. Dull blades or misaligned jigs will ruin your fit.
Box Joint Applications You Can Build Right Now
Here are a few beginner-friendly project ideas to try your first box joint:
-
A rustic wine crate using reclaimed pine
-
A small keepsake box with contrasting maple and walnut
-
A modular drawer system for your workbench
👉 Explore 10 beginner projects that teach real skills →
Box Joint Design Tip: Turn Utility into Art
Because box joints are symmetric and geometric, they can be a design feature. Use a dark hardwood like walnut for one board and a lighter maple for the other — the alternating pattern becomes a statement.
This works especially well for:
-
Kitchen drawer fronts
-
Display boxes
-
Handmade gifts and artisan items
Final Thoughts: Why Box Joints Belong in Your Skill Set
If you’re serious about woodworking, the box joint should be one of your first go-to joinery techniques. It’s easy to learn, rewarding to repeat, and adds a level of quality and strength to your builds that sets them apart.
And unlike some advanced joints, box joints can be made in minutes with the right jig — giving you speed and structure in one cut.
Chapter 8: Joinery Technique #6: Lap Joint – Simple, Strong, and Perfect for Framing
What Is a Lap Joint in Wood Joinery Techniques?
The lap joint is one of the most versatile and easy-to-learn wood joinery techniques, made by overlapping two wood pieces and removing material so they fit flush together. It’s called a “lap” because one board laps over the other, usually at a 50% thickness reduction on each side — creating a smooth, even surface at the joint.
Though often underestimated, the lap joint is surprisingly strong when glued properly and ideal for frames, workbenches, bracing, and structural projects where bulk and weight aren’t an issue.
Why Lap Joints Are a Go-To for DIY Framing Projects
For beginner and intermediate woodworkers alike, the lap joint is a quick win: easy to measure, simple to cut, and extremely functional. If you’re building large square frames, doors, or even fences, lap joints are your best friend.
✅ Key Benefits:
-
Very easy to cut with basic tools
-
Good strength for frames and flat panel joints
-
No special hardware needed
-
Works well with glue or screws
“Lap joints are the unsung heroes of woodworking. Understated, but tough as nails when done right.” – Family Handyman
Types of Lap Joints You Should Know
There are several variations, each suited for different tasks:
-
Half Lap Joint: Most common — both boards are notched halfway.
-
Cross Lap Joint: Boards intersect at 90°, often in X or grid shapes.
-
End Lap Joint: Overlaps the ends of boards (ideal for frames).
-
Mitered Lap Joint: Combines the strength of a lap with the aesthetic of a miter.
Each variation has the same goal: maximize surface area for glue and reduce movement between the boards.
Where Lap Joints Work Best
You’ll commonly use lap joints in:
-
Framing (e.g., picture frames, workbenches)
-
Doors and gates
-
Grid-style partitions or fences
-
Large-scale shelving
-
Basic furniture joints where screws aren’t ideal
👉 Want frame-based project plans that use lap joints?
Explore these woodworking plans designed for beginners →
Lap Joint vs. Other Basic Joinery Techniques
| Joinery Type | Strength | Ease | Visibility | Ideal For |
|---|---|---|---|---|
| Lap Joint | Medium–High | Very Easy | Visible or hidden | Frames, panels |
| Butt Joint | Low | Very Easy | Often visible | Temporary builds |
| Dowel Joint | Medium | Easy | Hidden | Boxes, light furniture |
| Box Joint | High | Moderate | Visible | Drawer corners |
If you’re building something large or structural, the lap joint often offers better support than dowels or screws.
Tools You Need to Cut Lap Joints
Lap joints don’t require fancy equipment, making them a beginner’s favorite.
🛠️ Hand Tools:
-
Marking gauge
-
Combination square
-
Crosscut saw or Japanese pull saw
-
Chisel and mallet
-
Clamps
⚡ Power Tools (Optional for Speed):
-
Table saw with dado blade
-
Circular saw with depth setting
-
Router with a straight bit
-
Band saw (for curved laps or notches)
👉 Want to start your own DIY shop without overspending?
Click here to explore this affordable small-shop setup →
How to Cut a Simple Half Lap Joint (Step-by-Step)
-
Measure & Mark:
-
Mark the overlapping length on both boards.
-
Use a square to ensure accuracy.
-
-
Set Your Depth:
-
Typically half the board’s thickness.
-
Mark on both sides using a marking gauge.
-
-
Remove Material:
-
Use a saw, router, or chisel to remove the waste.
-
Keep your cuts flat and clean.
-
-
Dry Fit the Joint:
-
Boards should lay flush with no rocking or gaps.
-
-
Glue and Clamp:
-
Apply glue, join the pieces, and clamp firmly.
-
-
Optional: Reinforce
-
For long-term strength, add screws, nails, or even dowels.
-
🪵 Pro Tip: Use contrasting wood types to make lap joints stand out as a design element — or match tones for a seamless look.
When to Use (or Avoid) Lap Joints
Use a lap joint when:
-
You need to connect flat boards at a 90° angle.
-
You want strong glue surface area.
-
You’re building a structure with visible joints.
Avoid it when:
-
You want completely hidden joinery.
-
You’re working with thin stock that can weaken from material removal.
👉 Need inspiration?
These 10 beginner woodworking projects are great places to practice lap joints →
Real-Life Example: Building a Simple Workbench Frame
When I built my first heavy-duty workbench, I used half lap joints for all four legs and cross beams. No metal brackets, no screws — just glue, clamps, and patience. It’s been rock-solid for three years, despite constant use, hammering, and sawing.
And the best part? I built the whole frame with a circular saw, chisel, and clamps.
Common Lap Joint Mistakes and Fixes
-
Cutting too deep — weakens structural integrity.
-
Not cleaning the surface — leads to poor glue bonding.
-
Skipping dry fit — causes alignment issues during glue-up.
-
Uneven thickness — results in wobbly or off-kilter joints.
Use a router or dado blade if you want clean, repeatable lap joints in under a minute.
👉 Click here to explore entry-level routers and jigs →
Final Thoughts: The Lap Joint’s Quiet Power
It may not have the flash of a dovetail or the elegance of a mortise and tenon, but the lap joint is one of the most reliable and repeatable wood joinery techniques you’ll ever use.
It’s forgiving to beginners, scalable for larger builds, and strong enough for serious use — a perfect blend of function and form for anyone learning the craft.
Chapter 9: Joinery Technique #7: Biscuit Joint – Invisible Strength for Perfect Panels
What Is a Biscuit Joint in Wood Joinery Techniques?
The biscuit joint is a modern, efficient, and surprisingly strong wood joinery technique that connects two pieces of wood edge-to-edge using thin, oval-shaped wooden “biscuits” inserted into matching slots. Once glued, the biscuit swells and locks the joint tightly.
Ideal for tabletops, cabinets, and wide panels, biscuit joints are an excellent choice when you want alignment, hidden strength, and speed — especially in plywood or composite boards where other joints may fail.
Why Biscuit Joints Are a Favorite in Modern Woodworking
Biscuit joints don’t offer as much mechanical strength as dovetails or mortise and tenon, but what they do offer is simplicity, speed, and near-invisible joinery — with plenty of holding power for flat surfaces.
✅ Key Benefits:
-
Aligns boards perfectly during glue-up
-
Fast and repeatable with a biscuit joiner
-
No visible fasteners or nails
-
Ideal for joining plywood, MDF, or solid wood panels
“Biscuit joinery is the secret sauce behind smooth, seamless tabletops.” – Popular Woodworking
Common Biscuit Joint Applications
This joinery method is commonly used in:
-
Panel glue-ups (e.g., tabletops, desktops)
-
Cabinet carcasses
-
Face frames
-
Shelving joints
-
Picture frame alignment
If you’re assembling wide boards or edge-joining planks, biscuits help with alignment and keep the surface flush.
👉 Looking for furniture plans that use biscuits?
Check out these detailed woodworking blueprints →
Biscuit Joint vs. Other Woodworking Joints
| Joinery Type | Strength | Speed | Best Use |
|---|---|---|---|
| Biscuit Joint | Medium | Very Fast | Panels, cabinets |
| Dowel Joint | Medium–High | Moderate | Boxes, drawers |
| Lap Joint | Medium | Easy | Frames |
| Mortise & Tenon | High | Slow | Chairs, tables |
Biscuits don’t replace structural joinery, but they excel in alignment and surface bonding.
Tools You’ll Need for Biscuit Joinery
The main tool required is a biscuit joiner (also called a plate joiner), which cuts precise, football-shaped slots into your wood.
🛠️ Essentials:
-
Biscuit joiner
-
Wood glue
-
Biscuits (#0, #10, or #20 depending on board thickness)
-
Clamps
-
Pencil or layout tool
👉 Need a biscuit joiner that won’t destroy your budget?
Click here to explore top-rated beginner-friendly tools →
How to Make a Biscuit Joint (Step-by-Step)
-
Mark Your Alignment:
-
Line up the two boards and draw layout marks across both.
-
-
Set Your Biscuit Joiner:
-
Choose the correct biscuit size and blade depth.
-
-
Cut the Slots:
-
Align the tool’s center to your marks and cut matching slots in both boards.
-
-
Glue & Insert Biscuits:
-
Add wood glue in the slots and on the edges.
-
Insert biscuits into one side.
-
-
Join & Clamp:
-
Push the boards together.
-
Clamp evenly across the joint and let cure.
-
🪵 Pro Tip: Always do a dry fit to ensure the biscuits align perfectly — minor misalignment leads to uneven surfaces.
Which Biscuit Size Should You Use?
| Biscuit Size | Typical Board Thickness |
|---|---|
| #0 | 5⁄8″ to ¾″ |
| #10 | ¾″ to 1″ |
| #20 | 1″ and up |
For most furniture panels and shelves, #20 biscuits are the safest bet.
Biscuit Joint Limitations (What It’s Not Great For)
-
Not suitable for joints under heavy load or tension
-
Doesn’t replace structural joinery like mortise & tenon
-
Requires a biscuit joiner tool
So if you’re building a table frame or chair leg — stick with a stronger joint. But for tabletops or shelves? Biscuits are quick and clean.
Real-Life Example: Creating a Seamless Tabletop
I once built a 6-foot dining table using biscuit joints to align five walnut boards. Each board was perfectly flush thanks to the biscuits — no sanding nightmare, no shifting during glue-up. The joint lines are invisible, and three years later, that top still looks brand new.
👉 Want to build your own?
See this step-by-step DIY furniture plan collection →
Common Biscuit Joinery Mistakes (And How to Avoid Them)
-
Misaligned marks = crooked joints
-
Too much glue = biscuit swelling too early
-
Clamping too hard = boards bow upward
-
Skipping dry fit = surprises later
Use light to moderate clamp pressure, and keep your glue near the slots only — not across the entire board edge.
Bonus: Can You Make Biscuit Joints Without a Biscuit Joiner?
Technically yes — with a router and slot cutter — but it’s difficult to get the depth and alignment just right. A biscuit joiner is designed specifically for this task and is well worth the investment for serious DIYers.
👉 Click here to explore beginner tool bundles →
Final Thoughts: Why Every Woodworker Should Learn Biscuit Joinery
Fast, flush, and foolproof — the biscuit joint is one of the easiest wood joinery techniques to master for edge-gluing and aligning boards. It’s not flashy, but it’s a serious time-saver that makes your work cleaner and more professional.
And once you experience a glue-up with zero sliding and perfect alignment, you’ll never go back.

Chapter 10: Joinery Technique #8: Bridle Joint – Open-Ended Strength with a Traditional Twist
What Is a Bridle Joint in Wood Joinery Techniques?
The bridle joint is a traditional open-faced joinery method that combines strength, simplicity, and visibility. Similar to a mortise and tenon joint, a bridle joint features a tenon cut on the end of one board that fits into an open mortise (or slot) in another. But unlike the mortise and tenon, the bridle joint’s components are fully visible, making it a popular choice when strength and design are both priorities.
This wood joinery technique is especially useful in frame construction — such as table legs, door frames, or large outdoor furniture — where the joint needs to handle high stress and support.
Why Bridle Joints Deserve a Spot in Your Skillset
Bridle joints offer a strong mechanical connection with maximum glue surface area. They’re easy to lay out, work well for wide boards or posts, and are ideal for visible, bold designs.
✅ Key Benefits:
-
Stronger than a lap or butt joint
-
Simpler than mortise and tenon
-
Easier to cut accurately by hand or machine
-
Aesthetic appeal with contrasting woods
“Bridle joints are a blend of brute strength and traditional elegance — easy to learn, hard to beat.” — Woodcraft Magazine
Where to Use Bridle Joints in DIY Builds
Bridle joints are perfect for frame-style woodworking or anywhere you need a strong corner or T-connection.
Use them in:
-
Table and bench leg-to-rail joins
-
Workbenches and tool stands
-
Doors and cabinet frames
-
Outdoor furniture
-
Window or gate frames
👉 Want step-by-step plans that include bridle joints?
Explore these functional furniture builds with diagrams →
Bridle Joint vs. Mortise & Tenon: What’s the Difference?
| Feature | Bridle Joint | Mortise & Tenon |
|---|---|---|
| Visibility | Exposed | Hidden |
| Ease of Cutting | Easier | Moderate |
| Strength | High | Very High |
| Best Use | Frames, furniture legs | Structural and high-stress joints |
The bridle joint is often used when strength matters and you want the joinery to be a visual element, especially with contrasting wood tones.
Types of Bridle Joints
-
Corner Bridle Joint: Used to join two boards at a 90° angle, such as in table frames or bench aprons.
-
T-Bridle Joint: Used to connect a horizontal rail to a vertical leg or post.
-
Mitered Bridle Joint: Combines a mitered edge with the bridle strength — ideal for picture frames with hidden strength.
Tools You’ll Need to Cut a Bridle Joint
Bridle joints can be done by hand or with power tools depending on your setup.
🛠️ Hand Tools:
-
Marking gauge and knife
-
Handsaw or Japanese pull saw
-
Chisel set
-
Mallet
-
Square
-
Clamps
⚡ Power Tool Setup:
-
Table saw with tenon jig or dado blade
-
Router table with straight bit
-
Bandsaw (for tall or thick joints)
👉 Want to build your own tool bench with bridle joints?
Check out this complete beginner-to-pro workshop plan →
How to Cut a Bridle Joint (Step-by-Step)
-
Mark Your Layout:
-
Use a square and marking gauge to mark the tenon and mortise cuts.
-
-
Cut the Mortise (Open Slot):
-
Remove material between your marked lines using a saw or dado blade.
-
Clean the sides with a chisel for precision.
-
-
Cut the Tenon:
-
Saw the sides and shoulders of the tenon carefully.
-
Trim to fit snugly — not tight.
-
-
Dry Fit and Adjust:
-
Make sure the boards sit flush and square.
-
-
Glue and Clamp:
-
Apply glue to both mating surfaces.
-
Clamp evenly and let cure.
-
🪵 Pro Tip: Use the tenon piece as a visual design feature by selecting contrasting woods or rounding the edges after glue-up.
Common Bridle Joint Mistakes to Avoid
-
Loose tenons = sloppy joints
-
Overcutting the mortise = visible gaps
-
Skipping dry fit = poor alignment
-
Not squaring the shoulders = weakened joint
Take your time on layout — the shoulders and cheek fit determine the strength and look of the final piece.
Real DIY Example: Strong Workbench Legs with Bridle Joints
When I built my current workbench, I used corner bridle joints to attach the legs to the upper and lower rails. It was my first time using this method, and I was surprised by the rigidity of the frame — even before glue. Once clamped and cured, the bench became a rock-solid base for all my future builds.
And the exposed joints? They’ve drawn compliments from every woodworker who’s seen it.
When to Use a Bridle Joint (and When to Skip It)
Use a bridle joint when:
-
You want a strong visible joint in a frame.
-
You’re working with thick stock or wide posts.
-
You want an easier alternative to mortise and tenon.
Avoid it when:
-
The joint will be under excessive torque or tension without reinforcement.
-
You want completely hidden joinery.
Final Thoughts: Bridle Joints Build Confidence and Strength
The bridle joint is a powerful blend of simplicity, strength, and style. It’s easier to cut than a mortise and tenon, more robust than a lap joint, and visually bold when done right.
Whether you’re building furniture, frames, or a heavy-duty bench, adding this joint to your toolkit expands your capabilities — without requiring high-end tools or years of practice.
Chapter 11: Joinery Technique #9: Japanese Kumiko – Precision, Patience, and Patterned Perfection
What Is Kumiko in Wood Joinery Techniques?
Kumiko is a traditional Japanese wood joinery technique that involves cutting and fitting small, delicate pieces of wood into intricate, repeating geometric patterns — all without nails, screws, or glue. The pieces are carefully notched and pressure-fitted together with such precision that the final panel appears seamless.
Unlike most joints built for brute strength, Kumiko is an artform. It blends joinery, symmetry, and cultural heritage into woodworking that’s decorative, meditative, and deeply impressive.
If you’re looking for a skill that tests your precision and rewards patience, Kumiko joinery is the ultimate next-level technique.
Why Kumiko Joinery Matters (More Than Just Decoration)
While Kumiko may seem purely aesthetic, it teaches essential woodworking skills:
-
Measuring with extreme accuracy
-
Cutting fine joints without chipping
-
Planning and patience in layout
-
Working with grain direction and light
✅ Key Benefits:
-
Stunning, complex designs with no fasteners
-
Incredible accuracy and visual harmony
-
Lightweight, strong, and flexible
-
Can be done with basic hand tools
“Kumiko is not just joinery — it’s mindfulness in wood.” — Fine Woodworking Magazine
Where Kumiko Patterns Are Used
Kumiko panels are traditionally used in Japanese architecture and design, especially in shoji screens, room dividers, and cabinet inserts.
You can also use Kumiko in:
-
Wall art or decorative panels
-
Furniture doors
-
Lamps and light diffusers
-
Display boxes or gift items
👉 Want project plans that incorporate traditional and modern joinery?
Check out these high-quality furniture and decor plans →
Common Kumiko Patterns You Can Try
-
Asa-no-ha (Hemp Leaf) – One of the most popular, a star-like pattern symbolizing growth and protection.
-
Kaku Asa-no-ha (Square Hemp Leaf) – A variation used in rectangular panels.
-
Sakura (Cherry Blossom) – A more advanced, curved form pattern.
-
Tsunagi (Linked) – Continuous diamond or square interlocks.
Each pattern has cultural meaning and is carefully calculated for balance and flow.
Tools You’ll Need for Kumiko Joinery
Kumiko doesn’t require power tools — precision and patience matter more than speed.
🛠️ Hand Tools:
-
Small plane (e.g., block plane or Japanese kanna)
-
Fine back saw or dozuki saw
-
Marking knife and straightedge
-
Chisels (6mm–12mm)
-
Kumiko jigs (optional, but helpful)
-
Small clamps or weights
👉 Want to build a Japanese-style mini workbench for hand tool precision?
Explore this small-shop setup optimized for fine joinery →
How to Build a Basic Kumiko Panel (Beginner-Friendly Steps)
-
Cut the Frame:
-
Build a square or rectangular outer frame using miters or half-laps.
-
-
Rip and Plane Your Kumiko Strips:
-
Uniformity is key — plane to exact thickness for clean fits.
-
-
Lay Out and Cut the Grid:
-
Mark centerlines and spacing.
-
Cut precise notches for cross-lapping the inner grid.
-
-
Choose Your Pattern:
-
Use jigs to cut angled ends for your chosen design (e.g., 45°, 67.5°).
-
-
Dry Fit Everything:
-
There should be no gaps, no glue needed — the pressure holds it all.
-
-
Assemble the Full Panel:
-
Insert the pattern pieces gently, working from the center out.
-
🪵 Pro Tip: For beginners, start with simple Asa-no-ha patterns and practice on softwoods like cedar or basswood.
Common Mistakes to Avoid in Kumiko Joinery
-
Uneven thickness – leads to misalignment
-
Over-tight joints – can crack delicate strips
-
Skipping dry fits – reveals errors too late
-
Ignoring grain direction – causes weak or brittle pieces
Use a shooting board and plane for micrometer-level consistency. Kumiko is about sub-millimeter precision — every 0.1mm counts.
Real DIY Story: First Kumiko Panel, Big Lessons
When I built my first Kumiko panel (a 9″ × 12″ Asa-no-ha pattern), I had to remake half the pieces — not because they broke, but because they almost fit. That lesson in “almost” taught me more about measurement and patience than any power tool ever did.
The finished panel became the centerpiece of a wall-mounted light. The moment it lit up, I was hooked.
👉 Want your first Kumiko piece to be something practical?
These creative project plans include Kumiko lighting and panels →
Kumiko in Modern DIY: Why It’s Trending
Woodworkers today are rediscovering Kumiko not just for its beauty, but because:
-
It requires minimal tools
-
It creates high-value decor with scrap wood
-
It sells well at craft fairs and online
-
It’s a deeply meditative, rewarding process
In short: it’s a timeless technique that’s modern-maker friendly.
Final Thoughts: Kumiko Is Joinery for the Soul
Among all wood joinery techniques, Kumiko stands apart — not for brute strength, but for beauty, balance, and deep satisfaction. It’s a practice that sharpens your hands, your eyes, and your patience.
And while it may seem intimidating at first, you don’t need to be a master carpenter to start — just a curious craftsperson with the will to measure twice (or thrice) and cut once.

Chapter 12: Joinery Technique #10: Rabbet and Dado – Clean Grooves for Strong Cabinetry
What Are Rabbet and Dado Joints in Wood Joinery Techniques?
Rabbet and dado joints are groove-based wood joinery techniques commonly used in cabinetry, bookshelves, drawer construction, and plywood-based furniture. These joints don’t interlock like dovetails or use hidden elements like dowels — instead, they rely on carefully cut grooves to nest one board securely into another.
-
A rabbet is a two-sided notch cut along the edge or end of a board.
-
A dado is a three-sided groove cut across the grain in the middle of a board.
They’re often used together in box or case construction — with dados holding shelves and rabbets forming back panels or drawer bottoms.
Why Rabbet and Dado Joints Are Essential in Modern Woodworking
Fast to cut, easy to align, and ideal for sheet goods like plywood or MDF, rabbet and dado joints are a staple in any woodworker’s toolkit — especially for furniture builders.
✅ Key Benefits:
-
Fast and repeatable with power tools
-
Strong glue surface area
-
Perfect for cabinets, shelving, and drawer boxes
-
Beginner-friendly but professional quality
“If you’re building cabinets without dados and rabbets, you’re missing out on efficiency and strength.” – Fine Homebuilding
Where Rabbet and Dado Joints Shine
You’ll find these joints used in:
-
Bookshelves
-
Drawer and cabinet carcasses
-
Back panels of furniture
-
Plywood builds
-
DIY home storage solutions
👉 Want to build shelves, cabinets, or storage units like a pro?
Check out these functional woodworking plans →
Rabbet Joint vs. Dado Joint: Key Differences
| Feature | Rabbet Joint | Dado Joint |
|---|---|---|
| Location | Cut on the edge | Cut in the middle |
| Shape | L-shaped notch | U-shaped groove |
| Use Case | Back panels, drawer bottoms | Shelves, dividers |
| Cutting Direction | Along the grain | Across the grain |
They’re often used together — for example, a rabbeted back panel fitted into dadoed side panels for a rock-solid cabinet box.
Tools You Need to Cut Rabbet and Dado Joints
While both joints can be cut with hand tools, power tools make them faster and more precise.
🛠️ Power Tools:
-
Table saw with dado blade stack
-
Router with straight bit
-
Circular saw with guide rail (for basic dado/rabbet cuts)
🛠️ Hand Tools (for fine-tuning):
-
Shoulder plane or router plane
-
Chisel set
-
Marking gauge
👉 Looking for affordable power tools that make clean dados and rabbets easy?
Explore this DIY-friendly workshop setup →
How to Cut a Rabbet Joint (Step-by-Step)
-
Mark the Depth and Width:
-
Typically the depth is ¼ to ⅜ inch.
-
-
Set the Blade or Router Bit:
-
Use a fence or guide for clean edges.
-
-
Cut Along the Edge:
-
Remove the L-shaped notch in two passes (shoulder first, then depth).
-
-
Dry Fit Your Panel:
-
Ensure it sits flush with no gaps.How to Cut a Dado Joint (Step-by-Step)
-
-
Measure the Shelf Thickness:
-
Match the dado width precisely to avoid sloppy fits.
-
-
Layout and Mark:
-
Use a square to mark the start and stop of the dado.
-
-
Use a Dado Blade or Router:
-
Make a single-pass cut (with router) or multiple passes (with standard blade).
-
-
Dry Fit:
-
Shelf should slide in snug — not tight.
-
🪵 Pro Tip: Always test your settings on scrap wood. A dado that’s too loose can’t be fixed after glue-up.
When to Use Rabbet and Dado Joints
Use a dado when:
-
Installing a horizontal shelf into a vertical panel
-
You need strong support across the grain
-
Building plywood cabinets or bookshelves
Use a rabbet when:
-
Joining the back panel of a cabinet or box
-
Insetting drawer bottoms
-
Framing glass or plywood in a groove
👉 Want project plans that use these techniques?
Start with these 10 easy builds perfect for beginners →
Common Mistakes to Avoid
-
Cutting the groove too wide — results in loose, wobbly joints
-
Inconsistent depth — can cause shelves to sit uneven
-
Skipping dry fits — leads to frustration during glue-up
-
Using the wrong glue — PVA works best; avoid expanding glues
👉 Want to learn about wood finishes that pair well with plywood and rabbet joints?
Check out our full guide to polyurethane finishes →
Real DIY Example: Building a Cabinet with Dado & Rabbet Joints
When I built a freestanding bookshelf for my home office, I used dado joints to hold each shelf and rabbet joints for the plywood back panel. Everything aligned perfectly, and the piece went together in under an hour — with no visible screws.
It’s still holding heavy loads of books, and the joints are as tight as the day I built it. Functional, clean, and fast — exactly what DIYers want.
Final Thoughts: Rabbet and Dado Are the Backbone of Plywood Builds
While they may not be flashy, rabbet and dado joints are essential for any woodworker looking to build durable, square, and strong furniture — especially with sheet goods. They’re easy to cut, easy to scale, and incredibly effective when paired with quality glue and precise layout.
Mastering these joints means you’re no longer just building boxes — you’re building reliable, professional-grade furniture with confidence.
✅ You’ve Completed the 10 Essential Wood Joinery Techniques!
Want the entire guide as a printable reference?
👉 Download the full PDF here – Wood Joinery Techniques Cheat Sheet (Link to your lead magnet)
👉 Need tools or plans to bring these joints to life?

Conclusion: Build Smarter, Stronger, and More Skillfully With Joinery
You’ve just explored 10 essential wood joinery techniques — from the humble butt joint to the elegant dovetail, the rugged mortise and tenon to the artistic Kumiko. Whether you’re building furniture, cabinetry, decor, or your first real project, these joints are more than just connections — they’re the framework of craftsmanship.
Here’s what to take away:
-
Start simple, with butt or lap joints — master the basics first.
-
Level up with dowels, box joints, and mortise & tenon as your accuracy improves.
-
Explore artistry with dovetails and Kumiko to give your work personality and value.
-
Build smarter, not harder — use rabbet and dado joints for fast, sturdy results.
And remember: even the most experienced woodworkers return to these fundamentals again and again. Why? Because strong joinery means long-lasting builds — and satisfied makers.
Whether you’re setting up your first shop, crafting a family heirloom, or launching a side hustle, the right joint can turn any build into something exceptional.
🛠️ Ready to Put These Joints to Work?
Start with one project. One joint. One tool.
The rest builds from there — literally.
Affiliate Disclosure
Some of the links in this article are affiliate links, which means if you click through and make a purchase, we may earn a small commission — at no additional cost to you. These links support the blog and allow us to continue creating free, high-quality woodworking content.
We only recommend tools, plans, and resources we trust and believe will truly help you grow your skills and projects.
Thank you for supporting independent DIY education — one joint at a time.
Please log in to access your exclusive content.
Don’t have an account? Click the “Register” button below to sign up.
Related Posts