Setup Woodworking Shop: Layouts and Essential Tools
Have you ever wished you could setup woodworking shop space that feels efficient, organized, and built for real projects instead of frustration? If you are ready to setup woodworking shop layouts that save time and make every cut smoother, you are in the right place. Many beginners struggle not because they lack skill, but because their workspace slows them down. A smart shop layout improves workflow, boosts safety, and makes woodworking far more enjoyable.
Whether you are working in a garage, basement, or a small corner of your home, the way you arrange your tools and plan your workflow matters. With the right approach, even a tight space can feel like a pro workshop. This guide will walk you through layout ideas, essential tools, and practical setups that help you start building with confidence.
Let’s move into the core steps that will help you design a woodworking shop that fits your space, budget, and goals.

Chapter1: What You Need Before You Setup Woodworking Shop Space (Planning Essentials)
Setting up your first workshop can feel overwhelming. The good news is that a solid plan eliminates most early frustrations and helps you build a workspace that feels organized from day one. Before you setup woodworking shop areas for cutting, assembly, or finishing, you need to understand the space itself. The goal is not perfection. The goal is creating a shop that works for your projects, budget, and tools. Whether you are in a single garage bay, basement corner, or outdoor shed, the early decisions you make will shape everything that follows.
A well-planned workspace saves time, reduces mistakes, and dramatically boosts safety. Even experienced woodworkers agree that the layout matters just as much as the tools. Publications such as Fine Woodworking and the Woodwork Institute repeatedly emphasize that good lighting, airflow, and electrical safety anchor every productive shop. These guidelines are not theory—they come from decades of real-world practice.
Below, we break down the three foundational steps: choosing the right space, ensuring electrical readiness, and setting up a safe airflow system.
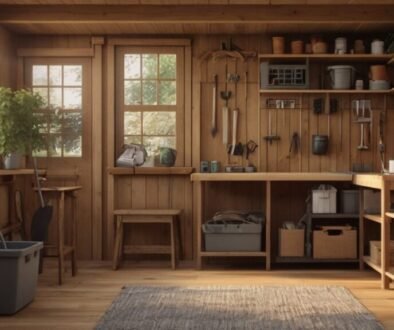
Choosing the Right Space for Your Woodworking Shop Setup
Your chosen workspace determines how efficient your shop will feel. For beginners, this often starts with a garage. It offers flexibility, decent ventilation, and enough room for a table saw or workbench. But basements, outdoor sheds, and shared multi-use rooms can also work with the right plan.
Key factors to evaluate early:
-
Flooring: Concrete floors are ideal because they stay level and withstand heavy tools.
-
Ceiling height: Essential for moving long boards and operating tools safely.
-
Noise considerations: Basements help with neighbors, garages help with dust.
-
Access: Can you bring in sheet goods? Can you remove sawdust easily?
If you’re working with limited space, building simple mobile carts can give your tools flexibility. Small shops often thrive with foldable workstations and wall-mounted storage. For more ideas, browse beginner-friendly projects inside our guide:
👉 10 Easy Builds for Beginners
If you dream of upgrading to a full shed workshop later, here is an excellent resource:
👉 See how you can build your own shed with this step-by-step plan.
Build Your Own Shed (MyShedPlans)
Power Requirements and Electrical Safety in a Woodworking Shop Setup
When you setup woodworking shop tools such as a planer, jointer, or table saw, power becomes a top priority. Many homes only provide 15-amp circuits in garages, which may not support multiple tools running at once.
What to check before you begin:
-
Whether the circuit can handle 20 amps
-
The distance between outlets (aim for multiple along each wall)
-
If your dust collector requires a dedicated line
-
Whether a licensed electrician is needed for upgrades
Improper electrical planning is one of the most common beginner mistakes. According to safety recommendations from OSHA and major woodworking communities, overloaded circuits significantly increase fire risk. A simple upgrade, such as adding GFCI outlets or running an additional circuit, often becomes the best solution for both safety and workflow.
If you’re exploring compact workshop ideas that are optimized for smart electrical layout, this resource is extremely useful:
👉 Discover small-shop optimization strategies here.
Ultimate Small Shop Guide
Ventilation, Dust Collection, and Airflow: The Hidden Backbone of Any Shop
Every woodworker learns quickly that dust is more than a nuisance—it’s a real hazard. Fine airborne dust from sanding and cutting can stay suspended for hours. When planning to setup woodworking shop equipment, integrate airflow early. A clean shop extends tool life, protects your lungs, and improves finishes.
Simple ways to improve air quality:
-
Use a shop vacuum with a HEPA filter for handheld tools
-
Install a basic dust collection system for stationary tools
-
Add a box fan with a furnace filter to scrub the air
-
Keep at least one window or door open when possible
A dust collection system does not need to be expensive. Many hobbyists start with a used single-stage collector and upgrade later. The DIY community consistently recommends starting small, then replacing hoses or filters as your setup grows.
If you want guidance on wood finishing once your workspace is clean and dust-free, explore this related post:
👉 Top Wood Finishing Techniques for a Pro Look
And if you’re thinking of creating a more advanced or standalone workshop structure, here’s a helpful resource:
👉 Click here to explore this recommended DIY solution.
Tiny House Made Easy
Pros and Cons: DIY Setup vs Pre-Built Solutions
DIY Setup Pros
-
Fully customizable for your workflow
-
Lower cost, especially with used tools
-
Easy to expand as your skills grow
DIY Setup Cons
-
Requires planning and troubleshooting
-
Electrical upgrades may require professional help
-
Dust collection can get complicated as tools multiply
Pre-Built Workshop Solutions Pros
-
Fast setup
-
Designed with airflow and layout in mind
-
Clear instructions and structured workflow
Pre-Built Cons
-
Higher upfront cost
-
Less flexibility for unusual spaces
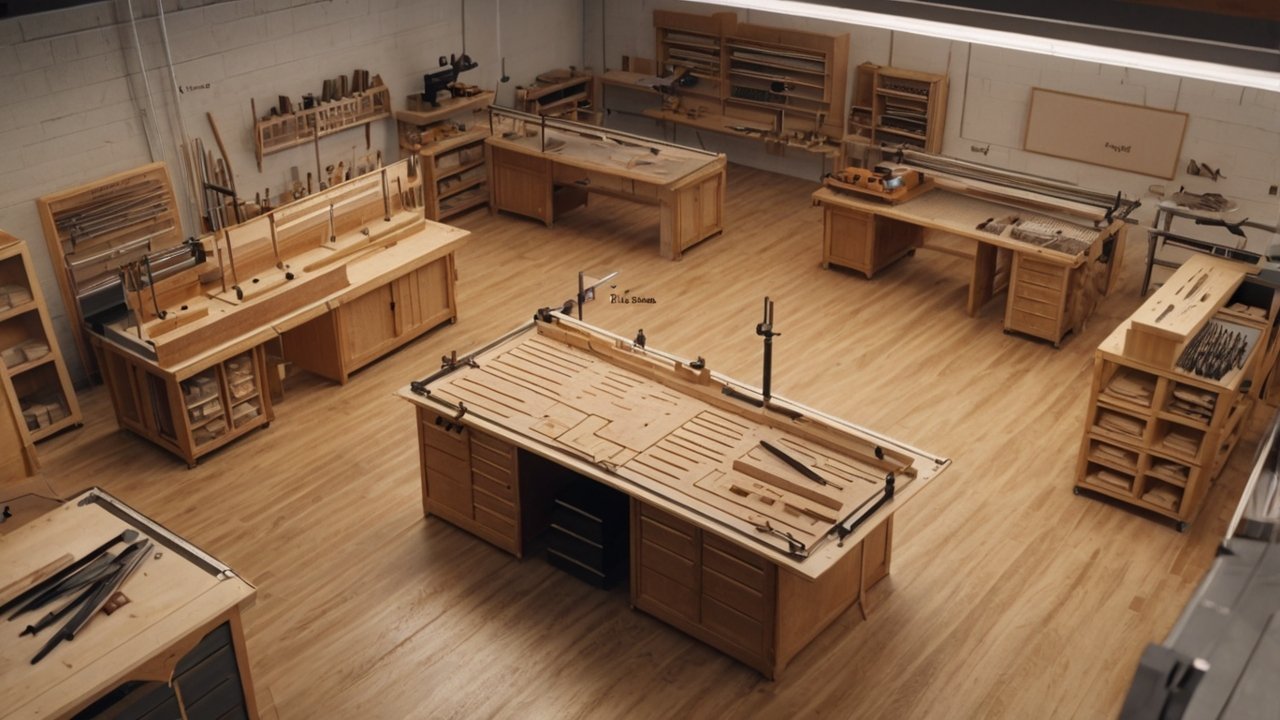
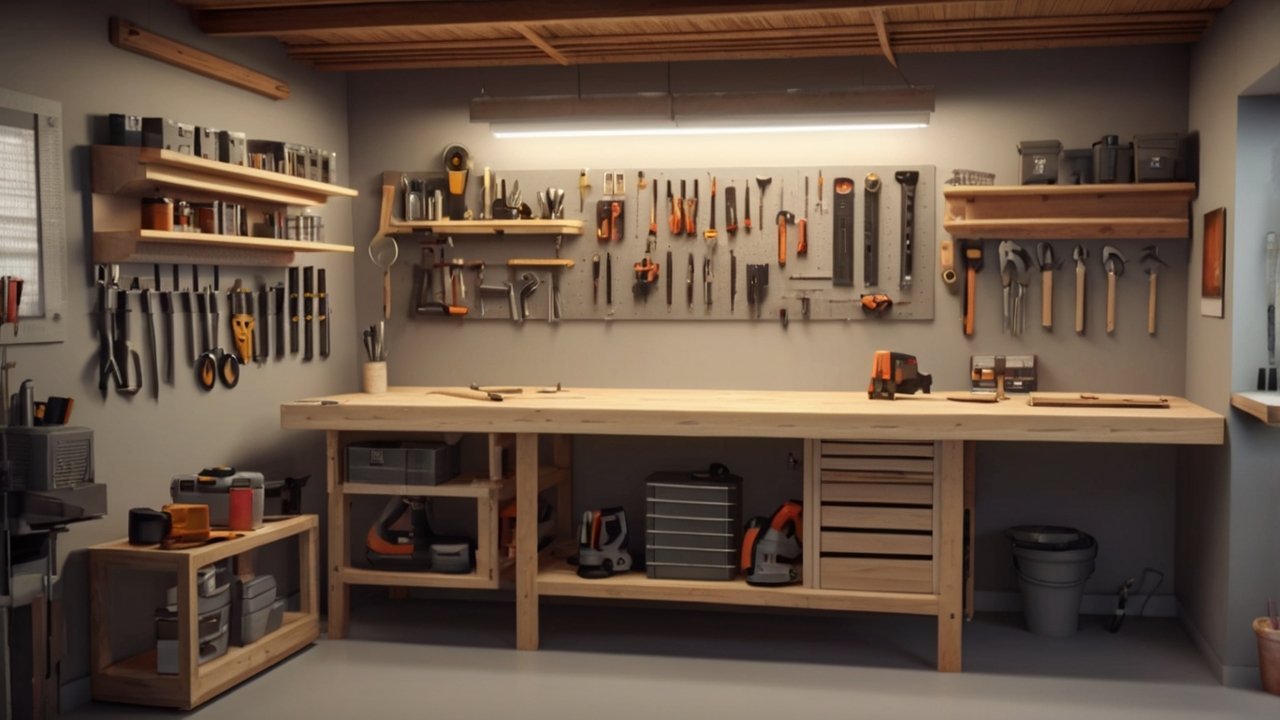
Chapter 2: Woodworking Shop Layout Basics: How to Setup Woodworking Shop Workflow Zones That Actually Work
A woodworking shop layout is more than placing tools wherever you have space. The way you position your tools, workbench, storage, and finishing areas decides how smooth every project feels. When you setup woodworking shop layouts with clear workflow zones, you reduce walking time, cut down on mistakes, and create a shop that supports your creativity rather than slowing it down.
Professional builders and publications like Fine Woodworking often note that the most efficient shops follow a predictable flow: rough cutting, shaping, assembly, and finishing. This flow mirrors how most projects move from raw lumber to final coat. When you organize your shop around these stages, everything feels faster and more intuitive.
Below you will find a practical, beginner friendly guide to setting up a smart layout, along with tool positioning tips and space saving strategies that real DIYers use in small shops.
Understanding Workflow Zones Before You Setup Woodworking Shop Layouts
A well designed woodworking layout centers on movement. You should be able to walk from tool to tool without awkward turns or blocking pathways. Even in small or shared spaces, you can create zones that follow the project lifecycle.
The Four Core Workflow Zones
1. Lumber Breakdown Zone
This is where you cut rough boards to manageable size. Keep your table saw, miter saw, or circular saw here. You need clear infeed and outfeed space, so avoid placing these tools against a corner.
2. Shaping Zone
Planers, jointers, routers, and sanders belong here. Grouping them together reduces dust movement and makes it easy to refine boards in sequence.
3. Assembly Zone
This is your open area for clamping, gluing, and building. Your workbench is the heart of this zone. Many beginners underestimate how much room assembly needs. If possible, give yourself at least a few feet around your bench.
4. Finishing Zone
This is where you apply stain, polyurethane, or paint. A quiet corner with good airflow is enough. For finishing tips, visit:
👉 Top Wood Finishing Techniques
When you arrange your shop in zones, even small spaces feel larger because every area has a clear purpose.
How to Position Tools for Efficient Woodworking Flow
Tool placement is one of the most common struggles for beginners. Many new woodworkers place tools based on where outlets are or where the tool fits. Instead, think about movement and board length.
Smart positioning rules to follow
-
Keep the table saw centered with straight paths on both sides.
-
Place the miter saw against a wall but leave room for long boards.
-
Install French cleats for flexible wall storage.
-
Store clamps near your assembly table, not across the shop.
-
Keep measuring and marking tools within arm’s reach of your bench.
A real example: One hobbyist working in a 20 by 10 garage reported cutting project time in half simply by moving his planer closer to the jointer. No new tools. Just smarter layout.
For more tool guidance, check out this internal resource:
👉 Woodworking Planers: How They Work
Small Space Woodworking Layouts: Making the Most of Tight Rooms
If your shop area is limited, the layout becomes even more important. Compact shops can outperform larger ones when the design is intentional.
Recommended strategies for small shops
-
Use foldable benches that store against the wall.
-
Put your heaviest tools on mobile bases.
-
Store sandpaper, glue, and hardware in labeled drawers.
-
Use vertical storage for clamps, bits, and hand tools.
DIYers in online communities often agree that small shops benefit most from simple, portable equipment. And if you want ready made layout plans built specifically for small spaces, here is a great resource:
👉 Click here to explore this recommended DIY solution.
Ultimate Small Shop
Pros and Cons of Popular Layout Styles
Choosing a layout style helps guide the rest of your planning. Here are the three most common structures.
1. Linear Wall Layout
Pros:
-
Saves space
-
Great for narrow garages
-
Works well with mobile carts
Cons:
-
Limited infeed space
-
Some tools may feel cramped
2. Center Island Layout
Pros:
-
Best for workflow efficiency
-
Perfect for table saw centric shops
Cons:
-
Requires more space
-
Harder to use in shared rooms
3. Hybrid Layout
Pros:
-
The most flexible
-
Great for evolving tool collections
Cons:
-
Requires more planning
If you want step by step DIY guides that pair well with different layouts, browse:
👉 Woodworking Projects for Beginners
When to Consider Pre-Built Workshops or Shed Plans
Some woodworkers choose to expand their space rather than fit everything indoors. Pre-built sheds or DIY shed plans can be a strong investment, especially if you value a dedicated, quiet workspace.
Here are two resources many hobbyists recommend:
👉 Check out these affordable woodworking plans →
MyShedPlans
👉 See how you can build a small, efficient workshop footprint.
Tiny House Made Easy
Advantages
-
Clean slate for layout planning
-
Easy to ventilate
-
Ideal for dust heavy tools
Disadvantages
-
Higher upfront cost
-
May require permits

Chapter 3: Essential Tools You Need When You Setup Woodworking Shop for the First Time
When you begin to setup woodworking shop tools and workflows, the biggest challenge is deciding which tools you actually need. The woodworking world is full of shiny upgrades, expensive machines, and “must-haves” that can overwhelm beginners. The truth is simpler: you can build a highly functional workshop with a small collection of core tools, then expand slowly as your skills grow. What matters most is choosing tools that support your workflow, fit your space, and align with the projects you want to build.
In this chapter, we break down essential power tools, must-have hand tools, beginner essentials, and practical buying strategies. You will also see real examples, expert recommendations from woodworking communities, and affiliate CTAs to help you make informed decisions without overspending.
Must-Have Power Tools for Any Woodworking Shop Setup
Power tools shape the backbone of your workshop. You don’t need everything at once, but strategic choices make a huge difference.
1. Table Saw
Often considered the “heart” of the workshop. It handles ripping, crosscuts, dados, and more. If space is tight, a compact jobsite table saw can still deliver excellent accuracy.
2. Miter Saw
Ideal for cutting precise angles and making quick crosscuts. Position it near a wall with room for long boards.
3. Drill or Drill Press
A cordless drill is enough for beginners, but a drill press adds precision for furniture and joinery projects.
4. Random Orbital Sander
Fast, clean, and beginner-friendly. Essential for preparing surfaces before finishing.
5. Planer or Thicknesser
Helps you dimension lumber accurately. If you want to understand how planers work or compare models, see this helpful guide:
👉 Woodworking Planers: How They Work
For complete beginners, these five tools are more than enough to start building. Many professionals started with even less.
If you’re looking for affordable DIY plans to pair with your new tools, try this:
👉 Check out these affordable woodworking plans →
MyShedPlans
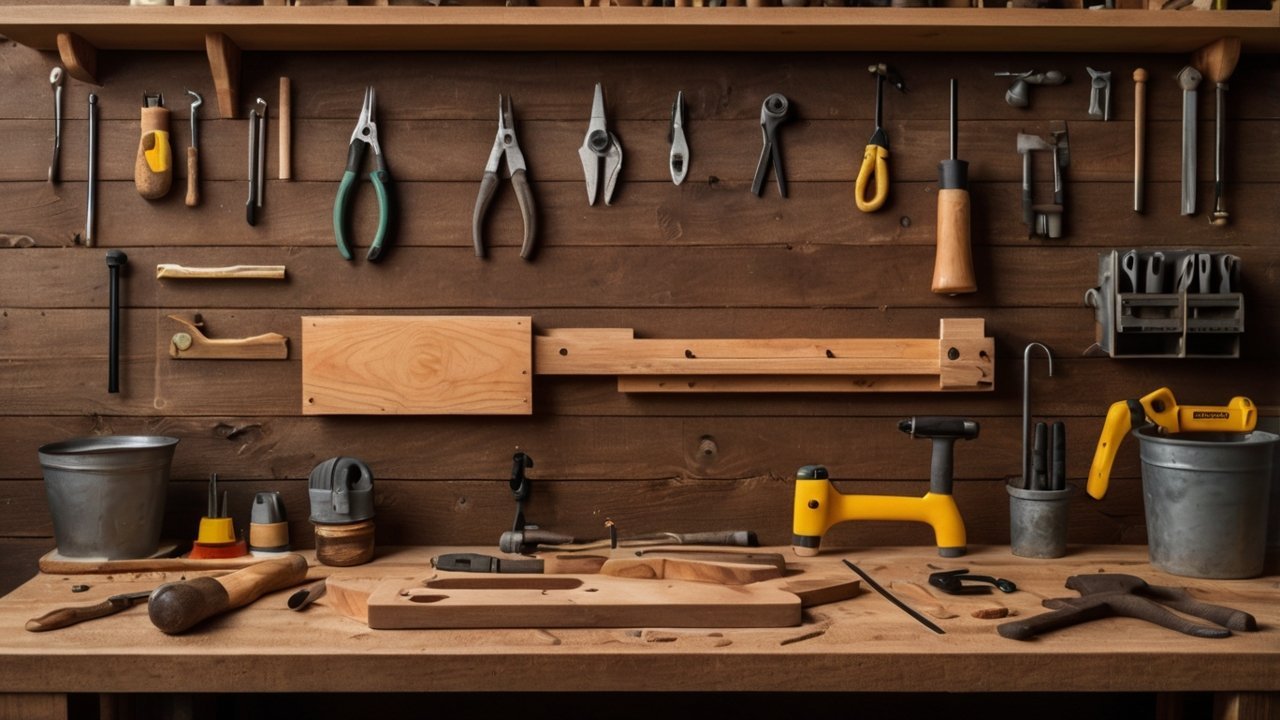
Essential Hand Tools to Support Your Woodworking Workflow
Even as you setup woodworking shop power tools, hand tools remain irreplaceable. They handle fine adjustments, joinery details, and tasks that machines simply can’t.
Recommended Starter Hand Tools
-
Bench chisels
-
Hand plane (No. 4 or block plane)
-
Combination square
-
Marking gauge
-
Mallet
-
Screwdrivers
-
Utility knife
-
Measuring tape
These tools improve your accuracy and shorten build times. Many hobbyists discover that a sharp hand plane becomes their favorite tool because it delivers smooth surfaces with little cleanup.
For joinery techniques that pair perfectly with these tools, check this internal post:
👉 10 Must-Know Wood Joinery Types
Beginner Tool Checklist When You Setup Woodworking Shop for the First Time
If you’re starting from zero, here is a clear, realistic tool list recommended by woodworking communities like The Wood Whisperer Guild and r/woodworking:
Beginner’s Core Kit
-
Circular saw
-
Jigsaw
-
Cordless drill
-
Random orbital sander
-
Two clamps (upgrade to eight later)
Intermediate Upgrade Kit
-
Table saw
-
Router and bits
-
Miter saw
-
Planer
When Budget Is Tight
Start with a circular saw and straight edge guide. It can perform many of the same tasks as a table saw for a fraction of the price.
If you prefer an organized learning path, this resource may help:
👉 Click here to explore this recommended DIY solution.
DIY Wood Haven Course
Should You Buy Tools New, Used, or Refurbished? (Pros & Cons)
Buying tools is a big investment. You don’t need top-tier brands at the beginning, but you also don’t want something that fails mid-project.
Buying New
Pros: Warranty, reliability, latest safety features
Cons: Higher cost, not always necessary for beginners
Buying Used
Pros: Save 40–70%, access professional-grade machines
Cons: Risk of worn parts, no warranty, requires inspection knowledge
Buying Refurbished
Pros: Lower cost, factory-tested, often includes warranty
Cons: Limited stock, mostly popular models only
Many experienced woodworkers recommend buying used jointers and planers because these machines hold value and are built to last.
If you want an affordable alternative to buying expensive tools upfront, consider building compact setups using the small-shop guide here:
👉 Ultimate Small Shop
Tool Safety Essentials That Every Woodworker Should Prioritize
Owning the right tools matters, but using them safely matters more. According to OSHA woodworking safety guidelines, eye protection, hearing protection, and dust masks are mandatory, even for hobbyists.
Bare Minimum Safety Gear
-
Safety glasses
-
Ear protection
-
Dust mask or respirator
-
Push sticks and featherboards
-
Non-slip footwear
A clean workshop and well-sharpened blades also reduce accidents significantly.
For finishing safety and technique, review:
👉 Best Types of Wood Finishes
Chapter 4: How to Setup Woodworking Shop on a Budget Without Sacrificing Quality
Setting up your first workshop doesn’t need to drain your wallet. Many beginners believe they need a full lineup of premium machines before they can build real furniture, but seasoned woodworkers know that the smartest shops often start small and evolve naturally. When you setup woodworking shop areas with a budget-first mindset, you learn what tools truly matter, how to maximize the space you already have, and how to build workflow efficiency without overspending.
This chapter covers practical money-saving strategies, DIY storage builds, used-tool buying tips, and affordable upgrades that help you get more from every dollar. You’ll also find expert-backed recommendations and affiliate CTAs for affordable, reliable resources.
Focus on the Essentials First When You Setup Woodworking Shop on a Budget
Beginners often overspend on tools they rarely use. The secret is understanding which tools cover the widest range of projects.
Tools you actually need to start
-
Circular saw
-
Drill/driver set
-
Random orbital sander
-
Two or four clamps
-
A solid workbench (DIY is fine)
These tools handle cutting, drilling, smoothing, and assembly for everything from shelves to small furniture. Publications like Fine Woodworking consistently remind beginners that “your first projects teach you what tools you really need,” not the other way around.
If you want simple builds that match a budget-friendly toolset, explore:
👉 Beginner Woodworking Projects
Where to Find Quality Tools for Less (Used, Refurbished, and Smart Alternatives)
Buying used tools can save 40–70 percent and still deliver professional results. Many woodworkers report finding excellent jointers, planers, and drill presses on local marketplaces, estate sales, and community listings.
What to check when buying used tools
-
Rust (surface rust is fine; deep pitting is not)
-
Motor sound (no rattling or burning smell)
-
Fence alignment
-
Missing parts or broken knobs
-
Availability of replacement blades or belts
Refurbished tools are another excellent option. Brands like DeWalt and Makita often sell factory-refurbished units with full testing and partial warranty coverage.
If you want a structured guide to building a functional, affordable workstation, consider:
👉 Click here to explore this recommended DIY solution.
Ultimate Small Shop
Build Your Own Workbench and Storage Instead of Buying New
One of the biggest expenses in any workshop is storage and work surfaces. A commercial workbench can cost hundreds of dollars, but a DIY bench built from construction lumber often outperforms it.
Budget-friendly DIY options
-
2×4 workbench with plywood top
-
French cleat wall for modular tool storage
-
Rolling shop cart for sanders and drills
-
Scrap wood bins using leftover boards
These projects offer huge savings and help you customize your shop layout. A DIY storage system also expands easily, so you won’t outgrow it as your tool collection grows.
If you want design inspiration for both indoor and outdoor builds, check this resource:
👉 DIY Wood Décor & Storage Ideas
And for larger workshop upgrades, here’s a great budget-friendly solution:
👉 See how you can build your own shed with this step-by-step guide.
MyShedPlans
Learn to Maximize Every Square Foot (Small Shops Can Be More Efficient)
A small workshop doesn’t just save money; it forces efficiency. Many hobbyists with small garages outperform large shops because everything is within reach, and tool paths are optimized.
Small-space efficiency ideas
-
Store clamps vertically to free wall space
-
Use mobile bases for heavy machines
-
Replace large cabinets with open shelving
-
Build fold-down work surfaces for multi-tasking
-
Keep sanding and finishing supplies in clear, stackable bins
For more space-sensitive solutions, explore:
👉 Outdoor Woodworking Projects
Save Money by Getting More From Each Tool
Many tools are far more versatile than beginners realize. Before buying something new, ask: Can another tool do this job with a simple jig?
Examples
-
A circular saw + straight-edge guide can replace a table saw for many cuts.
-
A router with a round-over bit reduces the need for expensive specialty tools.
-
A jigsaw with a fine blade can handle curved cuts that many beginners think require a bandsaw.
For jig ideas and joinery techniques, you can visit:
👉 10 Must-Know Joinery Methods
If you prefer step-by-step guidance on maximizing your first toolset, this resource helps:
👉 Check out these affordable woodworking plans →
DIY Wood Haven Course
Pros and Cons: Budget vs Full Investment Approach
Budget Approach (Most Beginners)
Pros:
-
Lower upfront cost
-
Learn what tools you actually use
-
Space-efficient
Cons: -
Slower workflow
-
More manual adjustments
Full Investment Approach (Experienced DIYers or Pros)
Pros:
-
Faster, more efficient workflow
-
Higher accuracy out of the gate
Cons: -
Expensive
-
Requires more space and power upgrades
Most hobbyists agree that starting small and upgrading over time is the best mix of savings and satisfaction.
Chapter 5: Small Woodworking Shop Setup Tips: How to Setup Woodworking Shop Spaces With Limited Room
Small workshops are often the most creative, organized, and efficient because every inch must serve a purpose. Whether you’re working in a one-car garage, basement corner, or compact shed, you can still setup woodworking shop layouts that feel productive and easy to navigate. In fact, many experienced hobbyists prefer small shops because tools stay close, workflow becomes faster, and cleanup is simpler.
In this chapter, you’ll learn how to transform tight spaces into fully functional work areas using smart layouts, wall storage, mobile stations, and adjustable work surfaces. These strategies come from real woodworkers in communities like The Woodworking Journal, Reddit’s r/woodworking, and long-time contributors to Fine Woodworking.
Start With a Layout Designed for Small Spaces
When you setup woodworking shop layouts in tight quarters, traditional long infeed paths for table saws and jointers may not be possible. That’s why the layout must revolve around mobility and vertical organization.
Recommended layout concepts
-
L-shape or U-shape tool grouping for efficient reach
-
Center workbench that doubles as assembly space
-
Tools along the wall to maximize central walking area
-
Mobile carts to reposition tools depending on the project
These layout structures allow you to rearrange tools easily and prevent your workspace from feeling cramped.
If you want inspiration for simple builds that work well in small layouts, explore:
👉 Beginner Woodworking Projects
Use Foldable and Mobile Workstations to Create Space on Demand
In small workshops, flexibility is king. Foldable benches and rolling carts allow you to convert your shop for cutting, sanding, or assembly within seconds.
Smart mobile solutions
-
Rolling miter saw stand you can store against a wall
-
Mobile planer cart with built-in storage
-
Fold-down wall-mounted workbench
-
Rolling clamp rack
-
Mobile sanding station with dust collection
Tools on wheels allow you to adapt your shop to different tasks. Many pros use mobile bases even in large workshops because they reduce setup time and keep the workflow fluid.
For complete workstation ideas designed for tight spaces, check this:
👉 Click here to explore this recommended DIY solution.
Ultimate Small Shop
Vertical Storage Is Your Greatest Advantage in a Small Shop
When floor space is limited, walls and ceilings become your best storage partners. Vertical storage keeps the shop clear, improves visibility, and reduces the time spent looking for tools.
Space-saving vertical ideas
-
French cleat walls (fully customizable, perfect for expanding shops)
-
Ceiling-mounted lumber racks
-
Magnetic strips for chisels and marking tools
-
Wall-mounted dust collection piping
-
Vertical clamp racks
A well-designed French cleat system is one of the most recommended solutions in woodworking forums and magazines because it grows with your shop over time.
If you want more organizational project ideas, browse:
👉 DIY Wood Décor & Storage Ideas
Optimize Lighting and Power Access in a Compact Environment
Small shops can feel dark or boxed in if lighting isn’t planned properly. Good lighting improves safety and accuracy, especially when working with measuring tools or performing delicate cuts.
Lighting recommendations
-
Bright overhead LEDs
-
Task lighting over the workbench
-
Clamp-on lamps for flexibility
-
Avoid warm, dim lighting—it hides measurement errors
Power access also matters. Install multiple outlets along the wall so you don’t run extension cords across the floor. This reduces trip hazards and keeps your workflow smooth.
If you plan to eventually expand into a dedicated shed workshop, this guide helps:
👉 See how you can build your own shed with this step-by-step guide.
MyShedPlans
Choose Tools That Make Sense for Small Shops
Not all tools are equally suited to small workshops. Some machines take too much space or require long infeed/outfeed paths. Instead, aim for compact tools or multi-purpose solutions.
Tools ideal for small shops
-
Compact table saw or track saw
-
Benchtop planer
-
Benchtop drill press
-
Compact router table
-
Combination sander (belt + disc)
-
Folding miter saw stand
Many small-shop woodworkers start with a track saw instead of a table saw. It saves space and handles sheet goods safely and accurately.
For help choosing the right woods for your projects, see:
👉 Types of Wood: Complete Guide
Pros and Cons of Running a Small Woodworking Shop
Pros
-
Highly efficient workflow
-
Easy to heat, cool, and maintain
-
Low setup cost
-
Tools stay close, improving speed
Cons
-
Limited infeed/outfeed space
-
Less room for large furniture projects
-
Dust collection must be planned carefully
Still, most woodworkers agree that small shops are excellent for beginners, hobbyists, and anyone working with furniture, décor, or home improvement projects.

Chapter 6: Beginner Woodworking Shop Setup Guide: How to Setup Woodworking Shop Spaces for Learning and Skill Growth
Beginning woodworking is exciting, but it can also feel intimidating. When you’re just starting out, every tool looks important, every technique feels essential, and every project raises new questions. The good news: you don’t need a professional shop to build real projects. What you do need is a space designed to help you learn safely, practice comfortably, and grow your skills step by step. This chapter shows you exactly how to setup woodworking shop areas tailored for beginners without overwhelming your budget or your space.
Experienced woodworkers often say, “Start simple, stay consistent.” This applies perfectly to beginner workshop setups. Your first shop doesn’t need to be large. It just needs to be functional, well-organized, and built around foundational tools and workflows.
Keep Your Setup Simple: What Beginners Actually Need
Beginner shops fail when they start too big. Many new woodworkers buy advanced machines before learning the basics, only to feel frustrated or unsafe. Instead, build your shop around the projects you want to make in your first year.
Beginner-friendly starter tools
-
Circular saw or track saw
-
Cordless drill
-
Random orbital sander
-
Two or four clamps
-
Speed square and measuring tape
-
Basic hand tools: chisels, mallet, utility knife
These tools cover cutting, drilling, shaping, and smoothing—everything needed for early projects like shelves, décor pieces, or small furniture. To find easy builds that match a beginner’s toolset, browse:
👉 10 Easy Beginner Projects
This simple kit helps you practice core skills before investing in larger machines.
Set Up a Safe and Comfortable Learning Environment
Safety is essential, especially when learning new techniques. Organizations like OSHA and woodworking magazines consistently emphasize that beginners must build habits early to prevent injuries.
Beginner safety setup
-
Clear walking paths
-
Good lighting, preferably LED
-
Safety gear stored at the entrance
-
Fire extinguisher and first aid kit
-
Push sticks for saws, guards left in place
You’re not just building a workspace—you’re building safe habits.
If you need guidance on selecting the right wood types for beginner projects, this resource helps:
👉 Complete Guide to Wood Types
Create a Beginner-Friendly Workflow: Practice Before Complexity
Many new woodworkers try to tackle advanced projects too soon. A better approach is designing your shop to support steady learning.
A simple, beginner-friendly workflow
-
Cutting Zone — Safe and uncluttered space for saws
-
Shaping Zone — Sanding and basic routing
-
Assembly Zone — Workbench with organized clamps
-
Finishing Zone — Ventilated corner for stain, paint, or polyurethane
As you practice this workflow, you’ll learn efficiency naturally. For finishing help, beginners love this guide:
👉 Best Wood Finishing Techniques
Build Your First Workbench: A Beginner’s Most Valuable Tool
A sturdy workbench becomes your home base for every project. Thankfully, you can build a solid, beginner-friendly bench using affordable construction lumber.
What makes a good beginner workbench?
-
Stable legs and cross-bracing
-
Flat plywood or solid-wood top
-
Clamp-friendly edges
-
Optional: lower shelf for tool storage
This project teaches measuring, drilling, assembly, and finishing—core skills you will use in every future build.
If you want step-by-step plans that guide beginners clearly, try:
👉 Check out these affordable woodworking plans →
DIY Wood Haven Course
Practice Through Simple, Confidence-Building Projects
Beginners improve fastest when they build small, repeatable projects that teach one skill at a time.
Skill-building project examples
-
Cutting boards (accurate cuts, sanding)
-
Wall shelves (drilling, leveling, assembly)
-
Small boxes (joinery basics)
-
Simple décor (finishing practice)
As skills grow, move toward furniture, joinery, and more complex builds. For joinery basics, explore:
👉 10 Must-Know Joinery Techniques
Upgrade Tools Slowly and Strategically
When you outgrow beginner tools, add new machines one at a time based on the projects you want to build.
Smart upgrade path
-
Table Saw or Track Saw
-
Miter Saw
-
Router Table
-
Planer
-
Drill Press
Adding tools gradually keeps your workflow organized and ensures you fully understand each tool’s purpose.
If you want a structured path for tool upgrades and small-shop layout optimization, this guide helps:
👉 Click here to explore this recommended DIY solution.
Ultimate Small Shop
Pros and Cons: Beginner-Focused Workshop vs Advanced Setup
Beginner-focused workshop
Pros:
-
Affordable
-
Less overwhelming
-
Easier to organize
-
Perfect for skill development
Cons: -
Slower workflow
-
Limited capability for large projects
Advanced workshop
Pros:
-
Fast, precise, and versatile
Cons: -
Expensive
-
Can intimidate beginners
-
Requires more space and power management
Most woodworking instructors recommend starting with the beginner model—even professionals often say their early small shops taught them the most.
Chapter 7: Finishing, Painting, and Clean-Up Zone Setup: How to Setup Woodworking Shop Areas for Professional Results
A well-organized finishing and clean-up zone is one of the most overlooked parts of workshop design. Yet seasoned woodworkers agree that this area influences the final quality of every project. When you setup woodworking shop zones specifically for finishing, you gain better control over dust, lighting, drying time, and product storage—all crucial factors in producing smooth, consistent results.
Even beginners quickly discover that beautiful woodworking isn’t just about cutting and assembly. The finishing stage is where a project comes to life. This chapter will help you build a finishing station that works efficiently in garages, small shops, and multi-use spaces.
Why Every Woodworker Needs a Dedicated Finishing Zone
Trying to apply stain, lacquer, or polyurethane in the same area where you cut wood leads to dust contamination, uneven coatings, and frustration. According to Fine Woodworking and Woodcraft Magazine, mistakes in finishing are one of the top problems new woodworkers face—and 80 percent of them come from workspace issues, not products.
Benefits of a dedicated finishing zone
-
Cleaner finishes with fewer imperfections
-
Better air control and faster drying
-
Safer handling of flammable chemicals
-
Less risk of dust ruining the surface
-
Easier cleanup
If you’re still learning how different finishes behave, this guide will help you understand the basics:
👉 Best Types of Polyurethane & How to Apply
How to Setup Woodworking Shop Finishing Areas in Small or Shared Spaces
You don’t need a large shop to build a professional finishing zone. Even a 3×5 ft corner can be transformed into a reliable finishing station.
Core elements of a great finishing area
-
Ventilation to reduce fumes
-
Good lighting to spot drips and streaks
-
Dust control (avoid fans that stir debris)
-
Chemical-safe storage for oils, stains, solvents
-
Drop cloth or disposable kraft paper to protect surfaces
Pro woodworkers recommend LED lighting with color accuracy around 5000K so you can judge stain tone correctly. A small HEPA air purifier nearby can help reduce dust settling during drying.
Recommended Ventilation and Dust Management Setup
Finishing chemicals release VOCs that require safe ventilation. OSHA and woodworking communities stress the importance of airflow that removes fumes rather than circulates dust.
Beginner-friendly ventilation options
-
Box fan blowing outward through a window
-
Inline duct fan pulling fumes away
-
DIY spray booth using PVC + plastic sheeting
-
Small air filter for dust scrubbing
A simple collapsible spray booth is one of the best solutions for tiny shops. It folds flat, stores easily, and keeps overspray contained.
If you want outdoor-friendly project ideas where ventilation becomes even easier, explore:
👉 Outdoor Woodworking Projects
Organize Your Finishing Supplies for Efficiency
Finishing products multiply fast—oils, stains, dyes, brushes, rags, sanding pads, and more. A well-organized zone saves time and ensures proper safety handling.
Smart organization strategies
-
Use wall shelves for finishes stored upright
-
Add labeled bins for brushes, rags, and gloves
-
Keep sandpaper in a moisture-resistant container
-
Store oily rags in a fire-safe metal container
-
Dedicate a drawer to nitrile gloves and mixing sticks
Many woodworkers use a rolling cart exclusively for finishing work. When it’s time to apply stain or topcoat, everything moves with you.
For décor and small builds where finishing really shines, check:
👉 DIY Wood Décor Ideas
Build a Clean-Up Station That Keeps Your Shop Safe
A clean-up station ensures your workshop stays safe and efficient. Solvents, glue, and finishes require proper disposal to prevent fire risks.
Your clean-up zone should include
-
Brush cleaning container (mineral spirits or water)
-
Disposable towels or shop rags
-
Fire-safe container for oily rag disposal
-
Dedicated trash bin with lid
-
Storage for sanding pads between coats
For many beginners, a compact sink or utility basin outside the finishing area makes cleanup easier. If water access is limited, use sealed containers for cleaning and disposal.
If you’re upgrading your whole shop layout step-by-step, this affordable guide provides small-shop strategies:
👉 Click here to explore this recommended DIY solution.
Ultimate Small Shop
Pros and Cons of Different Finishing Zone Setups
1. Dedicated Indoor Finishing Area
Pros:
-
Controlled environment
-
Perfect for year-round finishing
Cons: -
Requires ventilation planning
-
Can take limited shop space
2. Temporary Pop-Up Spray Booth
Pros:
-
Inexpensive
-
Great for renters or shared spaces
Cons: -
Takes time to assemble
-
Not ideal for winter finishing
3. Outdoor Finishing (Porch, Patio, or Yard)
Pros:
-
Excellent ventilation
-
Space for larger projects
Cons: -
Weather dependent
-
Higher risk of wind-blown dust
For help achieving the cleanest possible finish, refer to:
👉 Top Finishing Techniques for a Pro Look
Chapter 8: Sample Woodworking Shop Layouts: Practical Floor Plans to Help You Setup Woodworking Shop Spaces of Any Size
When you’re trying to setup woodworking shop layouts that flow smoothly, real examples make the process far easier. Instead of guessing where tools should go, you can model your shop after proven layouts used by hobbyists, pros, and instructors. In this chapter, you’ll explore three practical sample layouts—a 20×8 shop, a one-garage-bay shop, and a basement shop. Each is designed to help you understand tool placement, workflow paths, and space optimization no matter what size workshop you’re working with.
These layouts follow the classic woodworking workflow: breakdown → shaping → assembly → finishing. Publications like Fine Woodworking and The Wood Whisperer Guild emphasize this flow because it reduces wasted steps and improves safety. Once you understand these patterns, you can adapt any shop to your own needs.
20×8 Woodworking Shop Layout (Long & Narrow Space Design)
A 20×8 shop is one of the most practical layouts for beginners and hobbyists. It’s narrow, but long enough to allow for logical tool zoning.
Recommended tool positions
-
Table saw centered with infeed/outfeed space
-
Miter saw along the long wall with folding wings
-
Workbench at the opposite end for assembly and clamping
-
Planer and jointer on mobile carts to roll into position as needed
-
Vertical storage along both walls for clamps, bits, and accessories
Because this layout is long, workflow moves in a straight, efficient path. You start your rough cuts at one end and finish your project near the workbench. The narrow footprint encourages smart storage and reduced clutter.
To start building projects suited for this layout, explore:
👉 10 Beginner Friendly Woodworking Projects
If you want fully illustrated building plans for shop furniture, try:
👉 Check out these affordable woodworking plans →
MyShedPlans
One-Garage-Bay Woodworking Shop Layout (Most Popular Beginner Option)
If you’re trying to setup woodworking shop space in a single garage bay, you’re not alone—this is one of the most common workshop footprints in the DIY community. With good planning, a one-bay garage can perform like a mid-size professional shop.
Core layout recommendations
-
Put large tools on wheels so you can roll them out into the driveway when needed
-
Place the miter saw near the garage door for cutting long boards
-
Use a flip-top tool cart for planers, sanders, or benchtop drill presses
-
Install a French cleat system for maximum vertical flexibility
-
Set up a foldable outfeed table behind the table saw
This setup offers incredible flexibility. On sunny days, you can move dusty or noisy tools outside, instantly doubling your workspace. The garage door also provides excellent ventilation for finishing or sanding.
For inspiration on décor or small builds suited for garage workshops, visit:
👉 DIY Wood Décor Ideas
And for small-shop optimization strategies, this is one of the top-rated guides:
👉 Click here to explore this recommended DIY solution.
Ultimate Small Shop
Basement Woodworking Shop Layout (Quiet, Compact, Controlled Environment)
Basements are excellent for woodworking because they maintain stable temperatures and keep noise contained. The challenge is dealing with dust, low ceilings, and limited access.
Best practices for basement layouts
-
Place dust-heavy tools near the window or ventilation point
-
Use compact or benchtop tools when ceiling height is limited
-
Add bright, cool LEDs to counteract low natural light
-
Run a dedicated dust collection line along the wall
-
Keep finishing supplies upstairs to reduce fumes indoors
Many woodworkers prefer basement shops because they feel cozy, quiet, and interruption-free. With a small air filtration unit, you can dramatically reduce airborne dust.
If you need help selecting suitable wood types for indoor projects, check:
👉 Types of Wood: Complete Guide
Pros and Cons of Each Sample Layout
20×8 Layout
Pros: Easy workflow, great for linear spaces
Cons: Limited flexibility for large sheet goods
One-Garage-Bay Layout
Pros: Highly flexible, outdoor expansion possible
Cons: Shared spaces require frequent cleanup
Basement Layout
Pros: Quiet, stable environment, year-round working conditions
Cons: Ventilation and dust management require extra planning
Use these pros and cons to model a layout that matches your space, projects, and goals.
Want Full Workshop Layout Plans?
If you prefer ready-made shop layouts, storage plans, and workstation blueprints, here are two resources hobbyists consistently rate highly:
👉 Check out these affordable woodworking plans →
MyShedPlans:
👉 See small-shop optimization in action.
Tiny House Made Easy:
These plans help you skip trial-and-error and start with a proven layout immediately.
Chapter 9: Final Tips for Setting Up a Woodworking Shop: Long-Term Success, Safety, and Maintenance
As you wrap up the process to setup woodworking shop spaces that fit your workflow, tools, and budget, it’s important to look ahead. A woodworking shop is never truly “finished.” It grows with your skills, your projects, and your confidence. The best shops evolve slowly but intentionally, becoming more efficient each year. In this chapter, we outline key long-term strategies, safety upgrades, maintenance habits, and organization tips that help your workshop stay clean, safe, and productive for years to come.
Experienced woodworkers often say, “Your shop should work for you, not against you.” These final tips help ensure you maintain a space that supports creativity and reduces stress.
Keep Improving Your Workflow as Your Skills Grow
As you gain experience, your workflow will naturally evolve. What felt spacious early on may begin to feel cramped. The trick is gradual optimization.
Signs your workflow needs adjustment
-
You take too many steps between tools
-
Tools pile up on your workbench
-
Dust builds faster than you can collect it
-
Projects feel slow or overly complicated
Each time you reorganize, ask: Does this make my next project easier?
For example, moving your sander and sanding pads closer to the assembly bench removes unnecessary steps. Mounting jigs near related tools saves setup time. Even small improvements pay off quickly.
For finishing workflow improvements, explore:
👉 Top Wood Finishing Techniques
Long-Term Tool Maintenance Keeps Your Shop Running Smoothly
Good maintenance extends tool life and improves safety. Beginners often overlook this, but professionals insist it’s one of the most important long-term habits.
Maintenance routine to follow
-
Clean sawdust from motors weekly
-
Wax table saw surfaces monthly for smoother cuts
-
Replace sanding discs frequently to improve finish quality
-
Sharpen chisels and planes regularly
-
Check power cords for wear
-
Empty dust collectors before they overflow
A shop that stays clean and well-maintained is safer and more enjoyable. Sharp tools, especially hand planes and chisels, make woodworking smoother and reduce accidents.
If you’re choosing wood species for different projects, this guide will help:
👉 Types of Wood for Every Project
Upgrade Your Shop Strategically Over Time
Instead of buying everything at once, upgrade tools based on your project needs.
Smart upgrade sequence
-
Table saw or track saw upgrade
-
Router table for joinery and shaping
-
Miter saw for precision crosscuts
-
Planer for dimensioning lumber
-
Dust collector for improved air quality
Each upgrade unlocks new project types and shortens your workflow.
If you want a structured approach to upgrading small workshops, this is one of the most recommended guides:
👉 Click here to explore this recommended DIY solution.
Ultimate Small Shop
Keep Your Shop Safe With Smart Add-Ons and Modern Practices
Safety should evolve right along with your shop.
Safety upgrades worth making
-
Anti-fatigue mats to protect your feet
-
Fire-resistant cabinet for storing finishes
-
Wall-mounted first aid kit
-
Ceiling-mounted air filtration system
-
Better guards for saws and router tables
According to OSHA woodworking guidelines, good ventilation and proper dust collection are essential once you begin handling larger boards or producing fine dust.
If you frequently work with finishing chemicals, review:
👉 Best Polyurethane Finishes & How to Apply Them
Stay Organized With Systems, Not Just Storage
Storage matters, but systems matter more. Systems prevent clutter from returning.
Effective systems for real shops
-
The “One Project, One Tray” system to keep screws, parts, and sandpaper for each build organized
-
The “Five Minute Cleanup Rule” after every session
-
Label everything—drawers, bins, shelves, jigs
-
Project staging shelves to store boards between coats
Many woodworkers say that organization is the biggest difference between a relaxing shop and a stressful one.
For décor and storage project ideas, check:
👉 DIY Wood Décor & Storage
Plan for Expansion or Outdoor Add-Ons
As your projects grow, you may eventually want more space—or a dedicated outdoor structure.
Expansion options
-
Add a lumber rack outside
-
Install a finishing shed
-
Build a dedicated miter saw station in a side room
-
Construct a full workshop shed
If you want affordable plans for sheds or expansions, try:
👉 Check out these affordable woodworking plans →
MyShedPlans
Or, if you want to learn how to build compact, highly optimized spaces:
👉 Tiny House Made Easy

📘10 Easy DIY Wood Projects for the Weekend
Looking for a fun and rewarding weekend activity?
With this FREE eBook, you’ll discover 10 beginner-friendly wood projects that you can build with simple tools and a little creativity.
Inside, you’ll find:
🪵 Step-by-step instructions for each project
🛠️ Easy-to-follow designs—perfect for beginners
🌿 Functional and stylish pieces you’ll actually use
🎉 Projects you can complete in just a weekend
Whether you want to craft a garden bench, a planter box, or a simple home décor piece, this guide will help you turn raw wood into something beautiful and useful.
👉 Enter your email below to claim your FREE copy and start your DIY journey today!
Please log in to access your exclusive content.
Don’t have an account? Click the “Register” button below to sign up.
Related Posts