Woodworking Projects: 10 Easy Builds for Beginners
Ever thought about building something with your own hands, but weren’t sure where to start? Whether you’re a total beginner or just looking for quick wins, woodworking projects are a great way to develop hands-on skills without needing a full workshop or years of experience.
From crafting a simple phone stand to building a rustic wall shelf, woodworking projects let you create something useful, personal, and satisfying. Plus, with the right beginner-friendly plans, you won’t need fancy tools or expensive materials to get started. This is perfect for anyone interested in DIY woodworking or just craving a weekend project that actually gets finished.
What makes these projects even better? They help you build confidence while laying the foundation for more advanced work down the road. And let’s be honest — there’s something incredibly rewarding about saying, “Yeah, I made that.”
In this guide, we’ll walk through 10 easy woodworking projects perfect for beginners — all doable, practical, and weekend-ready.
Chapter 1: Why Start with Simple Woodworking Projects?
Starting with woodworking projects that are simple, achievable, and beginner-friendly is the smartest way to develop foundational skills without burnout or unnecessary expenses. Whether you’re hoping to turn woodworking into a business or just want a creative outlet, starting small sets the stage for success.
In this chapter, we’ll explore the benefits, challenges, and science-backed reasons for easing into the craft, while offering practical tips and resources for beginners.
Benefits of Starting with Beginner Woodworking Projects
1. Boosts Confidence and Motivation
Small wins matter. According to the Harvard Business Review, progress—even minor—has a powerful effect on motivation and creativity. Completing early woodworking projects gives you tangible evidence that you can build things yourself, which fuels momentum for more complex builds later on (source).
2. Reduces Financial Risk
Beginner woodworking projects typically require:
-
Basic tools (hand saw, drill, clamps)
-
Low-cost materials (scrap wood, pine boards)
-
No need for advanced machinery
This makes woodworking accessible even on a tight budget. If you’re not ready to invest in high-end gear, the Ultimate Small Shop Toolkit offers a smart, low-budget setup guide ideal for small garages and tight spaces.
3. Minimizes Frustration from Complex Mistakes
New woodworkers often struggle with:
-
Misaligned cuts
-
Split wood due to improper screws
-
Weak joints from incorrect gluing
These issues can derail large projects. Smaller projects teach you to handle these challenges in a low-stakes environment, so mistakes become learning opportunities—not deal-breakers.
Want to try woodworking but don’t know where to start? This free eBook gives you 10 simple DIY wood projects you can complete in just a weekend.
👉 Download your free copy here
Scientific Support: The Psychology of Learning by Doing
The Cognitive Load Theory suggests that new learners benefit from low-complexity tasks when acquiring practical skills. In hands-on hobbies like woodworking, reducing extraneous cognitive load leads to better learning outcomes (Sweller et al., 1998).
In other words, simple woodworking projects help you build muscle memory and spatial awareness without overwhelming your brain. This is especially helpful when using tools like saws, clamps, or wood glue for the first time.
Pros and Cons of Starting Small with Woodworking
| Pros | Cons |
|---|---|
| Quick to complete | May seem less “impressive” |
| Lower cost | Limited complexity |
| Great for learning tool safety | Might outgrow skills quickly |
| Builds momentum and consistency | Projects may lack variety |
Our Take: The benefits far outweigh the downsides. If you want long-term success in woodworking, the best strategy is to master fundamentals through repetition and iteration.
Realistic Recommendations for Beginners
To get the most out of your early woodworking journey, here’s what we suggest:
✅ Start with these 3 project types:
-
Phone stand or tablet holder – quick wins with scrap wood
-
Wall shelf with brackets – teaches mounting and leveling
-
Simple step stool – introduces basic joinery
Explore more ideas on our resource hub:
👉 DIY Wood Haven
🛠️ Tool Setup:
Don’t buy everything at once. Begin with:
-
Handsaw
-
Cordless drill
-
Measuring tape
-
Safety goggles
-
Wood glue
Bundle kits like MyShedPlans provide beginner-friendly project blueprints and shop setups.
Common Mistakes to Avoid
-
Skipping the sanding stage – causes splinters and poor finish
-
Not pre-drilling screw holes – leads to wood splitting
-
Using the wrong wood type – softwoods are better for starters
Learning through smaller woodworking projects ensures you make these errors in a controlled, fixable context.
Internal Links: Learn More
Affiliate Resources to Get Started
Chapter 2: Essential Tools and Materials for Beginner Woodworking Projects
You don’t need a full workshop or a five-figure budget to start building woodworking projects. With just a handful of affordable, versatile tools and the right materials, you can create beautiful, functional builds right from your garage, shed, or even a small apartment balcony.
In this chapter, we’ll break down the must-have tools for beginners, smart material choices, and where to get the best value — plus some honest tips to avoid common money-wasting mistakes.
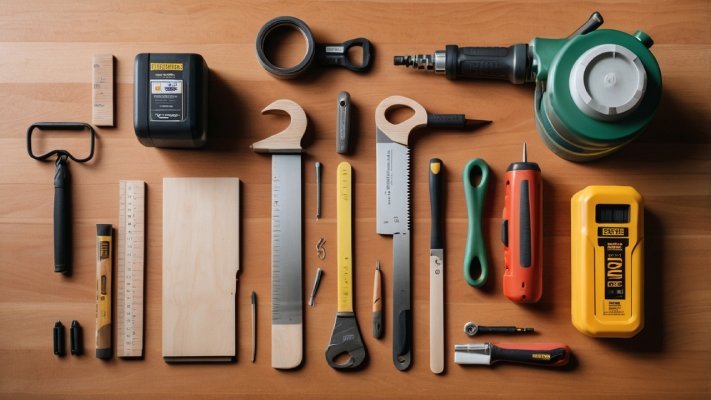
Basic Tools Every Beginner Needs for Woodworking Projects
Starting simple is the key. These five tools will cover 90% of beginner woodworking projects:
🛠️ 1. Hand Saw
-
Best for: Straight cuts on softwood
-
Pros: Affordable, no electricity needed
-
Cons: Slower than powered tools
💡 Tip: A pull saw is easier to control and makes cleaner cuts than traditional push saws.
🔩 2. Cordless Drill + Bits
-
Best for: Making pilot holes, driving screws
-
Pros: Versatile and fast
-
Cons: Battery life varies
➡️ For affordable bundles, check out this starter tool kit on Ultimate Small Shop.
📏 3. Measuring Tape + Speed Square
-
Best for: Accurate layout, angles, repeatable cuts
-
Pro Tip: Always double-check before cutting – the golden rule in woodworking.
🧰 4. Clamps (At Least 4)
-
Why they matter: Secure wood for gluing or screwing
-
Buy tip: Start with 12-inch bar clamps for versatility.
🧴 5. Wood Glue
-
Use: Invisible joints and strong bonds
-
Scientific note: Wood glue often creates bonds stronger than the wood itself (source).
Optional But Useful Tools to Add Later
-
Jigsaw (for curved cuts)
-
Orbital sander (for smoother finishes)
-
Pocket hole jig (for invisible joints)
-
Bench vise (for detailed work)
Check out our Beginner Woodworking Tools Checklist for a printable shopping guide.
Choosing the Right Materials for Beginner Woodworking Projects
The material you build with affects cost, appearance, and difficulty. Here’s a comparison:
| Material | Pros | Cons | Best Used For |
|---|---|---|---|
| Pine (softwood) | Inexpensive, easy to cut | Dents easily | Most beginner projects |
| Plywood | Stable, comes in large sheets | Edges can chip | Shelving, furniture |
| Poplar | Affordable hardwood | Needs sanding to finish well | Painted pieces |
| MDF | Smooth surface | Weak with screws | Decorative panels |
| Reclaimed Wood | Eco-friendly, character-rich | May contain nails, uneven | Rustic designs |
💡 Eco tip: Reclaimed wood not only saves money but also reduces waste — a win-win for sustainability and your wallet.
Want to try woodworking but don’t know where to start? This free eBook gives you 10 simple DIY wood projects you can complete in just a weekend.
👉 Download your free copy here
Where to Buy Tools and Wood Without Breaking the Bank
-
Home Depot / Lowe’s – Good for standard lumber and beginner tool brands
-
Facebook Marketplace – Great for secondhand clamps, drills, and scrap wood
-
Local sawmills or lumber yards – Often cheaper and higher quality than big-box stores
-
Online kits – For curated, beginner-friendly setups like MyShedPlans
Avoid These Common Beginner Mistakes
❌ Buying every tool at once – Start lean and only buy what your project requires.
❌ Using hardwoods too early – They’re tougher to work with and burn through saw blades faster.
❌ Overcomplicating your first builds – Simple = success. Save the fancy joinery for project #10, not #1.
Starter Woodworking Projects That Use Only Basic Tools
If you’re working with just the basics, here are perfect entry-level woodworking projects you can try today:
-
Phone holder – Use one clamp, one saw, one drill
-
Wall-mounted coat rack – Teaches spacing, drilling, sanding
-
Simple bookshelf – Great intro to measuring and edge finishing
🧰 Browse more step-by-step ideas at: DIY Wood Haven Projects Hub
Beginner Woodworking Setup: Example Kit (Under $200)
| Item | Approx. Cost |
|---|---|
| Hand saw | $15 |
| Cordless drill + bits | $50 |
| Clamps (4) | $30 |
| Wood glue | $5 |
| Tape + square | $20 |
| Safety gear | $25 |
| Starter pine boards | $25 |
| Total | $170 |
Need help building a micro workshop in tight space? Try Ultimate Small Shop – a full guide on budget-friendly setups.
What Science Says About Tool Learning Curve
A study on manual skill acquisition found that using real tools for physical projects activates both cognitive and motor pathways, leading to faster learning and retention than passive observation (source).
What does this mean for you? You don’t need to “know everything” before starting — just start. The learning will follow.
Internal Links to Explore Next
Affiliate Resources to Get Started Smart
Chapter 3: 10 Easy Woodworking Projects for Beginners
Starting small doesn’t mean boring — these woodworking projects are fun, functional, and beginner-approved. Each one teaches you something new without being overwhelming. Best of all, you can finish most of them in a single weekend, using affordable tools and materials.
🧰 What to Expect
-
All projects use basic tools (hand saw, drill, clamps)
-
Minimal materials (scrap wood, pine, plywood)
-
Estimated build time: under 4 hours
-
Great for practicing cuts, joints, drilling, and finishing
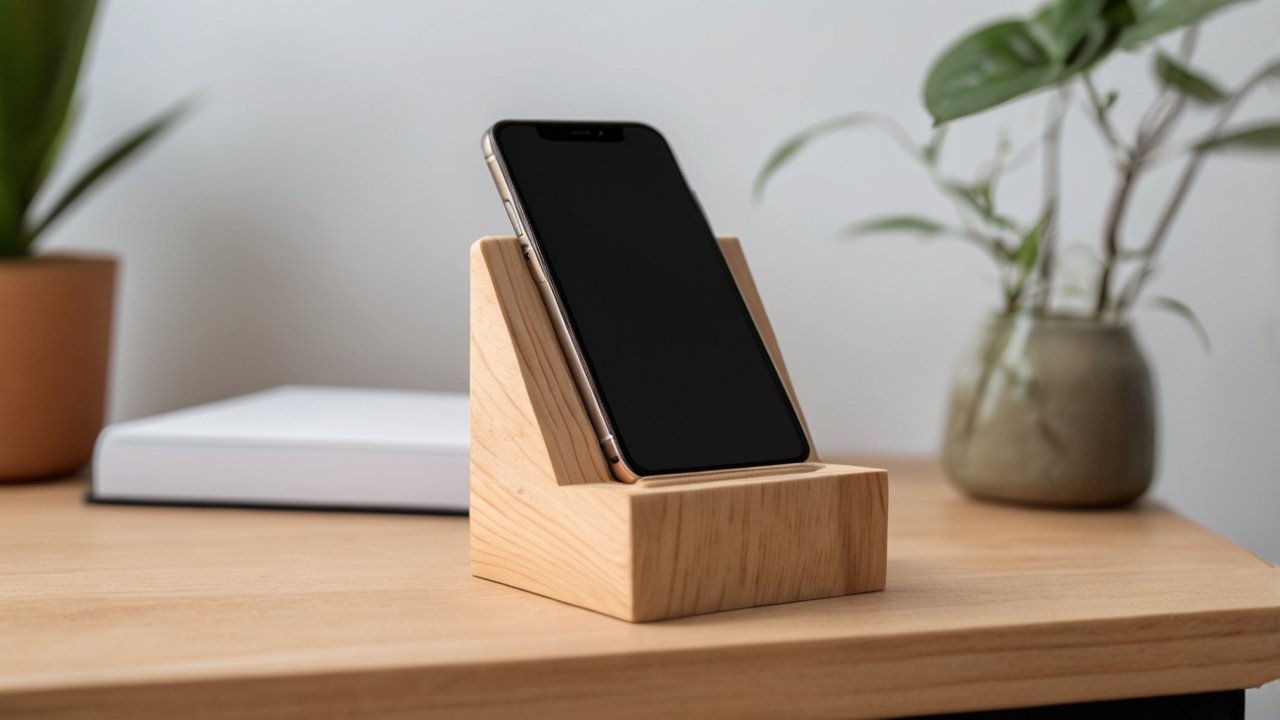
📦 Project 1: DIY Wooden Phone Stand
Estimated Time: 1 hour
Tools: Saw, drill
Skills Learned: Precision cutting, slot fitting
This minimalist desk phone stand is perfect for testing your measuring and cutting accuracy. Made from one piece of wood and a single cut for the phone groove, it’s a fast, satisfying build.
✅ Use softwood like pine for easier cutting.
📷 Get visual plans on DIY Wood Haven
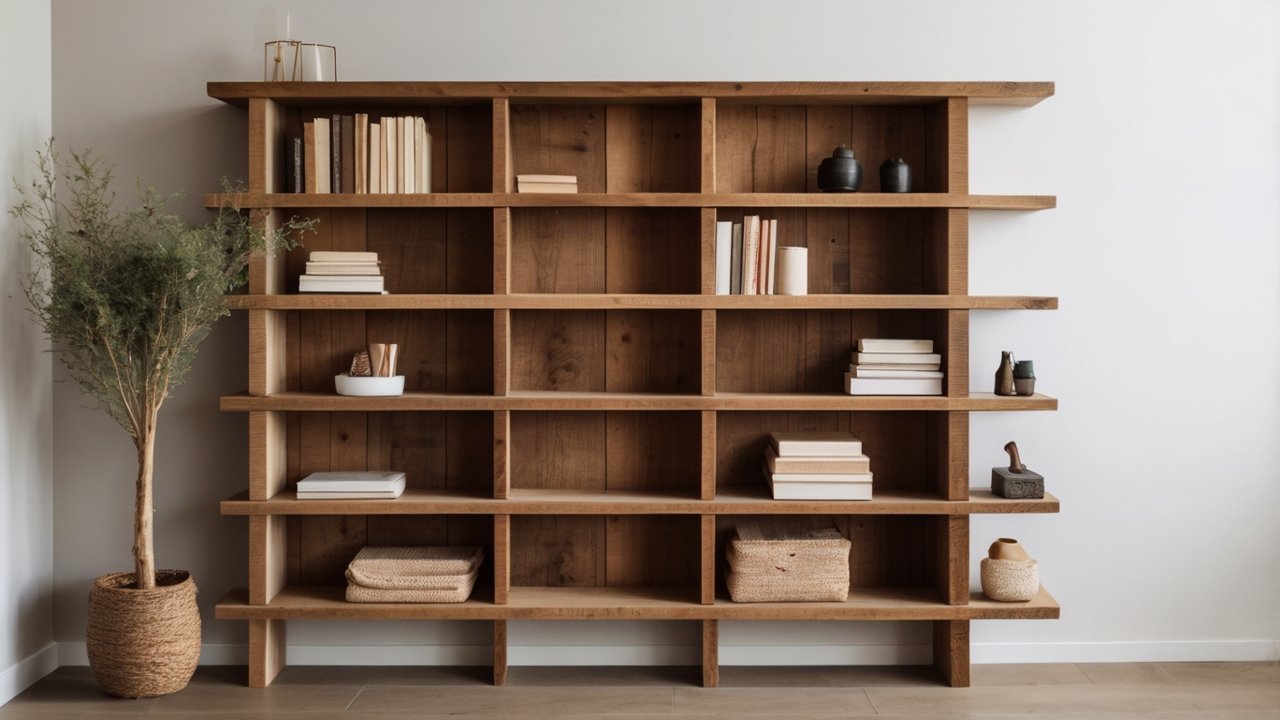
📚 Project 2: Compact Bookshelf
Estimated Time: 3–4 hours
Tools: Drill, clamps, square
Skills Learned: Edge joining, leveling, bracing
A compact bookshelf teaches the basics of structural balance. It’s also the perfect canvas for painting or staining.
✅ Use plywood panels for sides and pine for shelves.
💡 Upgrade later with a back panel for more stability.
🪑 Project 3: Simple Step Stool
Estimated Time: 3 hours
Tools: Saw, drill, clamps
Skills Learned: Joinery, structural support, angled cuts
Great for kitchens, closets, or kids. This project introduces angled legs and reinforces the importance of pre-drilling holes.
✅ Consider adding felt pads under the legs to avoid scratching floors.
🧲 Project 4: Wall-Mounted Coat Rack
Estimated Time: 1.5 hours
Tools: Drill, level
Skills Learned: Mounting, symmetry, pilot holes
All you need is a board and a few hooks. This project teaches clean layout and anchoring to a wall stud for strength.
✅ Use reclaimed wood for a rustic, high-value finish.
🛠️ Add custom labels or carving for personalization.
Instead of searching endlessly for project ideas, get everything you need in one guide. From benches to planters, this eBook has clear, step-by-step instructions.
👉 Grab your free eBook today
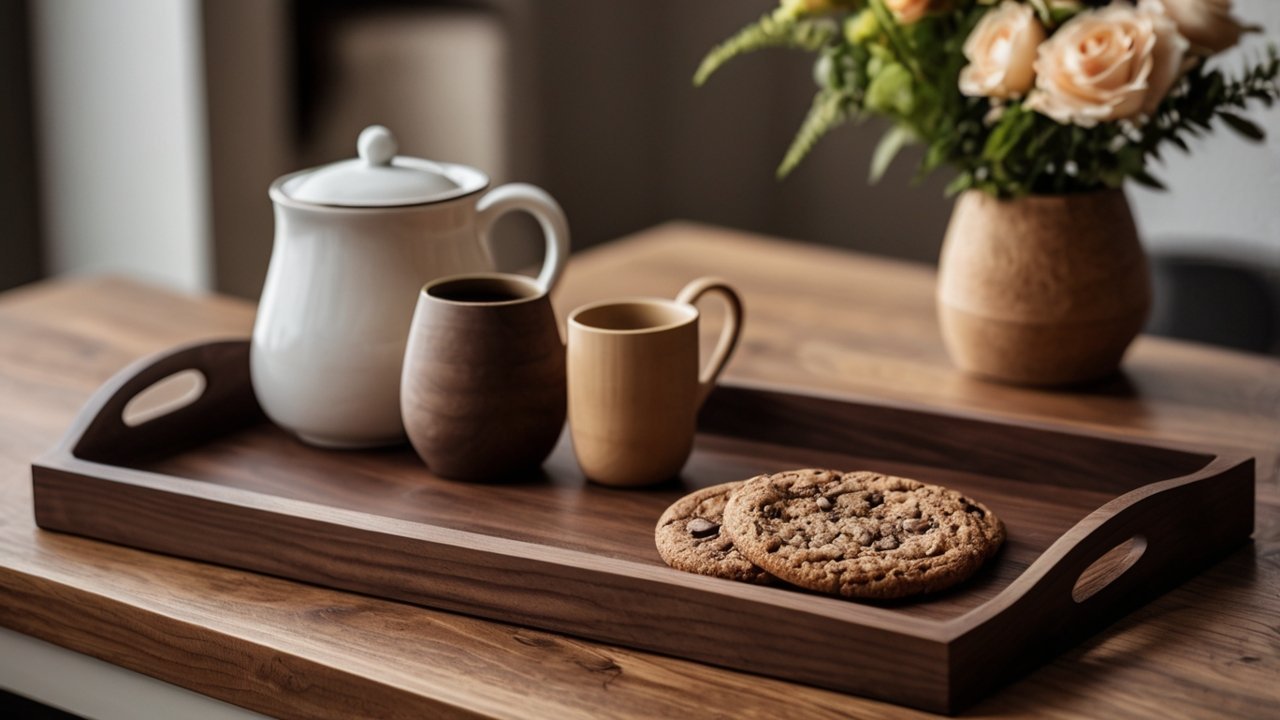
🍽️ Project 5: Wooden Serving Tray
Estimated Time: 2 hours
Tools: Saw, clamps, drill
Skills Learned: Routing edges, gluing, carrying handles
Elegant and practical, a wooden tray gives you room to play with handles, rounded corners, and finishes.
✅ Use wood glue and clamps to reinforce corner joints.
🔗 Want 12,000+ woodworking plans?
Try MyShedPlans for premium blueprints like this.
📸 Project 6: Picture Frame (Custom Size)
Estimated Time: 2–3 hours
Tools: Miter box, glue, clamps
Skills Learned: Angled cuts, frame assembly
Great intro to 45° mitered corners. This project improves your measuring precision and wood joining.
✅ Use poplar or pine, avoid hardwoods to make cuts easier.
📐 Try adding a glass insert and backing for a professional finish.
🛠️ Project 7: Tool Organizer Wall Rack
Estimated Time: 2–3 hours
Tools: Drill, saw, clamps
Skills Learned: Peg layout, spacing, mounting
Keep your growing tool collection organized. This rack uses hooks or dowels on a plywood backboard and mounts directly to a garage or shed wall.
✅ Paint or stain for durability and style.
🔗 Need a full workshop layout? Try the
Ultimate Small Shop Setup Guide
🧺 Project 8: Stackable Wooden Crates
Estimated Time: 3–4 hours
Tools: Saw, drill, clamps
Skills Learned: Repetitive assembly, spacing, nail/screw driving
Great for toy storage, tools, or pantry goods. These crates use slatted sides and reinforce box-building skills.
✅ Add handles or wheels for better function.
🔄 Make multiple crates with identical measurements — perfect practice!
🖥️ Project 9: Couch Laptop Desk
Estimated Time: 3 hours
Tools: Drill, clamps, square
Skills Learned: Ergonomics, support angles, edge finishing
Sit back and build a functional piece you’ll use daily. This laptop desk rests over your legs and provides a smooth, flat surface for working on the couch.
✅ Test height and lap clearance before assembling.
🔗 Sell these on Etsy! Learn how in Woodworking Projects That Sell
🌿 Project 10: Garden Tool Rack
Estimated Time: 2 hours
Tools: Drill, saw
Skills Learned: Utility mounting, spacing, strength support
Perfect for garages and sheds. Use scrap wood to create a vertical storage solution with hook mounts for shovels, rakes, and clippers.
✅ Use weatherproofing if storing outside.
🔍 Which Project Should You Start With?
If you’re completely new, begin with:
-
Phone stand
-
Wall-mounted coat rack
-
Serving tray
If you have a little more time:
-
Bookshelf
-
Step stool
-
Crates
If you’re looking to sell or gift:
-
Picture frame
-
Couch laptop desk
Explore more projects on DIY Wood Haven.
🧰 Recommended Tools and Plans
📦 Affiliate Picks for Beginners:
✅ Final Word: Practice > Perfection
These woodworking projects aren’t just for fun — they’re building blocks for serious skill development. By completing a few of these, you’ll gain confidence, learn what tools you love, and get addicted to the satisfaction of building something with your hands.
Chapter 4: Common Mistakes Beginners Make with Woodworking Projects (and How to Avoid Them)
Every beginner makes mistakes. But in woodworking projects, the wrong cut or skipped step can mean wasted time, materials, or even injury. The good news? Most mistakes are completely avoidable — if you know what to watch out for.
This chapter outlines the most common beginner errors in woodworking, why they happen, and how to prevent them with simple, realistic practices.
🧯 Mistake #1: Skipping Safety Basics
It may seem obvious, but too many beginners jump into woodworking projects without proper safety habits. According to the U.S. Consumer Product Safety Commission, over 400,000 ER visits per year involve workshop-related injuries — and many are preventable.
❌ What goes wrong:
-
Not wearing eye/ear protection
-
No dust mask while sanding
-
Loose clothing near power tools
✅ How to avoid it:
-
Always wear safety goggles and hearing protection
-
Use a dust mask (especially with MDF or pressure-treated wood)
-
Tie back long hair and avoid loose sleeves
🔗 See our beginner’s safety checklist
📐 Mistake #2: Measuring Once, Cutting Twice
One of the golden rules in woodworking is: “Measure twice, cut once.” Rushing through measurements leads to uneven builds, wasted wood, and frustration.
❌ What goes wrong:
-
Not using a square for straight lines
-
Mixing up units (inches vs centimeters)
-
Forgetting to account for saw blade thickness (kerf)
✅ How to avoid it:
-
Use a speed square and measuring tape on every cut
-
Mark cuts with a sharp pencil, not a thick marker
-
Always measure from the same reference edge
💡 Pro tip: Practice layout on scrap wood before cutting your project boards.
🪚 Mistake #3: Using the Wrong Wood for the Job
Not all wood is created equal. Choosing the wrong type can make your project harder, heavier, or more prone to splitting.
❌ What goes wrong:
-
Starting with hardwoods that are difficult to cut
-
Using warped or knotty wood from the discount bin
-
Not understanding wood grain direction
✅ How to avoid it:
-
Use pine or poplar for most beginner projects — they’re soft and easy to work with
-
Learn to inspect boards for warping, cupping, and knots
-
Follow grain direction when drilling or planing
🔗 Guide: How to Choose Wood for DIY Projects
🛠️ Mistake #4: Overbuilding or Overcomplicating Early Projects
It’s tempting to jump straight into advanced builds with drawers, hinges, and joinery. But complex woodworking projects come with more failure points.
❌ What goes wrong:
-
Taking on projects requiring advanced tools or jigs
-
Losing motivation when the project drags out
-
Burning out on frustration
✅ How to avoid it:
-
Stick to flat-panel, square-edge projects until you’re comfortable
-
Choose projects that teach one new skill at a time
-
Celebrate small wins — build your skill stack slowly
🧠 According to Cognitive Load Theory, gradual skill-building is more effective than trial-by-fire learning (Sweller et al., 1998).
Instead of searching endlessly for project ideas, get everything you need in one guide. From benches to planters, this eBook has clear, step-by-step instructions.
👉 Grab your free eBook today
🔩 Mistake #5: Poor Joinery Techniques
Your project might look good on the outside, but poor joints make it wobbly or unsafe.
❌ What goes wrong:
-
No pre-drilling = split wood
-
Weak glue bonds due to poor clamping
-
Using nails when screws are better (or vice versa)
✅ How to avoid it:
-
Always pre-drill holes, especially near edges
-
Use clamps while glue dries — minimum 30 minutes
-
Learn when to use glue, screws, nails, or dowels (each has its purpose)
🔗 Wood Glue vs Nails: What You Need to Know
⏳Mistake #6: Rushing the Finishing Stage
A rough surface or blotchy stain can ruin hours of careful work.
❌ What goes wrong:
-
Not sanding evenly before finishing
-
Skipping between-grit sanding steps
-
Using low-quality stain or sealant
✅ How to avoid it:
-
Sand through at least three grits (80 > 120 > 220)
-
Wipe away all dust before staining or sealing
-
Test finishes on scrap wood first
💡 Bonus tip: A light mist of water after 120 grit raises the grain and gives a smoother final result.
📦 Mistake #7: Poor Project Planning
Jumping into a project without a clear plan often leads to material waste, extra trips to the hardware store, and unfinished builds.
❌ What goes wrong:
-
No cut list or layout plan
-
Forgetting to check available tools
-
Underestimating time or complexity
✅ How to avoid it:
-
Download a full plan with dimensions (like those on MyShedPlans)
-
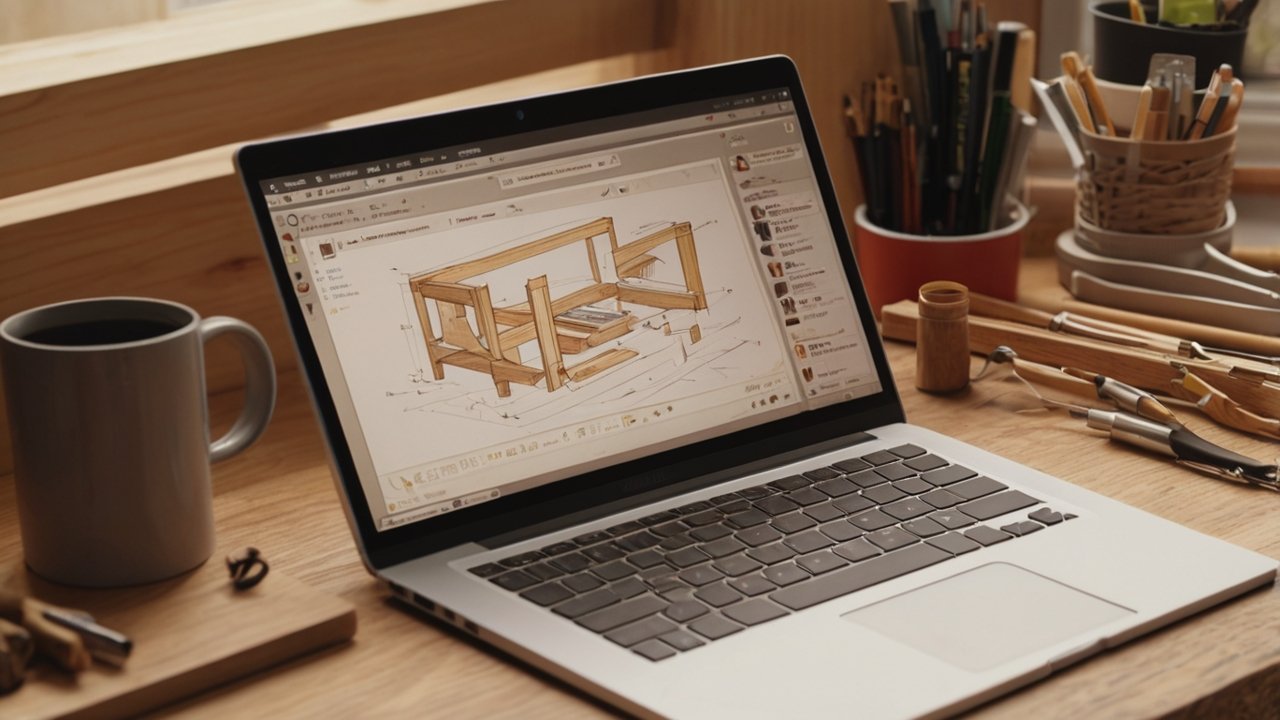
Sketch out your build or use a free 3D tool like SketchUp
-
Inventory your tools and hardware before cutting
✅ Final Checklist: Avoiding the Top 7 Mistakes
Here’s a quick summary of what to double-check before your next build:
✔ Wear proper safety gear
✔ Measure twice, mark carefully
✔ Choose soft, straight wood
✔ Start simple, build gradually
✔ Use the right joinery method
✔ Sand thoroughly before finishing
✔ Follow a written project plan
📥 Download our full Beginner Mistakes PDF Cheat Sheet (Coming Soon)
🧰 Recommended Resources for Smarter Building
Chapter 5: Can You Sell These Woodworking Projects? (Yes—Here’s How)
If you’ve ever looked at your finished woodworking projects and thought, “People would buy this,” — you’re absolutely right. In 2024, handmade wooden goods are in demand on platforms like Etsy, local craft fairs, and even Instagram.
But not every project is sell-worthy, and not every builder is ready to turn their passion into profit. This chapter breaks down which woodworking projects sell, where to sell them, and how to price them realistically — without hype, guesswork, or overwhelm.
🛍️ Why Handmade Wood Projects Sell So Well
According to a 2023 consumer report by Statista, 67% of online shoppers said they’re more likely to buy handcrafted or personalized products than mass-produced ones. Wood stands out for its:
-
Timeless aesthetic
-
Eco-friendly perception
-
Durability and authenticity
-
Gifting appeal (customization = value)
If you can combine function + beauty + craftsmanship, your project becomes a product.
🧱 Best Beginner-Friendly Woodworking Projects That Sell
You don’t need to build full furniture sets to make money. Start with small, scalable items that require minimal materials and have strong market appeal.
🪵 1. Wooden Phone Stands
-
Cost to build: $2–$5
-
Sell for: $15–$30
-
Why it sells: Simple, customizable, useful
✅ Use scrap wood for low cost and high margin.
🧺 2. Rustic Crates or Storage Bins
-
Cost: ~$8
-
Sell for: $25–$50
-
Add-ons: Custom engraving, handles, wheels
✅ Great for home organization, decor stores, or farmhouse-themed shops.
🎁 3. Picture Frames
-
Cost: $3–$7
-
Sell for: $15–$40
-
Tips: Offer unique sizes and wood types
🔗 Build this from Chapter 3: DIY Picture Frame Project
☕ 4. Wooden Serving Trays
-
Cost: $6–$10
-
Sell for: $25–$60
-
Why it sells: Decorative, giftable, upsell with resin or handles
✅ Pair with custom laser engraving for premium pricing.
💻 5. Laptop Desks / Sofa Tables
-
Cost: ~$10–$20
-
Sell for: $40–$100
-
Audience: Remote workers, students, minimalist home shoppers
🔗 Learn how to build one: DIY Couch Laptop Desk
Whether you’re new to woodworking or already a DIY enthusiast, these 10 projects are fun, practical, and rewarding to build.
👉 Get the free eBook now
🌍 Where to Sell Your Woodworking Projects
Selling offline and online both have advantages. Choose what matches your lifestyle, time, and production capacity.
🛒 Online Platforms:
-
Etsy – Great for niche items, gifts, home decor
-
Shopify/WooCommerce – More control, better for scaling
-
Facebook Marketplace – Local reach, no fees
-
Instagram + TikTok – Visual-first, ideal for custom builds
🏘️ Local Options:
-
Craft fairs / makers markets
-
Consignment in gift shops / boutiques
-
Friends, family, and word-of-mouth
-
Pop-up events / weekend markets
💡 Tip: Start small and test different products in your local market before scaling online.
💵 How to Price Your Woodworking Projects
Use the 3-part pricing model:
1. Materials + 2. Time + 3. Margin = Retail Price
📦 Example:
You build a tray that uses $7 in materials and takes 1.5 hours at a $20/hour rate.
-
$7 (materials) + $30 (labor) = $37 base cost
-
Add 30% profit margin → $48–$55 retail price
Don’t forget to include:
-
Tool depreciation
-
Finishing materials (sandpaper, stain)
-
Packaging, delivery, platform fees
📸 What Makes Wood Projects Sell Better?
To stand out in a saturated market, focus on:
| Factor | What to Do |
|---|---|
| Presentation | High-quality, well-lit product photos (use natural light) |
| Storytelling | Share the build process or material source (e.g., “reclaimed oak from a 1950s barn”) |
| Customization | Let buyers add names, quotes, logos |
| Consistency | Brand your shop with a niche: modern, rustic, farmhouse, etc. |
🔗 Use this affiliate course to scale faster:
Tiny House Woodworking System
⚠️ Common Mistakes New Sellers Make
-
Underpricing your work – Don’t race to the bottom.
-
Not protecting your wood – Seal everything properly for shipping.
-
Skipping market research – Always search Etsy and Pinterest for top trends first.
-
Poor packaging – Broken products = lost customers.
🧠 Is It Worth It Financially?
Yes — but treat it like a business. A study by Shopify reports that craft sellers make $1,000–$5,000/month on average with consistent effort and smart product development.
You won’t get rich off one phone stand — but scaling the right set of woodworking projects can create a steady income stream or even replace a full-time job.
Each project in this guide is designed to improve your woodworking skills while giving you something useful for your home or garden.
👉 Claim your free download here
🧰 Monetize Smart: Your Starter Checklist
✔ Build 3–5 products that are fast to reproduce
✔ Take pro-level product photos (or use mockups)
✔ Start with Etsy or local markets to test demand
✔ Offer simple personalization
✔ Track cost and profit margins in a spreadsheet
✔ Use templates from MyShedPlans for consistent builds
🔗 Affiliate Resources to Help You Launch

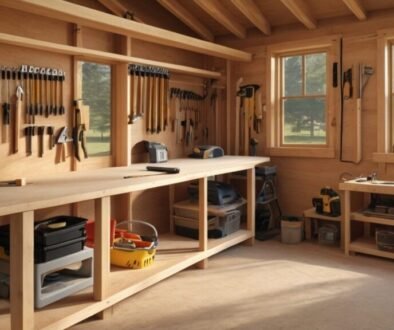
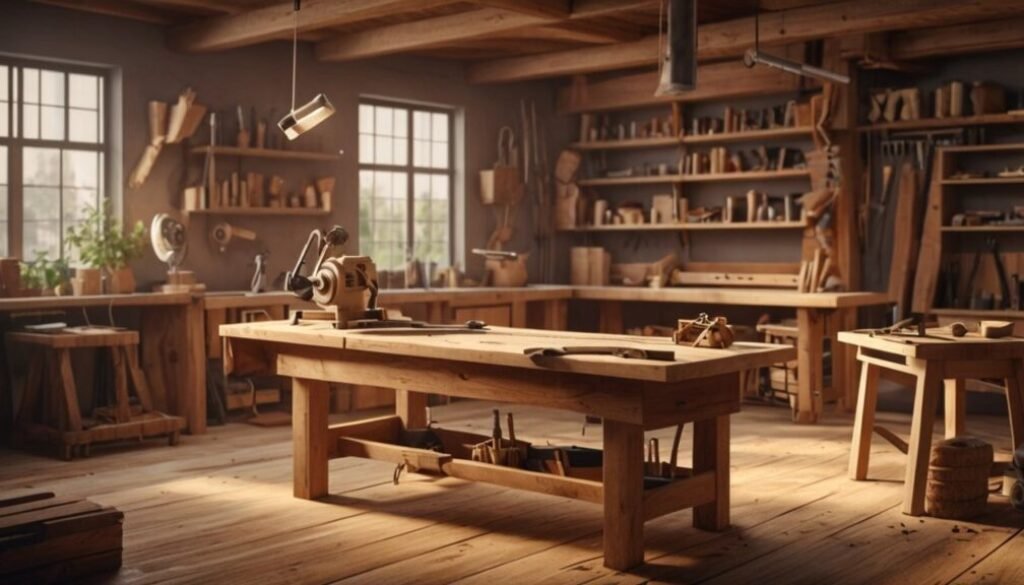
Chapter 6: How to Set Up a Beginner Woodworking Space (Even in Small Areas)
If you’ve fallen in love with woodworking projects, the next logical step is creating a space that lets you build comfortably, safely, and efficiently.
The good news? You don’t need a huge garage or a fancy workshop to get started. Many successful builders work from a shed, apartment balcony, or single corner of a garage. With a few smart choices, you can set up a beginner-friendly workspace that grows with you.
🧭 Step 1: Define Your Building Style and Space Needs
Before you start buying tools or benches, ask yourself:
-
What types of woodworking projects do I enjoy?
-
Do I want to build furniture, crafts, or both?
-
Am I mostly working on weekends or daily?
-
How much space can I dedicate (permanently or temporarily)?
This helps determine what layout and tools you’ll truly need — not just what looks good on Instagram.
📐 Step 2: Choose Your Workshop Location
| Space Option | Pros | Cons |
|---|---|---|
| Garage Bay | Good ventilation, full power access | May need to share space with cars |
| Shed or Outbuilding | Dedicated space, quiet | Needs weatherproofing, power access |
| Apartment Balcony | Compact, good light | Weather limits use, noise-sensitive |
| Spare Room / Basement Corner | Year-round access | Requires dust control, noise-proofing |
✅ Tip: Even a 6×8 ft area can support a workbench, tool wall, and storage shelves.
🛠️ Step 3: Must-Have Equipment for a Small Workshop
You don’t need a full arsenal. These tools and storage options will cover 90% of starter woodworking projects:
🧰 Tools:
-
Cordless drill & bits
-
Hand saw or compact circular saw
-
Speed square & tape measure
-
Clamps (4 minimum)
-
Sander or sanding block
-
Wood glue
-
Safety gear (glasses, mask, ear plugs)
📦 Storage & Work Surface:
-
Folding or wall-mounted workbench
-
Pegboard for tools
-
Stackable bins for scrap wood & hardware
-
Clamp rack or magnetic strips
🔗 Learn how to build a compact, low-cost setup with Ultimate Small Shop
🧹 Step 4: Control Dust and Noise (Especially Indoors)
Woodworking creates dust. If you’re in a shared or indoor space, this is critical.
Simple solutions:
-
Use a shop vac connected to tools
-
Add a box fan with a furnace filter for air cleaning
-
Use a dust mask every time you sand
-
Choose quiet tools (manual saws, battery-powered drills)
🔗 See our indoor woodworking setup guide
🔌 Step 5: Manage Power and Lighting
Good lighting = better accuracy and safety.
-
Use LED clamp lamps or hanging strips above your bench
-
For power, use a surge-protected power strip mounted to the bench
-
Battery tools reduce cord clutter and fire hazard
✅ Avoid using extension cords across walkways — mount cords to walls or ceilings if needed.
📋 Step 6: Optimize Workflow for Small Spaces
In tight spaces, everything should serve multiple functions:
-
A folding bench doubles as a cutting station and assembly area
-
Wall space becomes vertical storage
-
Keep your most-used tools within arm’s reach
-
Use mobile carts or toolboxes with wheels
💡 Pro Tip: Plan your shop like a tiny house — with zones for measuring, cutting, assembly, and finishing.
🔗 Internal Tools & Project Links
🧰 Suggested Setup: Complete Starter Kit (Under $300)
| Item | Estimated Cost |
|---|---|
| Cordless drill & driver set | $70 |
| Compact circular saw | $60 |
| Clamps (set of 4) | $30 |
| Folding workbench | $50 |
| Pegboard + hooks | $30 |
| Safety gear | $25 |
| Lighting + power strip | $20 |
| Total: | $285 |
🔗 Want pre-made plans? Get them all in MyShedPlans (12,000+ Projects)
You’ve got the tools, the time, and the interest—now all you need are the plans. This free eBook gives you everything in one place.
👉 Grab your copy here
✅ Final Tips for Small Woodworking Spaces
✔ Prioritize comfort and safety
✔ Don’t overcrowd — clear workspace is key
✔ Label storage bins and keep things tidy
✔ Add one new tool only when you need it
✔ Practice safe power tool habits, even in small spaces
🏁 You’re Ready to Build (and Grow)
You now have the knowledge to build woodworking projects with confidence — and the workspace to support your skills. Whether you’re creating as a hobby, a side hustle, or a business, your workshop is your creative zone. Make it work for you, not against you.
🧾 Affiliate Disclosure & Disclaimer
This article contains affiliate links, which means we may earn a commission if you make a purchase through one of our links — at no extra cost to you. All tools, plans, and resources are independently selected based on real-world experience and effectiveness. Always follow manufacturer guidelines and local safety regulations when using woodworking tools and equipment.
🔗 Explore More or Download the Full Guide:
Please log in to access your exclusive content.
Don’t have an account? Click the “Register” button below to sign up.
Related Posts